Creating Taxonomy Categories


Prerequisites:

Users with permissions can create taxonomy categories to associate with content items.

The Taxonomy Manager UI differs depending on your CMS site version. Follow the steps that correspond with your version.

CMS 10.6 Steps

To create a taxonomy category:

  1. Navigate to Administration > Taxonomy.
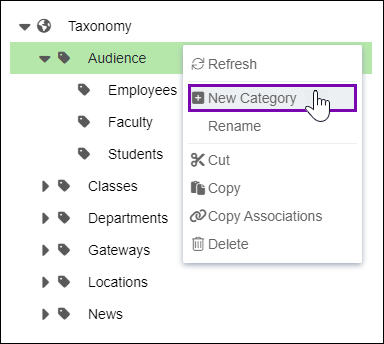
  2. Right-click Taxonomy or an existing category that will serve as the parent for your new category, and select New Category in the context menu.
    Tip
    You can establish parent-child relationships to organize the categories in the Taxonomy Tree. See Taxonomy for details about parent and child categories.

    New Category Context Menu Action

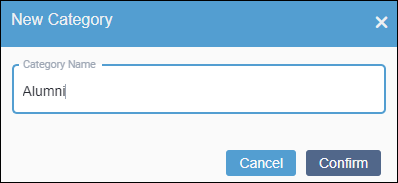
    The New Category dialog displays.

  3. Enter a name for the new category in the Category Name field, and click Confirm.

    New Category Dialog

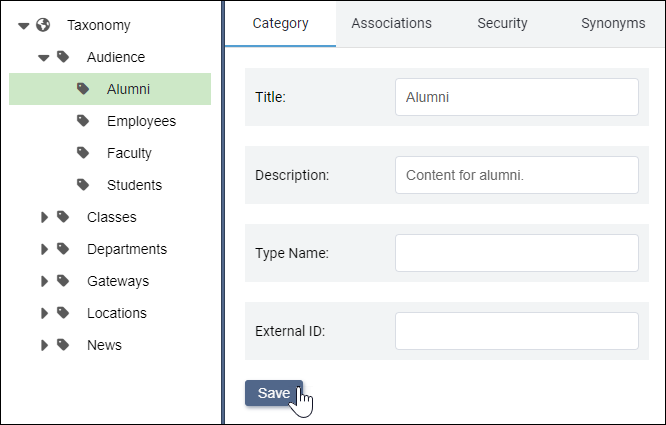
    The system creates the new category in the taxonomy tree.

  4. Optional: Complete the following optional fields in the Category tab to suit your organization's needs.
    Warning
    Changes to the taxonomy category do not save automatically. If you navigate away from the category, you lose unsaved changes.

    Field

    Description

    Title

    You provided the title when you first created the category. However, you can rename the category by editing this field.

    Note

    Alternatively, you can rename the category by right-clicking the category in the Taxonomy Tree and selecting Renaming Taxonomy Categories.

    Description

    Provide details relevant to this category.

    Type Name

    Provide an arbitrary category type. You can use this field to organize categories.

    External ID

    Provide an additional attribute that is analogous to a foreign key to an external system. The external ID links the CMS taxonomy to the external system.

  5. If you completed the optional fields, click Save in the Category tab to confirm your changes.
    Tip
    You can localize theses category values to different languages and locales. See Localizing Taxonomy for details about multi-lingual categories.

    Category Tab

CMS 10.0–10.5 Steps

To create a taxonomy category:

  1. Navigate to Administration > Taxonomy.
  2. Ensure the appropriate language displays in the Language field.

    When you create the category, Ingeniux CMS saves the value as the category's original language.

    Note
    See Localizing Taxonomy for details about multi-lingual categories.
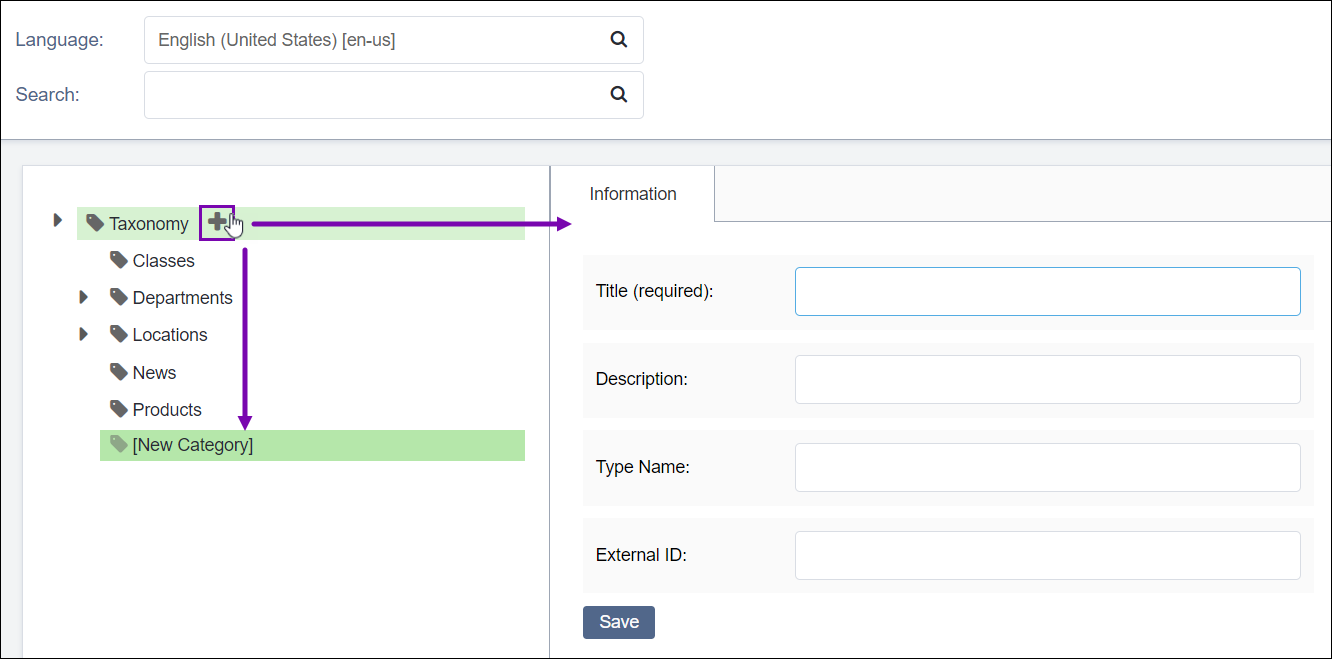
  3. Expand the appropriate categories. Hover over Taxonomy or an existing category to place the new category as a child.

    Tip
    You can establish a parent-child relationship to organize the category in the Taxonomy Tree. See Taxonomy for details about parent and child categories.

    Create Taxonomy Category

  4. Click the plus (+) button.

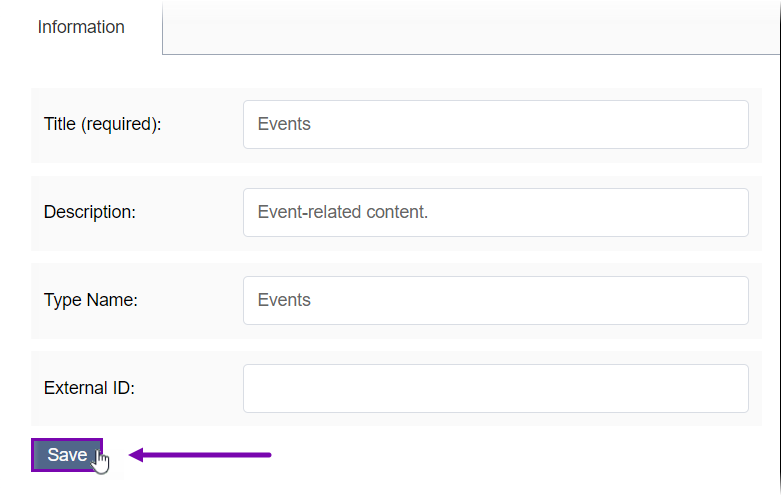
    The category's Information tab displays.

  5. Complete the following fields:
    Warning

    Changes to the taxonomy category do not save automatically. If you navigate away from the category, you lose unsaved changes.

    Field

    Description

    Title (required)

    Category friendly name.

    Description

    Category details.

    Type Name

    Category type. You can use this field to organize categories.

    External ID

    Additional attribute that is analogous to a foreign key to an external system. The external ID links the CMS taxonomy to the external system.

    Save New Category

  6. Click Save.

    The new category displays in the Taxonomy Tree. The category's Associations, Security, and Synonyms tabs display.

Next Steps:

Choose one of the following optional steps.