Uploading Assets from Assets Tree Context Menu


Prerequisites: Asset folders must exist within the Assets Tree to contain asset items. See Creating Asset Folders for details to add folders to the Assets Tree.

Users can upload one asset at a time via the Assets Tree context menu.
To upload an asset via the Assets Tree context menu:
  1. Navigate to Assets > Assets Tree.

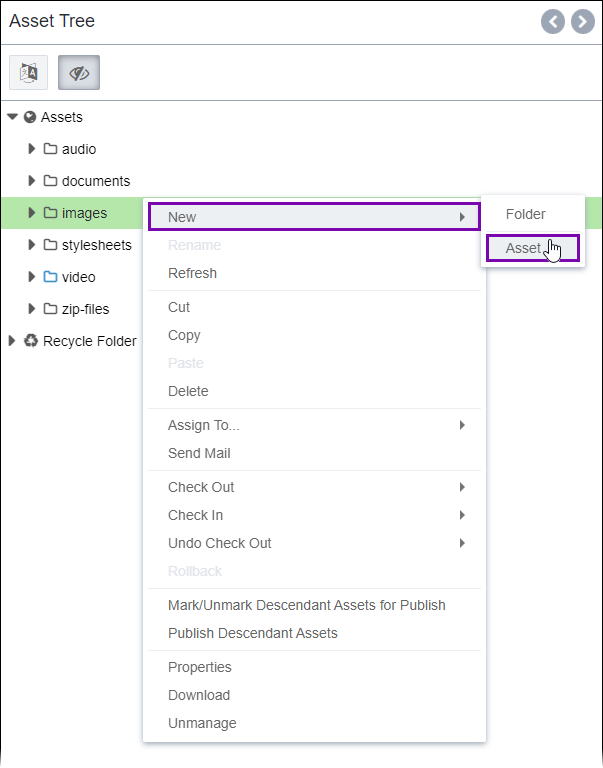
    New > Asset via Assets Tree Context Menu

  2. Right-click the asset folder that contain the new asset, and select New > Asset.
    The Create New Asset dialog opens.
  3. Optional: Select an asset schema from the Select the type of Asset to create drop-down list to associate with the new asset.
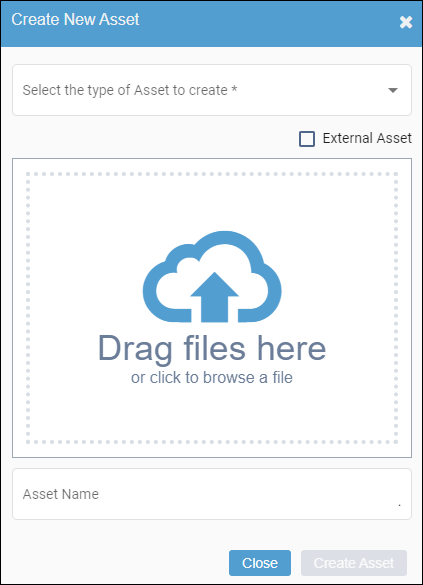
    Create New Asset dialog

    Additional Information
    You can complete this field before or after selecting the new asset to upload, or you can leave this field empty.
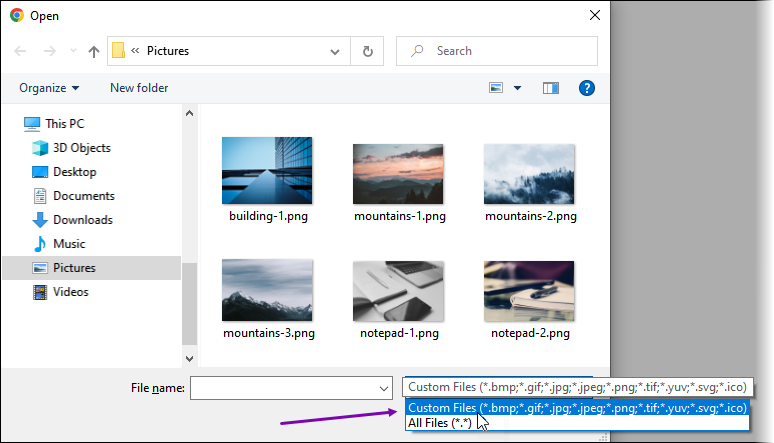
    • If you complete this field before selecting an asset, then your system's file explorer only displays files with extensions that the selected schema type allows. See Creating Asset Schemas for details about allowed extensions. When selecting an asset, you can view allowed extensions in the Custom Files drop-down list within your system's file explorer dialog.

      To clear the current schema selection, you can select the Custom Files drop-down list and select the All Files option. This option allows users to select any file your system's file explorer dialog.

      Windows File Explorer Dialog

    • If you complete this after selecting an asset, then your system's file explorer displays all file types, as no asset schema is selected.
    • If you leave this field empty, then the CMS chooses the default schema based on the new asset's file extension when you click Create Asset.
  4. Choose one of the following steps:
    • Drag the asset from your system’s file explorer to the assets uploader area.
    • Click the asset uploader area to browse and select the asset from your system’s file explorer.

    The asset displays in the uploader area, and the asset's file name and extension populate the Asset Name field.
    Note
    Hover over the asset in the uploader area to view the size (KB) of the asset.
  5. Optional: Use the current asset file name, or enter a new name in the Asset Name field.

    This field automatically defaults to the name of the uploaded file.

  6. Click Create Asset.
    The CMS uploads the asset to Assets Manager displays the asset in the Assets Tree.