Prerequisites: - Users must have the following group
permissions.
- site content item and asset item authoring permissions.
- alias management permissions.
- DITA content must be checked in to the appropriate publishing target.
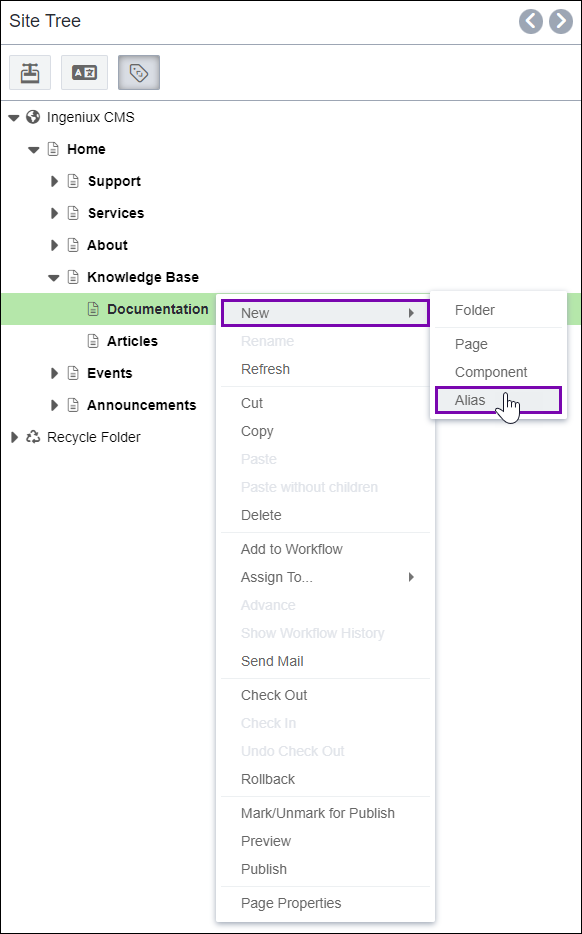
Users can add alias structures by accessing the action in the Site Tree context menu.
To add an alias structure via the Site Tree context
menu:
- Navigate to .
- Right-click the site page, component, or folder that will contain the alias structure
in the Site Tree, and select .

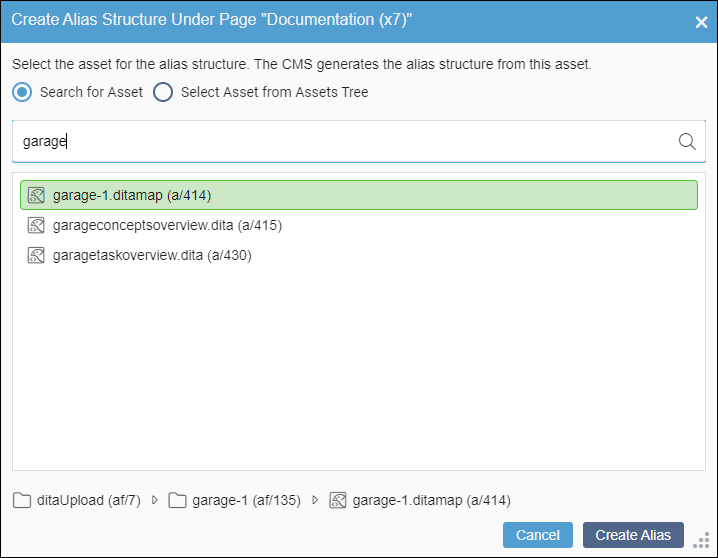
The Create Alias Structure Under Page dialog
displays.
- Choose one of the following options.
| Option | Description |
|---|
| Search for Asset | This option is selected by default. Search for the DITA map asset that will
serve as the alias structure root. Enter the asset ID or keywords based on the asset
file name in the search field.Tip Select the search
result entry to display the Assets Manager file path of the DITA
asset. |
| Select Asset from Assets Tree | Locate the DITA map that will serve as the alias structure root in the provided
Assets Tree. |
- Select the DITA map asset, and click Create Alias.

A confirmation message displays.
- Select Create in the Creating Alias dialog
to confirm the new alias structure.
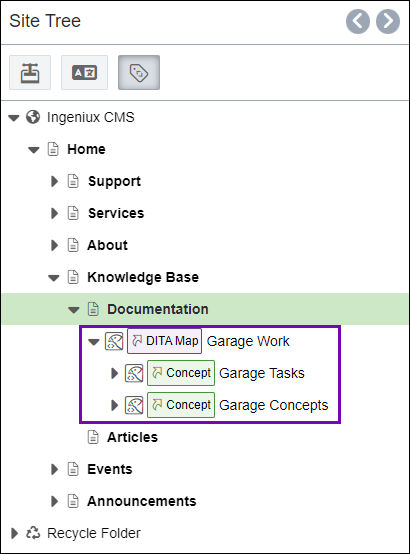
The aliases generate under the parent site content item or folder. The aliases
mirror the hierarchical structure defined within the DITA map.


