Uploading Assets to Ingeniux CMS
To upload assets such as images, documents, or media files, follow these steps:
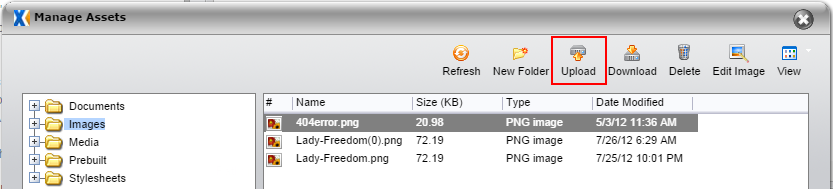
- On the CMS client's main toolbar, click Assets.

- Click the directory that corresponds to the type of content you want to upload. Then click Upload.
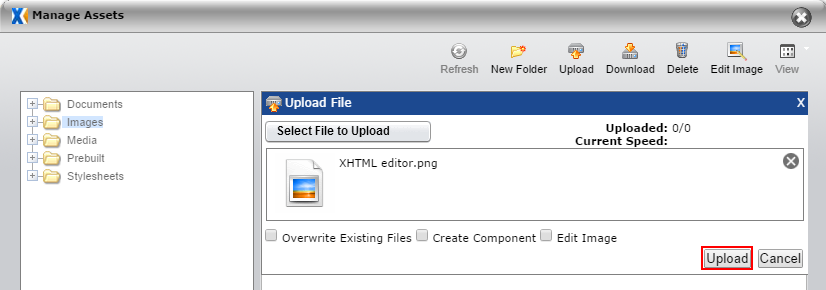
- Click Select File to Upload and select a file (or press Ctrl and select multiple files) to upload in your computer's file browser.
- After selecting a file or files, you can apply two options:
- Overwrite Existing Files: Automatically overwrites existing files with the same name.
- Create Component: Creates a component for each asset uploaded.
- If you're uploading an image, there's a third option, Edit Image, which opens the image editor in the Assets dialog.
- Click Upload.
The upload dialog shows the number of files remaining to be uploaded and the current speed of the upload in megabits per second. There is a progress bar for each file, along with the amount of time remaining for the upload. At any time before completion, you can click the "X" to the right of the progress bar to stop the selected files from uploading.
It's also possible, and usually more common, to upload assets at the same time that you add them to a page. Because adding assets to a page occurs through the Asset Manager, the steps are identical.