Creating a Translation Project
Translation Manager is located in a site's Apps pane. Click the application to open it.
On the Create New Project tab, you can create a new translation project.
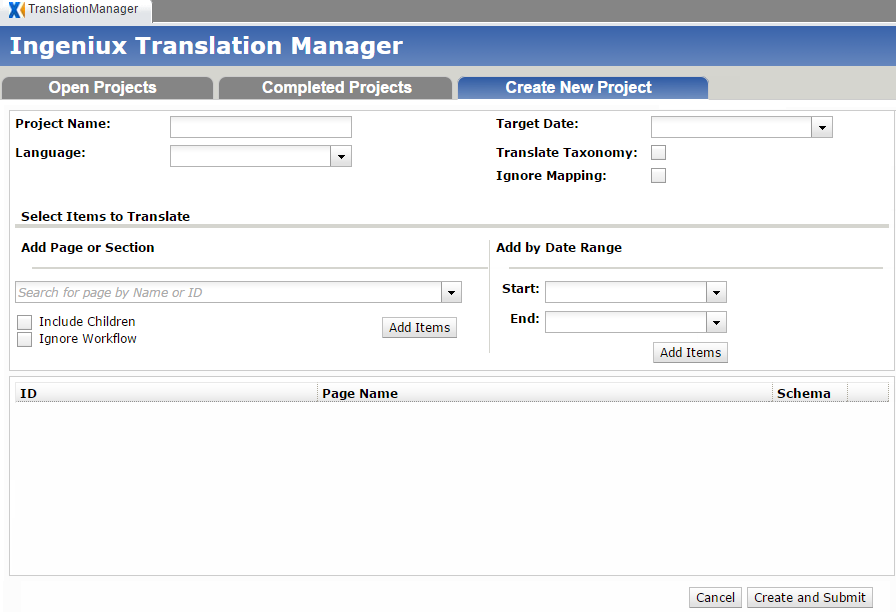
Project Name: The project's display name.
Language: The language into which the project is being translated.
Target Date: The date by which the project should be completed.
Translate Taxonomy: When selected, a site's taxonomy system is included in the translation project.
Ignore Mapping: When selected, translations replace the original pages after import. This options should be selected when no master/clone page relationship exists.
Add Page or Section: Enter the xID of a page or folder. This becomes the root page for this section of translated content.
Include Children: When selected, the children of the page in the Add Page or Section field are included.
Ignore Workflow: When selected, any workflows pages belong to are disregarded.
Add Items: Clicking this button allows you to select pages, components, and folders to add to the translation project.
Add by Date Range: Using the date fields, you can select for translation all master pages created within a certain time period.
Create and Submit: Submits the translation project to a database, from which it will be reimported when the translation is finished.