Adding TinyMCE Plugins
Administrators can add new, third-party plugins to TinyMCE. Learn more about this process in this article.
Description
CMS administrators have the ability to override TinyMCE plugins listed in XHTML Editor Plugins list as well as add new, third-party plugins.
Step-by-Step
To implement a third-party plugin via JSON:
- Create a folder with the name of the plugin in the following path: [Drive]:[path-to-CMS root-directory]\site\js\tinymce\plugins\.
For example, if your new plugin is called helloWorld, then the path would be [Drive]:[path-to-CMS root-directory]\site\js\tinymce\plugins\helloWorld.
- Within the plugin folder, create a file named plugin.min.js.
- Add the plugin code written in JavaScript.
For example, the JavaScript for a helloWorld plugin might look like this:
tinymce.PluginManager.add('helloWorld', function (editor) { var text = editor.getParam('helloWorld'); editor.addButton('helloWorld', { type: 'button', text: "Greetings, world!", icon: false, onclick: function() { alert("Hello World: " + text); } }); });NoteThis file contains your plugin, written in JavaScript. Be sure to name this file plugin.min.js.
- Navigate to Administration > System Options > CMS > XHTML Editor > JSON Configuration.
- In the Edit JSON Config Overrides field, add the plugin to the list of plugins.
Important
When adding a new plugin, you must include the entire plugin list as exemplified below.
For example, if you added the helloWorld plugin, the modified JSON may like similar to this:
{
    "plugins": "helloWorld,
                contextmenu,
                advlist,
                anchor,
                autolink,
                autoresize,
                charmap,code,
                colorpicker,
                directionality,
                fullpage,
                igxlink,
                link,
                image,
                insertdatetime,
                lists,
                media,
                nonbreaking,
                noneditable,
                paste,
                preview,
                print,
                searchreplace,
                table,
                textcolor,
                visualblocks,
                visualchars",
    "toolbar": "insertfile undo redo |
                styleselect |
                fontselect fontsizeselect |
                bold italic strikethrough forecolor backcolor |
                alignleft aligncenter alignright alignjustify |
                bullist numlist outdent indent |
                anchor igxlink image igxglobalvars |
                helloWorld ",
    "helloWorld": "Greetings, World!"
}
Additional InformationAdministrators must explicitly override the plugins list in the JSON Configuration. Consequently, your entry in the Edit JSON Config Overrides field completely overrides the plugins list configuration in the CMS UI.
-
Optional: Update other JSON configuration options as needed by the plugin (extra sections, toolbar buttons, menu items, etc.).
For example, the above JSON code sample defines the toolbar properties for the helloWorld plugin.
Further information on TinyMCE configuration options can be found in TinyMCE's documentation.
-
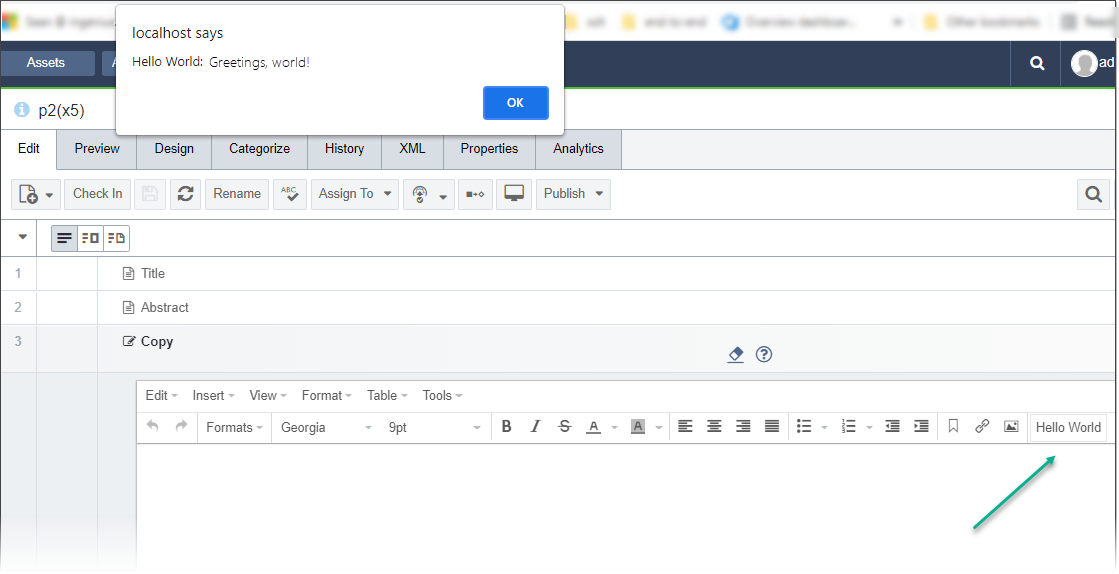
Verify your new plugin works as expected in the XHTML editor.
For example, the helloWorld plugin looks like this after completing the steps above:


There are no comments yet.