Extract-Transform-Load (ETL) Tool
The ETL tool imports CSV, JSON, and XML data into Ingeniux CMS. Learn more about this process and how to use this tool in this article.
Overview
The Extract-Transform-Load (ETL) tool is an add-on custom tab application that loads in an Ingeniux CMS instance. The tool imports and updates data from various structured data sources (e.g. CSV, JSON, XML) to schema-driven page elements within a CMS instance.
Prerequisites
- Contact Ingeniux Support for the latest version of the ETL zip file and specify if you will use XML, JSON, or CSV import data.
- Install a CMS instance to receive the imported data.
- Configure the page schema that will map imported data to its fields.
- Ensure you have access to the file system where the CMS and ETL tool reside.
Installation
To install the ETL tool:
- Navigate to [Drive]:\[path-to-CMS-root-folder]\site\App_Data\xml\Custom on the server hosting the CMS.
- Create a folder named CSVImport within the Custom folder.
- Extract the contents of CSVImport.zip into the csvimport folder.
- In IIS, recycle the application pool of the CMS receiving the imported data.
- Log in to the CMS.
-
Test the installation by appending /apps/csvimport/import to the base URL of the CMS instance (e.g., https://staging.ingeniux.com/apps/csvimport/import).
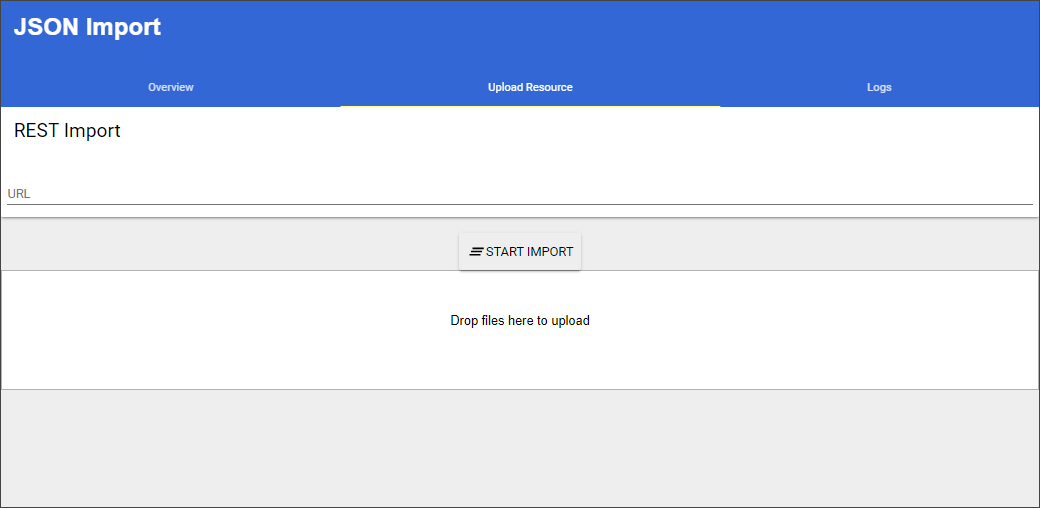
The ETL tool displays.

Next Steps: At this stage, your installation is complete. However, you need to configure the tool before it works properly.
Configuration
The main ETL configuration file,settings.xml, contains templated settings for you to customize.
To set up the ETL tool:
- Navigate to [Drive]:\[path-to-CMS-root-folder]\site\App_Data\xml\Custom\csvimport.
- Open settings.xml in a text editor.
<csvImportSettings> <parentId>x2</parentId> <jsonObjectPath>Root</jsonObjectPath> <!--<jsonObjectPath>[*].SomeSubObject</jsonObjectPath>--> <schemaName>BasicPage</schemaName> <stagingPath></stagingPath> <resourcePath></resourcePath> <pageElement> <column>Title</column> <delimiter>,</delimiter> <elementName>Title</elementName> <attributeName>value</attributeName> <trimStart>true</trimStart> <trimEnd>true</trimEnd> </pageElement> <pageElement> <column>Contents</column> <delimiter>,</delimiter> <elementName>Contents</elementName> <attributeName>value</attributeName> <trimStart>true</trimStart> <trimEnd>true</trimEnd> </pageElement> <pageElement> <column>DownloadList[*].DownloadType</column> <delimiter>,</delimiter> <elementName>DownloadList</elementName> <attributeName>value</attributeName> <trimStart>true</trimStart> <trimEnd>true</trimEnd> </pageElement> <pageName> <column>Title</column> <delimiter></delimiter> <trimStart>true</trimStart> <trimEnd>true</trimEnd> </pageName> </csvImportSettings> - Refer to the following tables for element descriptions:
Element Description Note/Example parentID xID that will contain content. This xID serves as the parent page to the incoming data that will map to child pages. The parent page must exist in the CMS before running the import. assetFolderId Asset ID (af/ID) that will contain content. This asset folder will contain any assets associated with the incoming data. If assets will be imported, the asset folder must exist before running the import. jsonObjectPath Actual JSON query to be used against the import data. root['dbo.content'][?@?(@['@xml_config_id']-=='14')] defaultDomain If importer encounters a relative path in the import data, it will prepend the base URL, resulting in an absolute URI. SchemaName Schema to be used when creating pages. matchElementName Element on the target page(s) used as a unique key when updating existing pages. This is a match on any page within the defined ParentID. It doesn't check against the SchemaName value defined in this configuration. includedSettings Defines child mapName elements, which refer to different mapping .xml files in app_data/xml/Custom/maps* folder. This allows for running multiple settings configurations to do different imports all at once. pagePath Defines folder hierarchy structure. Content element pageElement One-to-one match to the element on the page. - Content element.
- This runs a JSON query against the page via the
<column/>element. - You can define multiple
<column/>values, which concatenate the import data. -
Alongside
<delimiter/>and<trimStart/>with<trimEnd/>, you can define what the end value looks like.See pageElement Child Elements below for descriptions of valid child elements.
embedded Recurses configuration within a pageElement. - This allows jsonObjectPath and schemaName, so you can add sub pageElements.
- This is similar to creating embedded components on a page.
useFileMapName Maps a file name to a settings file in the Maps sub-folder When set to true and if you upload a file named products.csv, the importer will look for a file named "products.xml" in the folder /Custom/CSVImport/Maps pageElement Child Elements
Element Description Note/Example column Query to use. <column>@<column>indicates that the current context as JSON text.<column>@@<column>indicates that entire document is brought in as JSON text.
subquery Queries the result of the first query. If <column>@content_html</column>, then<subquery>/root/title</subquery>has executed a query for/root/titlevalue from the returned data in<column>.delimiter Defines the character to delimit. The delimiter character can be a comma, pipe, etc. elementName Target element name receiving import. attributeName Target attribute name receiving import. concat trimstart Bool(true). Trims delimiter from start of the imported value. trimend Bool(true). Trims delimiter from end of the imported value. - Save settings.xml when finished configuring the file.
If you upload XML data for import, the ETL tool first converts it to a JSON file on disk.
Content Import Tool's UI
After configuring settings.xml, the ETL tool is ready for you to begin importing your data set. You can either upload a data file or provide a URL to the data file via the UI's REST importer.
To import data to the CMS via ETL tool:
-
In a browser, navigate to the ETL tool by appending /apps/csvimport/import to the base URL of the CMS instance (e.g.,https://staging.ingeniux.com/apps/csvimport/import).
The ETL tool displays.

-
There are 3 ways to specify content to import. Choose one of the following:
- Drag the data file from your filesystem to the Upload Resource tab, then drop the file in the area labeled Drop files here to upload. Alternatively, you can click the Drop files here to upload area and browse for the data file.
- Provide a URL to the data file in the REST Import field and click START IMPORT.
-
Import content programatically using the data import REST API discussed in this related article.
NoteIf you upload the data file via the file system, the import starts automatically; whereas, if you reference the data file via REST, you must click START IMPORT.
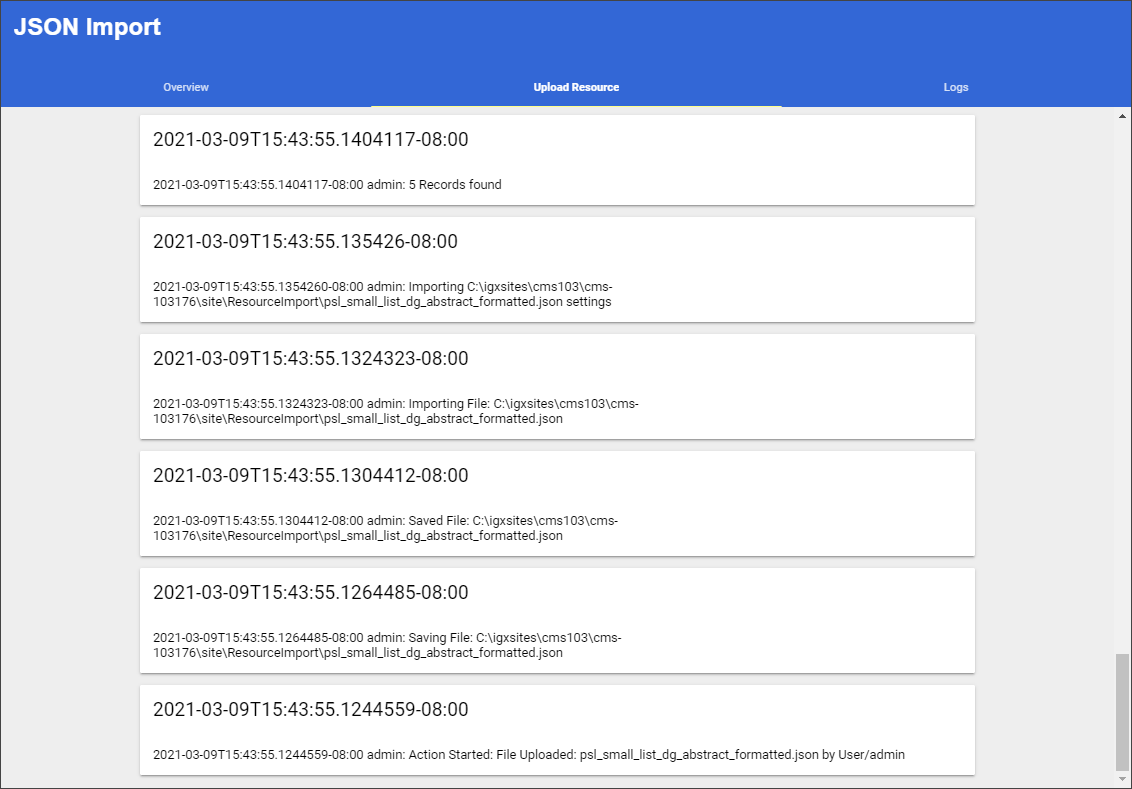
During the import, the ETL UI displays an event progress log.

-
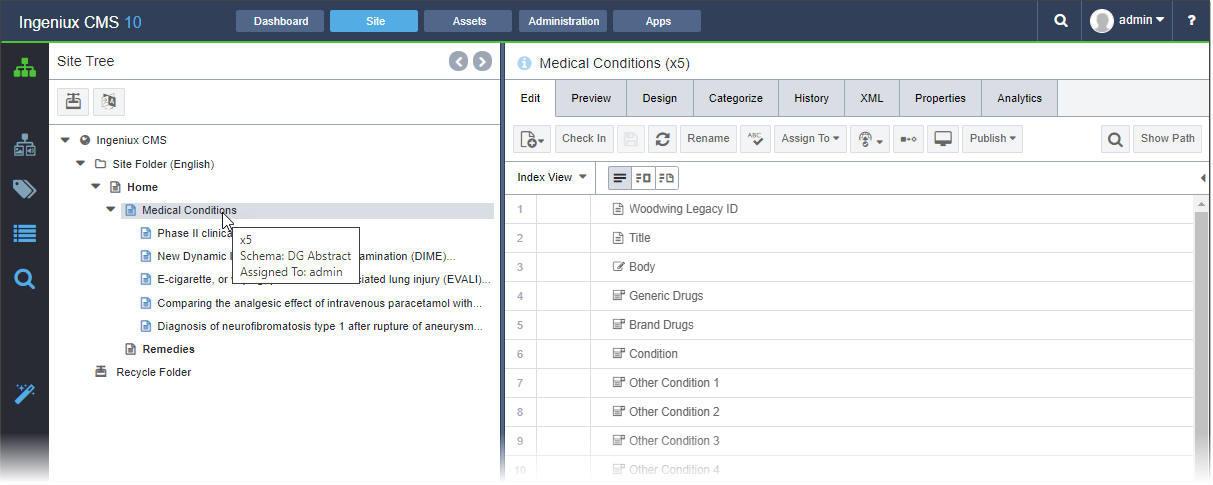
When the import completes, navigate to Site > Site Tree in the CMS.
The imported data now resides in the Site Tree location that settings.xml defines.

Next Steps: When the import finishes, the ETL tool puts a copy of the resource in the following folder: [Drive]:\[path-to-CMS-root-folder]\site\ResourceImport.
Troubleshooting
Through the ETL UI, you can access output logs from the import process. These ETL logs include CSAPI logging.
To access the ETL tool log files:
- Ensure you logged into the CMS where the ETL tool has been installed.
- Open the ETL UI (e.g., https://staging.ingeniux.com/apps/csvimport/import).
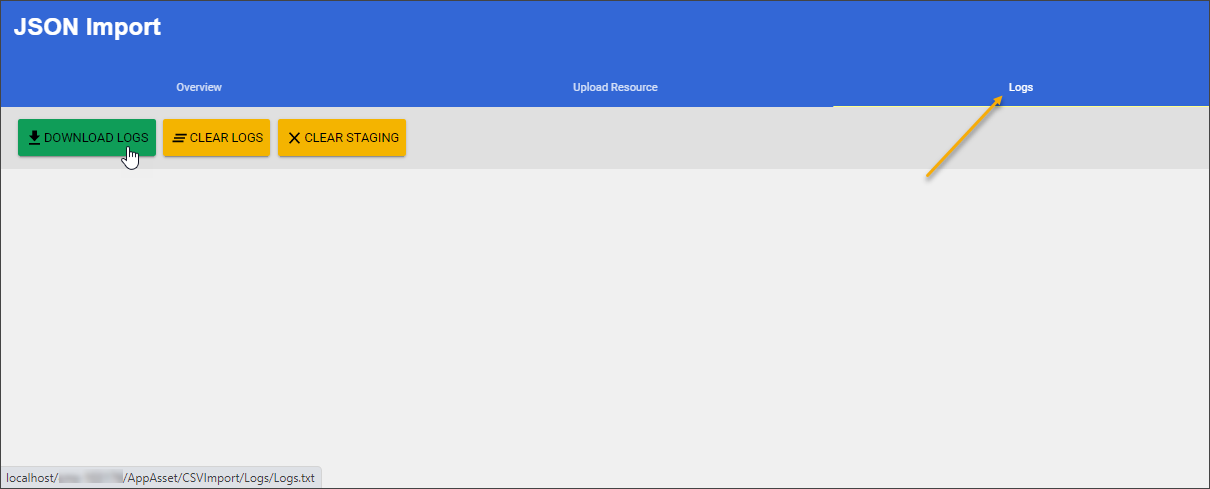
- Click the Logs tab.

-
Click DOWNLOAD LOGS to troubleshoot a failed import.
The ETL log file downloads to your local file system.
- Click CLEAR LOGS to clear the ETL log file on the CMS server (e.g., [Drive]:\[path-to-CMS-root-folder]\site\App_Data\xml\Custom\csvimport\Logs).
- Click CLEAR STAGING to remove prior import events from the staging area.
- Re-import the data file as necessary.
Related Topics

There are no comments yet.