Adding Transition Actions


Prerequisites:

Workflow transitions may have associated actions. An action represents an operation to complete before or during the execution of a transition. Workflows Designer provides actions for the most common UI operations (e.g., check in, mark for publish).

Important
The actions associated with a transition execute in order. If an action fails, the transition doesn't complete, and the workflow remains in the workstate prior to executing the transition.

The Workflow Transition Editor dialog UI differs depending on your CMS site version. Follow the steps that correspond with your version.

CMS 10.6 Steps

To add an action to a transition:
  1. Navigate to Administration > Workflows Designer.
  2. Select the appropriate workflow from the list, then click the Edit button Edit Button in the toolbar.
  3. Double-click the transition in the Workflow Transitions list. (Alternatively, click the NewNew Button button to create a new transition that will contain the action).
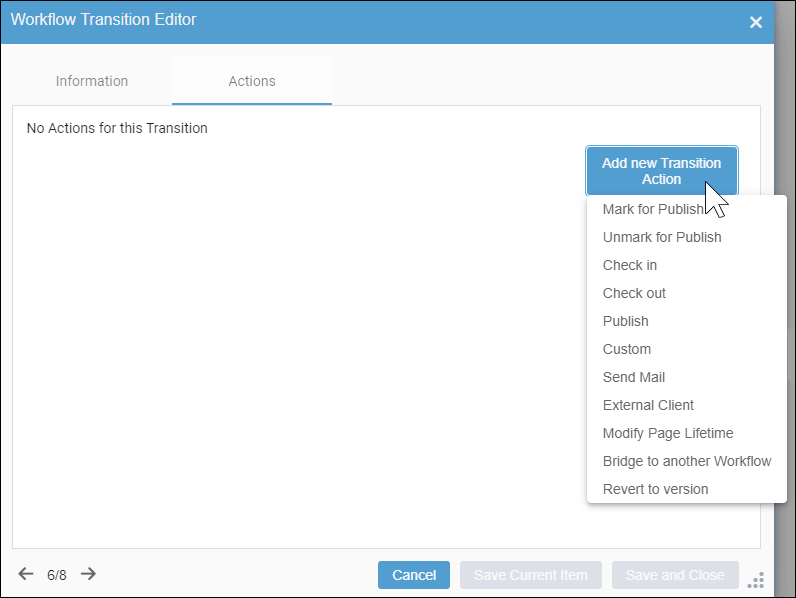
  4. Click the Actions tab in the Workflow Transition Editor dialog, then click the Add New Transition Action button.
    The actions drop-down list displays.

    Edit Transitions

  5. Select one of the actions from the drop-down list, then complete the required fields for your selection.

    See List of Actions for details about available actions.

    Note
    A single transition can only contain one of each action type.

    Edit Transitions

  6. Repeat the steps above to add other actions as needed.
    Tip
    • To reorder an action in the list, click the drag icon (hamburger menu) of the action entry, then drag the action to the new location.
    • To delete an action, click the corresponding trash icon.
  7. Choose one of the following steps:
    • Click Save Current Item to save your action changes, then use arrow icons in the bottom-left corner of the dialog to navigate to another transition to edit.
    • Click Save and Close to exit the Workflow Transition Editor dialog.
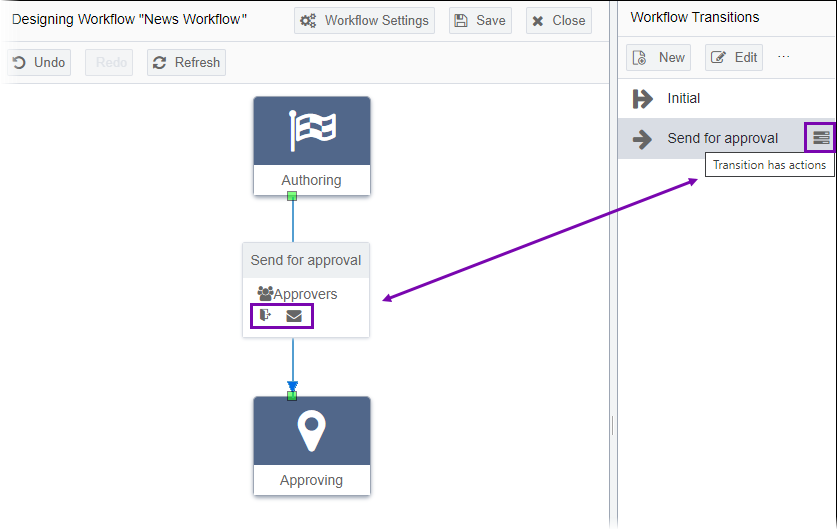
    When you close the dialog, the Actions icon Transition Actions Icon displays next to all transitions that contain actions in the Workflow Transitions list. If you click transitions with actions in the Designing Workflow area, icons display for each action.
  8. Click the Save button Save Button in the toolbar menu of Designing Workflow area to save your workflow changes.

CMS 10.0–10.5 Steps

To add an action to a transition:
  1. Navigate to Administration > Workflows Designer.
  2. Select the appropriate workflow from the list, then click the Edit button in the toolbar.
  3. Double-click the transition in the Workflow Transitions list. (Alternatively, click New to create a new transition that will contain the action).
  4. Click the Actions tab, then click the Add New Transition Action plus (+) button in the Workflow Transition Editor dialog.
    The actions drop-down list displays.
  5. Choose one of the actions from the drop-down list.

    See List of Actions for details about available actions.

    Note
    A single transition can only contain one of each action type.
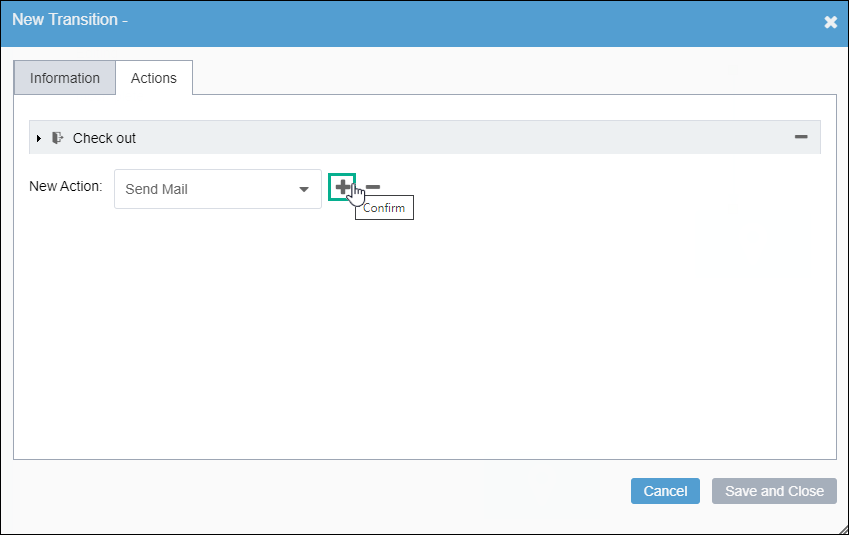
  6. Click the Confirm plus (+) button, then expand the action entry.

    Confirm New Action

  7. Complete the required fields for the action you added.

    See the List of Actions for details about fields associated with each action.

    Tip
    • To reorder an action, drag the action entry to the new location in the list.
    • To delete an action, click the corresponding minus (-) icon.
  8. Choose one of the following steps:
    • Click Save Current Item to save your action changes, then use arrow icons in the bottom-left corner of the dialog to navigate to another transition to edit.
    • Click Save and Close to exit the Workflow Transition Editor dialog.
    When you close the dialog, the Transition has actions icon displays next to all transitions that contain actions in the Workflow Transitions list. If you click transitions with actions in the Designing Workflow area, icons display for each action.

    Transition Action Icons

  9. Click the Save button in the toolbar menu of Designing Workflow area to save your workflow changes.