Associating Taxonomies with Schemas


Prerequisites:

Use the Taxonomy Configuration area to predetermine specific taxonomy category availability and add default taxonomy categories to page, component, and asset schemas. If users with permissions create a new page, component, or asset using this schema, then the taxonomy configurations apply to the new item.

To associate taxonomy with a schema:
  1. Navigate to Administration > Schema Designer > Management.
  2. Choose one of the following steps:
    • Click New in the Actions menu to create a new schema.
    • Double-click an existing schema in the appropriate tab.
  3. Click the expand arrow to open additional configurations for the schema.

    Schema Designer Expand Arrow

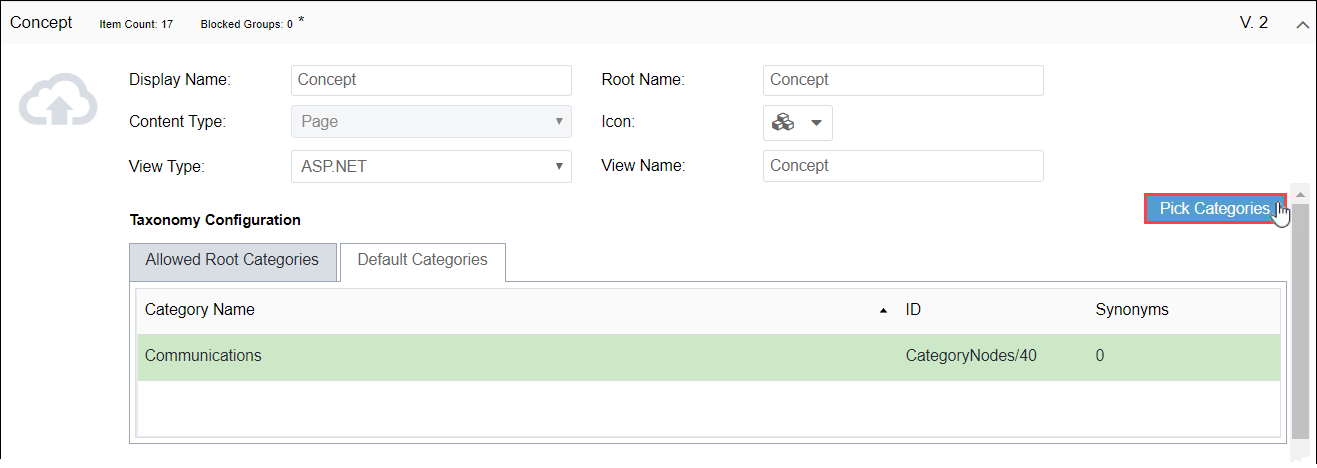
  4. Choose one of the following steps (or both) within the Taxonomy Configuration area.
    • Select the Allowed Root Categories tab.
      Note
      Only these categories and their descendants can be associated with pages instantiated from the given schema. If you want to predetermine the categories from which users can choose, you can do so on this tab.
    • Select the Default Categories tab.
      Note
      These categories apply by default to pages created from the given schema.

    Schema Designer Taxonomy Configuration

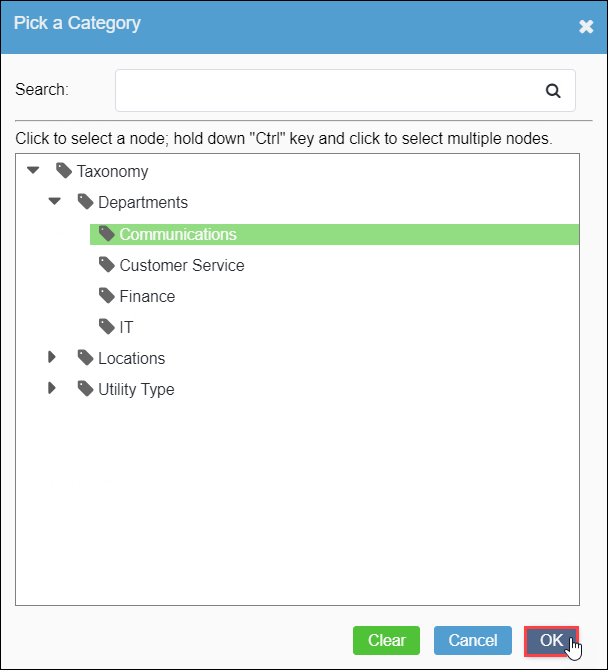
  5. Click Pick Categories. The Pick a Category dialog displays.

    Pick a Category Dialog

  6. Select categories in the Pick a Category dialog.
    Note
    Use Ctrl+click to select multiple categories.
  7. Click OK.
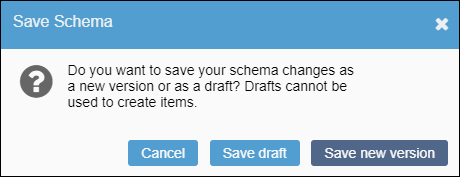
  8. Click Save in the Schema Actions menu when you finish. The Save Schema dialog displays.

    Save Schema Dialog

  9. Choose one of the following steps:
    • Click Save Draft. Schema Designer saves the schema as a draft.
      Note
      If you save the schema as a draft, then taxonomy configurations don't apply to new pages, components, or assets that use this schema. Save the draft as a new version to apply configurations.
    • Click Save new version. Schema Designer saves the schema as a new version.