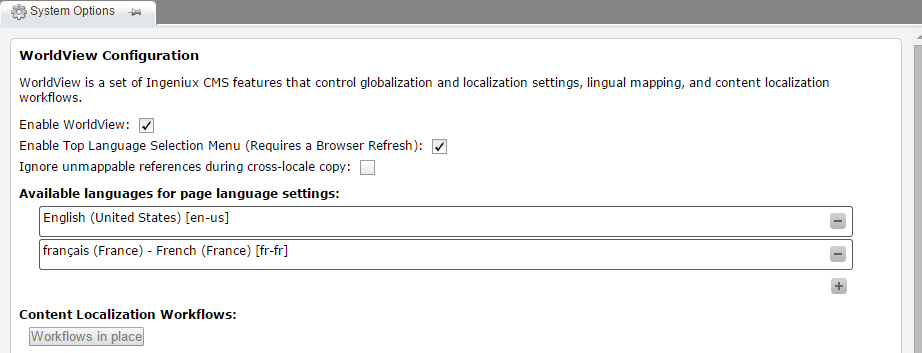
Configuring WorldView
To enable the WorldView translation manager, go to Administration > System Options > CMS > WorldView and check Enable WorldView.

Enable Top Language Selection Menu: When enabled, users can access the language menu at the top of the CMS. When this menu is enabled, users can click Language on the top menu bar and choose English, Spanish, French, German, Chinese, or Japanese as the language to be displayed in the CMS. This setting will not affect the content displayed on the live site. It will only change the labels and dialogs within the CMS.
Ignore unmappable references during cross-locale copy: When enabled, broken references are ignored when pages are copied across locales. (For example, a Link element that references a broken page would be left blank when copied to the new locale.) When this option is disabled, the cross-locale copy stops and throws an error when a broken or unmappable reference is encountered.
Available languages for page language settings: The languages available for translating site content. To add a language, click the + button. You're presented with two options:
- Select from locales listing: Select a language from a predefined list of languages.
- Create new custom locale: Create a new locale based on a predefined locale. Give this locale a name and description, and select the locale on which it's based from the Base Locale field.
To remove a language, click the - button by its name.
Create Workflows for WorldView Content Localization System: Deploys WorldView's set of prebuilt localization workflows. These help streamline the process of translating content in the CMS.
