Connecting to Assets Manager via Oxygen XML Editor


Prerequisites:
  • Before you can transfer assets to and from the CMS Assets Manager, complete the steps outlined in SFTP Access to Assets.
  • Optional: If you'd like to run a full-featured FTP client that can be started from within Oxygen XML Editor, download and install WinSCP.

If you use Oxygen XML Editor to create assets such as DITA topics or ditamaps, you can upload assets to the Ingeniux CMS Assets Manager, open assets from Oxygen, and save changes to assets from Oxygen. If you have WinSCP installed on your system, Oxygen XML Editor can run it from inside the editor and use this FTP client to transfer files. Perform the initial bulk upload of assets to Ingeniux CMS with a standalone FTP client such as a WinSCP application, FileZilla, or another FTP client.

Note
For security, assets must be transferred via SFTP.

Access Assets in Oxygen XML Editor

Once you complete the initial upload of assets to Assets Manager, you can open an SFTP connection from Oxygen XML Editor to access assets.

To access an asset from Oxygen XML Editor:
  1. Open Oxygen XML Editor.
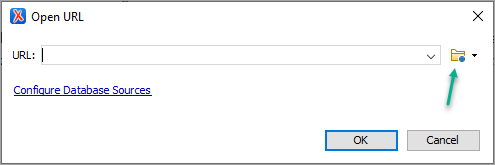
  2. Navigate to File menu > Open URL.... The Open URL dialog displays.

    Oxygen Open URL Dialog

  3. In the URL field, provide the host server URL. (Begin the URL with sftp.) For example: sftp://localhost:22.
    Note
    Port 22 is the default port for SFTP, so you are not required to append it to the host server URL.
  4. Click the Browse for remote file icon. An expanded Open URL dialog displays.
  5. Provide the User and Password values of the user that you defined as a member of the SFTP group in Ingeniux CMS > Administration > Users/Groups.
  6. Click Connect. The Assets Tree in Assets Manager displays.
  7. Browse to and then select the asset you want to open in Oxygen XML Editor.
  8. Click OK to close the expanded Open URL dialog.
  9. Click OK to close the unexpanded Open URL dialog. The asset displays in Oxygen XML Editor, ready for editing.
    Note
    Assuming you are still connected to Assets Manager, you can save your changes to the remote asset in the same way as with any other file edited in Oxygen XML Editor. Also, you can preserve your connection to Assets for easy access later. See Data Sources Preferences on the Oxygen site.

Save Changes to Assets in Assets Manager

If the SFTP connection from Oxygen XML Editor to Assets Manager breaks (e.g., you rebooted your pc), you can re-establish the connection and save your changes to the asset.

To save changes to an asset residing in Assets Manager:

  1. In Oxygen XML Editor, ensure the remote asset displays in the editor's work area. You may have multiple files open at the same time, so verify that the remote asset displays in the active tab.
  2. In Oxygen XML Editor, navigate to File menu > Save to URL... The Save to URL dialog displays. Because you had already established the connection, Oxygen XML Editor pre-populates the URL field. For example: sftp://admin:*****@localhost:22/DITA/task-1.dita.
  3. Click OK. The changes to the remote asset save to Assets Manager.

Access WinSCP's Commander Interface from Oxygen XML Editor

If you choose to use Oxygen XML Editor's embedded WinSCP client, you may find it convenient to access the full set of WinSCP features in what WinSCP calls the "Commander Interface."

Note
You must install WinSCP before proceeding with the following steps.
To access WinSCP's Commander Interface from Oxygen XML Editor:
  1. Establish a connection to access assets in Assets Manager as described in the steps above.
  2. You may have multiple files open within Oxygen XML Editor at the same time, so verify that the remote asset is in the active tab.
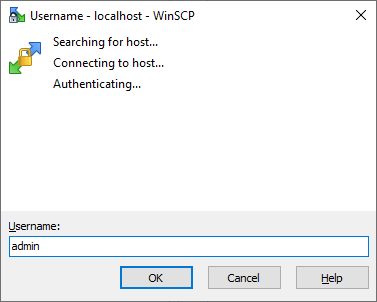
  3. Navigate to File menu > View in Browser/System Application. A WinSCP authentication dialog displays.

    WinSCP Authenticate User

  4. In the fields provided, authenticate the username and password values of the user that you defined as a member of the SFTP group in Ingeniux CMS > Administration > Users/Groups.
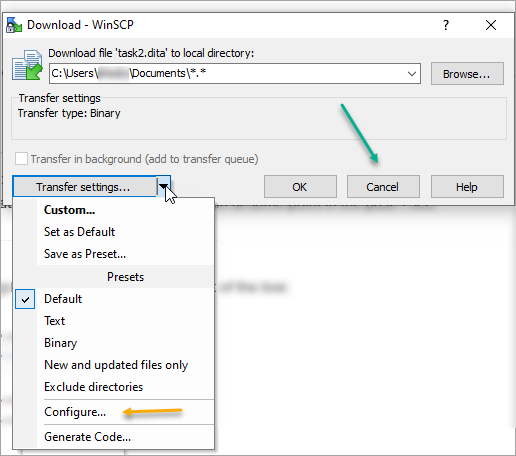
  5. Click OK. WinSCP's Transfer Options dialog displays.

    Transfer Options Dialog

  6. Click Configure... to ensure that the Commander Interface is selected. See Environment > Interface. Click OK.
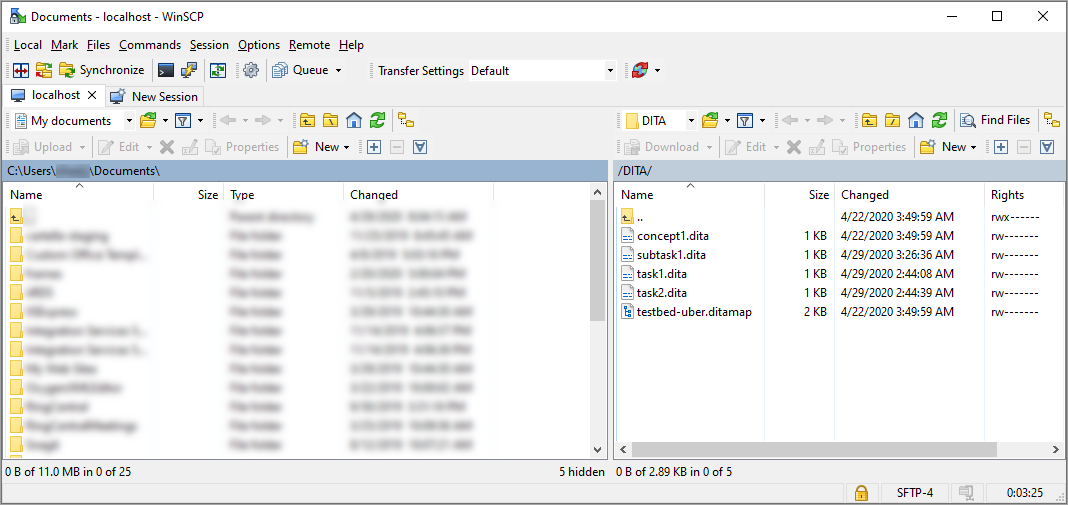
  7. Click Cancel in WinSCP's Transfer Options dialog. The Commander Interface displays.

    Commander UI