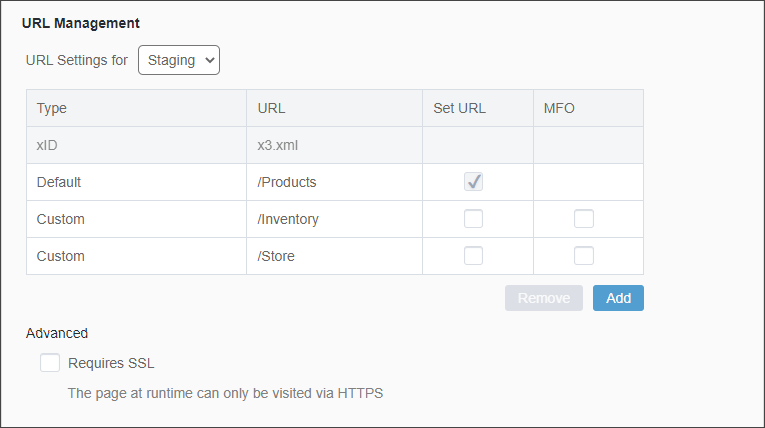
URL Management
Prerequisites:
- The content item must be marked to the publishing target to receive structured URLs.
- If you plan to enable Multi-format output (MFO) for custom URLs, administrators must configure MFO. See Setting Up MFO for details.
URL Management in the Properties tab
provides URL settings for individual pages and components. Use these settings to customize the
URL of any content item. URL settings include:
- Changing the preferred URL for the content item (i.e., the canonical URL).
- Adding and removing custom URLs that point to the content item.
- Associating MFO publishing with individual custom URLs.
You may find these settings useful for SEO purposes. For example, you can apply URL Management properties to follow search-engine friendly naming conventions and to include keywords in URLs.
Important
Any URL values
listed for a content will resolve as a 301 redirect to the canonical value if administrators
select the Redirect all requests to canonical URL
automatically checkbox for the given publishing target. See Configuring Structured URL Settings for
details.
To manage URLs:
Once you publish your changes to the publishing target, end users will be redirected to your preferred URL from any other listed URL on the site.

