Scheduling Reports


Administrators can schedule reports to run at defined times and then have these reports sent to the appropriate CMS users.
Note
Advanced reports cannot be scheduled.
To schedule a report:
  1. Navigate to Administration > Reports.
  2. Select a report from the Reports tree.
  3. Navigate to the Schedules view.
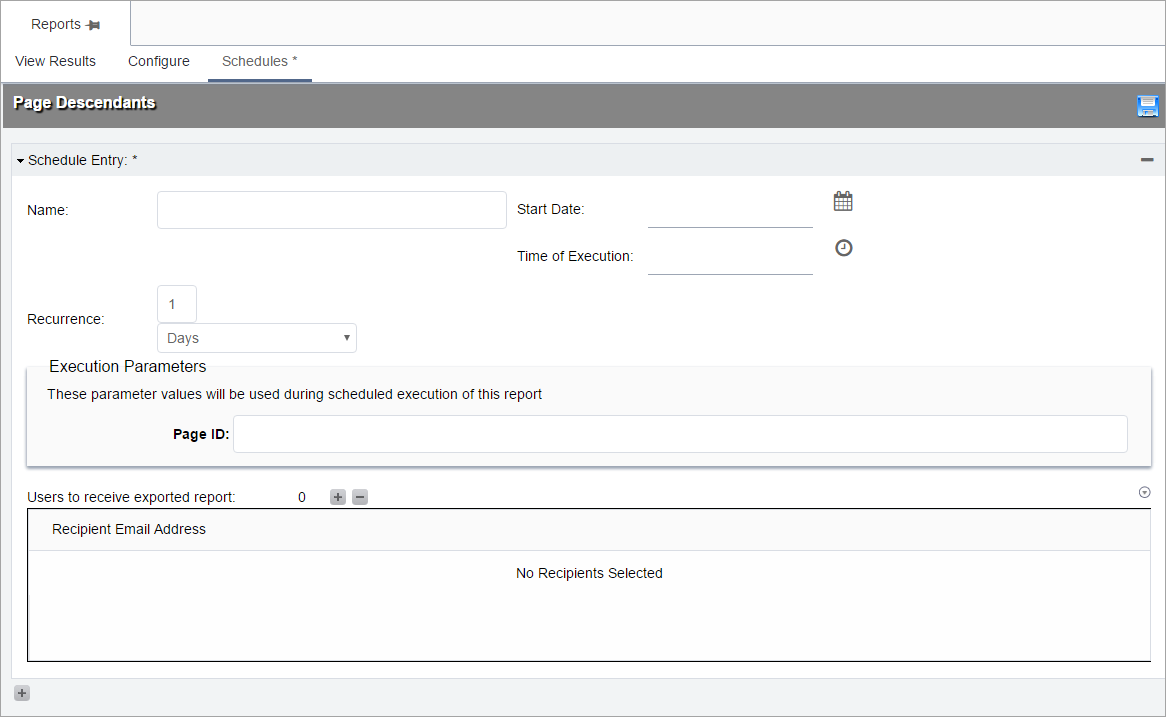
  4. Click the Add New Schedule button (+). The Schedule Entry form displays.

    Reports Schedule View

  5. Enter a name for the report in the Name field.
  6. Use the date and time pickers to enter a Start Date and Time of Execution.
  7. In the Recurrence fields, set the frequency with which the report will run.
  8. To select users to receive the report, use the add button (+) to the right of Users to receive exported report.
    Note
    You can select groups or individual users, and you can remove them using the remove button (-).
  9. Click Save. Your scheduled report now displays in the Scheduled Report Action list within the Scheduling view on the main Reports page.
  10. To run scheduled reports automatically, ensure that the scheduling service is active.