Creating a CMS Site Instance
After installing the CMS system, we can start to create CMS Site instances. The Create Ingeniux CMS Site Instance Wizard creates an empty site, adds the site to IIS, and installs supporting files. To run the Wizard successfully, you must be a user with administrative access to the server.
To create a CMS site instance:
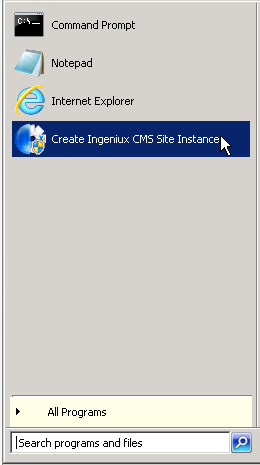
- In a file browser, navigate to Ingeniux CMS 9.0 > Create Ingeniux CMS Site Instance.
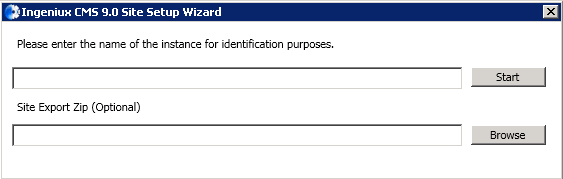
- Enter a name for your site instance. If you want to set up a site from a site export, click Browse and select the site export .zip folder in Windows Explorer. (Note that a site export's version cannot be higher than that of the Site Setup Wizard.) Click Start.
- The wizard opens. Click Next.
-
Select whether to install your site as a Web Site or as a Virtual Directory. Then click Next.
If you select Web Site, configure the following values and then click Next.
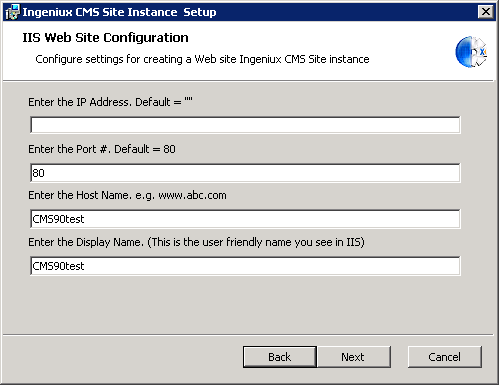
- IP Address
- Port Number
- Host Name
- Display Name (friendly name)
If you select Virtual Directory, you're prompted to select under which to run the virtual site.
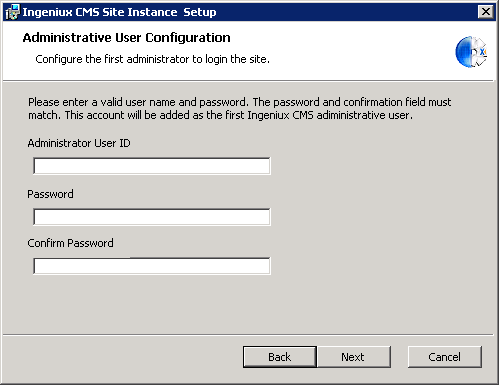
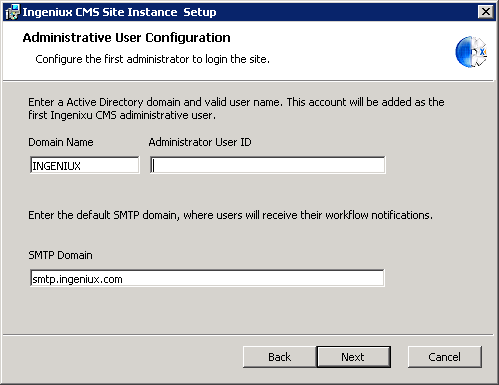
- The next step is configuring an administrator account for logging into the site.
Select either Ingeniux User Provider or Domain Controller and click Next.
If you selected Ingeniux User Provider, enter a user ID and password, then re-enter the password in the Confirm Password field. The information you entered will be the user ID and password for the first administrative account that can log into the site.
The domain controller option requires a valid Active Directory account and user name. The system adds this information to the first administrative account. Enter an SMTP domain as well. This is the domain where users receive workflow notifications from the CMS.
When you're finished, click Next.
- The final step in setting up a CMS site is configuring which features are installed.
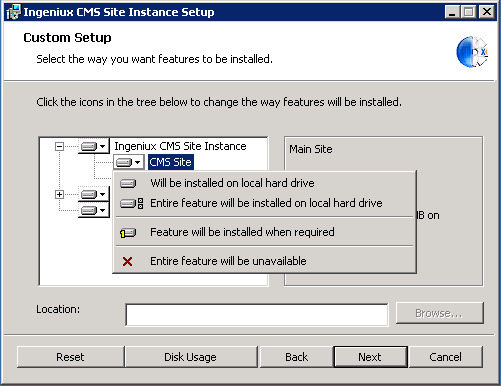
For most sites, the default settings are adequate. If you want to customize how features are installed, however, you can do so in the site tree area, which contains the following features:
- Ingeniux CMS Site Instance
- CMS Site: The site to be installed
- Preview Site: A rendering of the DSS that users can see to preview their work.
- Content Store Service:
- Raven DB Plugins: Ingeniux plugins for Raven DB to support custom indexing and other functionality.
Clicking any server icon in the tree opens a context menu where you can decide to install a feature on a local hard drive or to run from a network. You can also make entire features unavailable, but keep in mind that in a standard CMS implementation, all features are required.
You can also modify the site's default location. Click Browse to open Windows Explorer and select a location there, or enter the path manually. Within the site's root folder, a folder named DB is also created as a sibling of the site folder. The DB folder contains the Raven database's external data directory, indexes, and assemblies.
At any time, you can click Reset to restore the default installation settings.
- Ingeniux CMS Site Instance
-
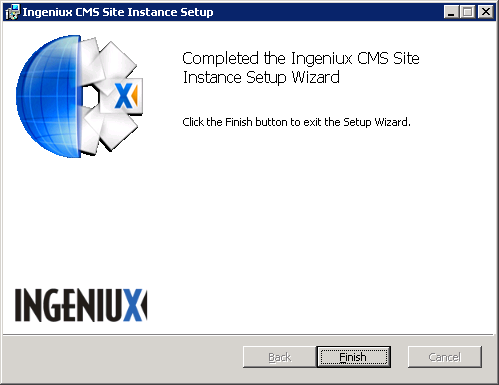
When you're finished customizing your site installation, click Next to begin the installation. After it completes, click Finish to exit the installer.