Editing HTML Assets in the CMS
Users can edit HTML assets via the asset's Edit tab within Ingeniux CMS.
Version Notes: CMS 10.6
Users can choose an editor mode for
HTML asset types. CMS 10.6 provides a Tiny MCE (XHTML editor) mode in addition to the Ace
(text editor) mode where users can make changes to HTML content.
To edit HTML asset within the CMS:
- Select the Edit tab.
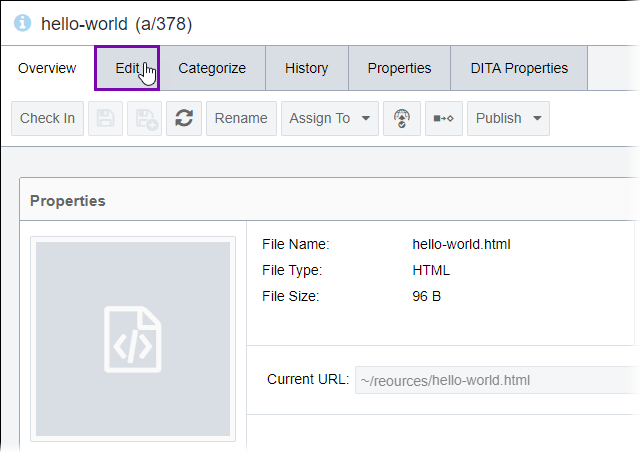 The asset's HTML content displays in the Edit tab.
 - Choose one of the following Editor Mode options in the
Edit tab toolbar.TroubleshootingThe CMS prevents users from switching editors when unsaved changes exist. If the Editor Mode buttons display as inactive, then select Save
 to register your changes. The system activates the
Editor Mode buttons when the save action completes.
to register your changes. The system activates the
Editor Mode buttons when the save action completes.Editor Mode Description Ace (default) Select this editor mode to display a text editor interface for the HTML content. 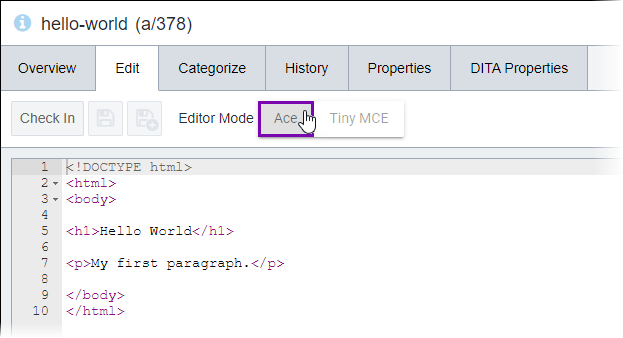 Version Notes: CMS 10.0–10.5The Ace editor mode automatically displays in CMS 10.0–10.5.
No Editor Mode options display in the Edit tab toolbar, as the CMS provides only this editor mode for HTML assets.
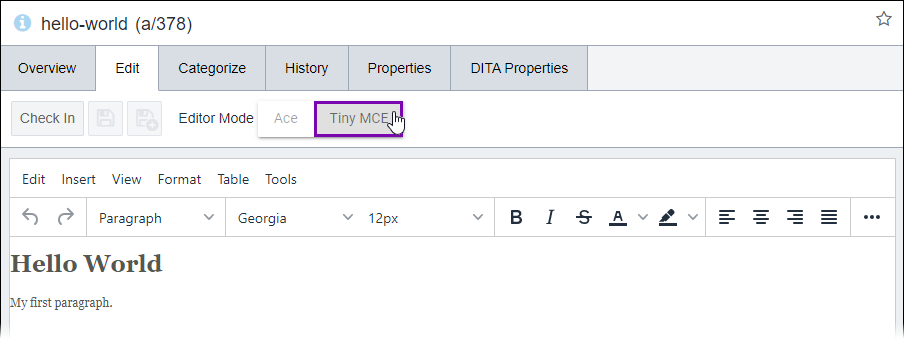
Tiny MCE Version Notes: CMS 10.6CMS 10.6 provides the Tiny MCE editor mode in addition to the Ace editor mode for HTML asset types.Select this editor mode to display an XHTML editor interface for the HTML content. See XHTML Editor for details about this interface.
- Choose one of the following steps.
- Select Save to confirm and save your edits without checking in the
asset.
- Select Save As
 to save the content as a new asset item in the Assets Manager. Complete the
following steps in the Save As dialog that displays:
to save the content as a new asset item in the Assets Manager. Complete the
following steps in the Save As dialog that displays:- Enter a name for the new asset in the Enter a New Name field.
- Select or clear the Save as Related checkbox. If selected, the new asset becomes related to the original asset. See Adding Related Images for details.
- Select a parent folder to contain the new asset, and select Save.
- Select Check In
 to save your edits and check in the asset to the CMS.
- Select Save