In-Context Editing Settings
The In-Context Editing (ICE) feature provides users with a click-and-edit system where they can edit elements on the page in real time. When a user clicks the Edit button in the Preview tab of a checked-out page or component, each editable field is highlighted on mouse-over. Clicking a highlighted field opens the editor. Clicking Preview saves the changes and redisplays the page.
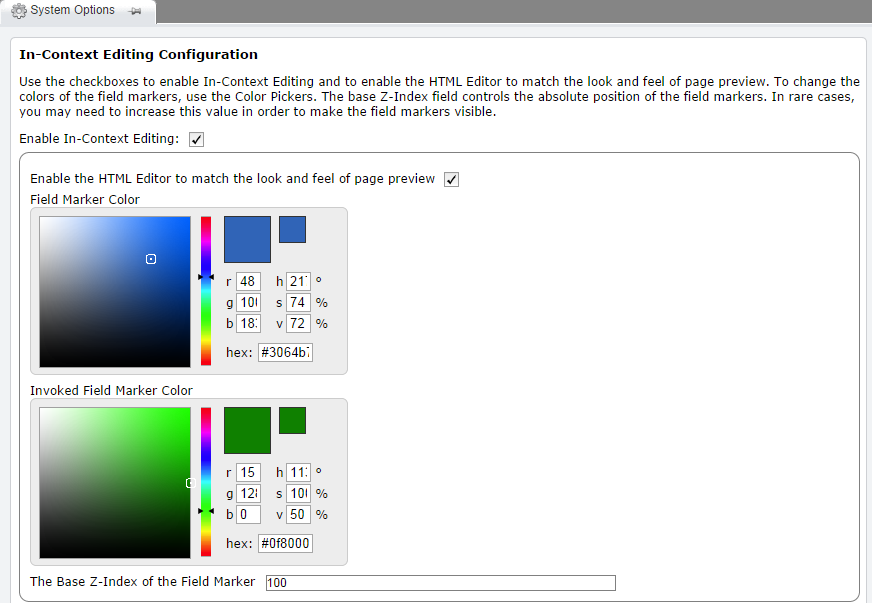
In order for this process to work, ICE must be enabled. The file must be checked-out and assigned to the user, and the XSL style sheets must conform to Ingeniux requirements. These requirements can be configured by navigating to System Options > In-Context Editing.

Enable In-Context Editing: When selected, ICE is enabled
Enable HTML Editor to match the look and field of page preview: Causes the HTML editor to apply the CSS from the preview page in order to match the look of the preview field. This feature doesn't work with HTML that employs CSS filters. If the styling in the HTML editor appears unusual, this feature should be disabled.
Field Marker Color: Specifies the highlight color used to indicate an editable field on mouse-over. Values must be either standard CSS color names or else conform to the "#xxxxxx" or "#xxx" hexadecimal color code.
Invoked Field Marker Color: Specifies the color used to outline an editable field once it has been selected with a mouse click. Values must be either standard CSS color names or else conform to the "#xxxxxx" or "#xxx" hexadecimal color code.
Base Z-Index of Field Marker: Can be configured to make field markers visible when an HTML template depends on Z-Index for layout.
Previewing Multi-Format Output Pages in ICE
The In-Context Editing (ICE) feature gives users the ability to edit text and replace images in the Page View tab, where they can see XML content transformed to HTML, as it will appear to site visitors. You can also configure Page View to return a preview from an external URL. This makes it possible to edit Multi-Format Output (MFO) content via the ICE system.
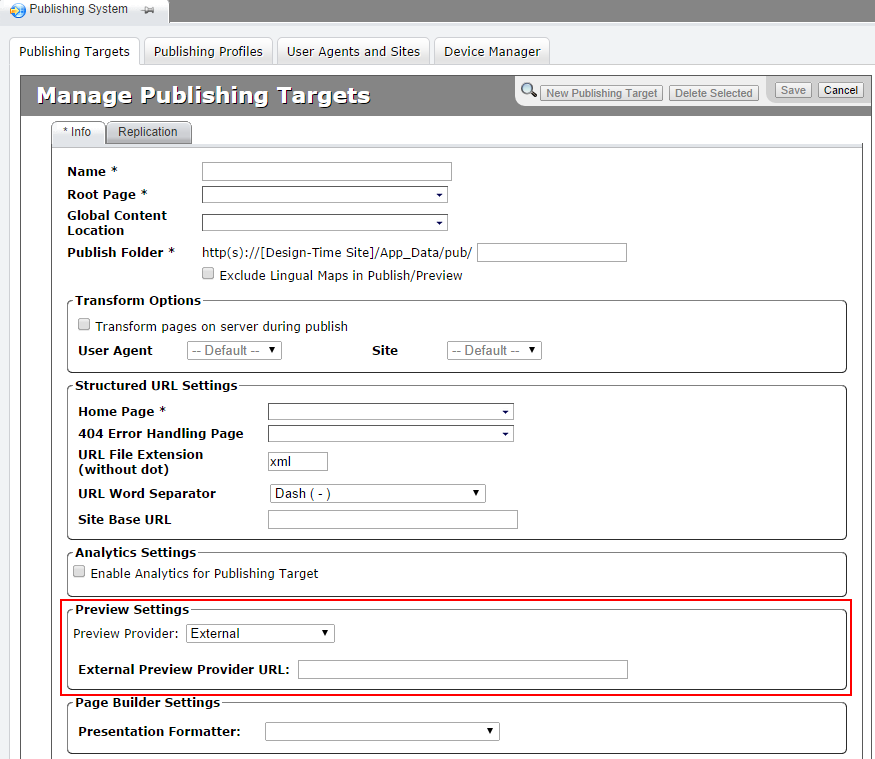
To configure the ICE preview for MFO, go to Administration > Publishing System > Publishing Targets and select the publishing target that you want to configure. In the Info tab, check Use External Preview Provider and enter URLs for the external preview provider and for the ICE system. Note that as of CMS 7.5 SR1, the external preview feature supports URLs starting with "/". This means that the preview URL can be a path relative to the default site root. It's usually a good idea to use a relative path in the External Preview Provider URL field.

The URL for the external preview provider will replace the built-in previewpage.asp file. The URL for the ICE system will be fed updated element values and will return rendered markup.
When the correct URLs are entered, you will be able to preview MFO content in both the Page View and the Preview windows.
