
Creating Simple Reports
A simple report runs an XPath query against a single XML document that combines the XML documents you choose. Simple reports take no parameters and display results only as a list.
- Right-click a folder in the Reports menu to contain the new
report then click .
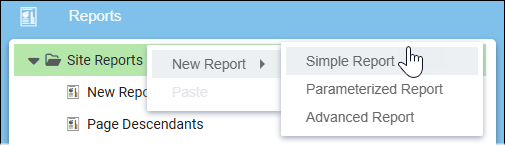 The CMS creates the report under the folder and displays the report in the Reports Manager.
- Click the Configure tab then enter a report name in the
Name field..NoteThe name displays in the Reports menu. Change the name as needed.
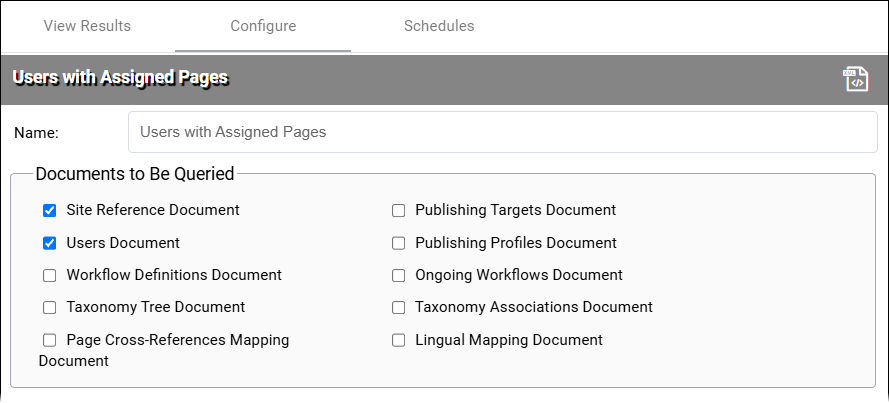
- Set up the results table columns under Setup Results Table
Columns.
Each row represents one column in the results table. To show all attributes, select the check box in the header row. To change the column order, drag a row up or down by its dotted handle.
To refresh the results table, click the reload button
 above the attribute list.
Setting Description Attribute Name Select the check box for each attribute to show as a column. The list shows the attributes of the elements that the query returns. Column Label Enter the column heading that appears in the results table. Data Type Select how to display the column data: - Text
- Displays the value as plain text.
- Page Id
- Displays the value as a page ID.
- Page Icon
- Displays the icon for the page type.
- Image
- Displays the value as an image.
- Integer
- Displays the value as a whole number.
- Float
- Displays the value as a decimal number.
- Date Time
- Displays the value as a date and time.
Width Enter the column width in pixels. ID column 
Required. Click the key cell for the column you want as the ID, and then click OK in the Confirm ID Column dialog.
Key cells appear at the far right of each row. A key icon
marks the current ID column, and you can set only one. To change the ID,
click the key cell in a different row.CautionChoose a column with unique values. Duplicate values cause errors when you view results.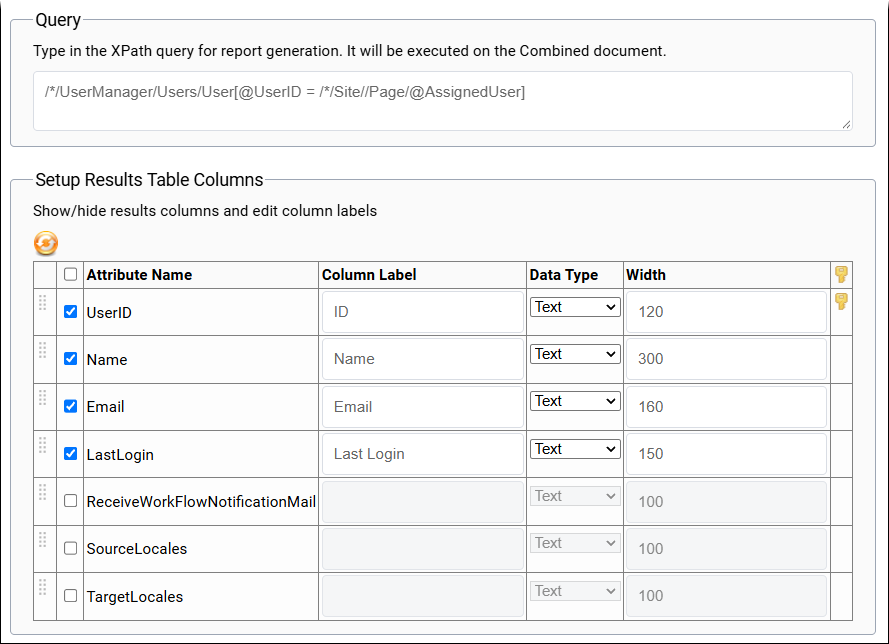
- To view the combined XML document that the query searches, click the View
Combined Document for Query button
 in the top right corner of the Configure tab.
The combined XML document opens in your browser. Use the document to verify the element and attribute names, such as
Page,Schema, andAssignedUser, for your XPath query. - Click the Save Reports Configuration button
 in the top right corner of the Configure tab.
Next Steps: Each report can have multiple schedules and each schedule can have its own reporting times and recurrence, and recipients list. You can create schedules on the report's Schedules tab.
Related Topics