Creating Transition Arrows
- See Workflows Designer Prerequisites for details.
- Workstates must exist in the workflow. See Creating Workstates for details.
Use the connection points to create transition arrows between workstates in the Designing Workflow area.
- Navigate to Administration > Workflows Designer.
- Select the appropriate workflow from the list.
- Click Edit.
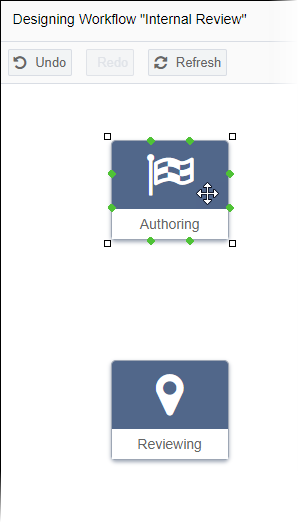
- Click the workstate from which the transition arrow will start in the
Designing Workflow area. Workstate connection points display.

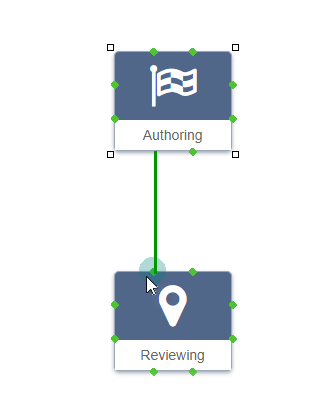
- Drag the starting workstate connection point to another workstate connection point
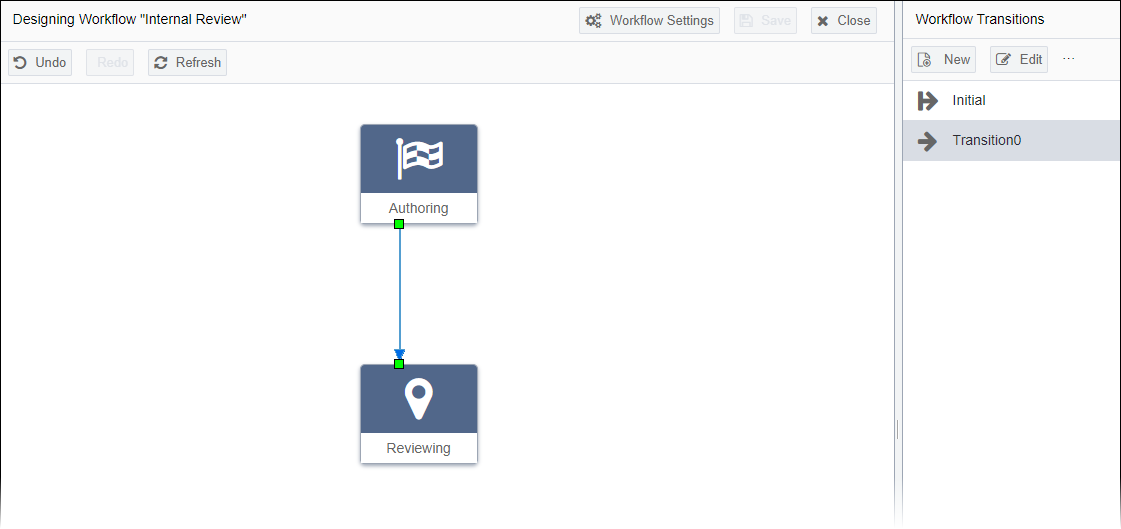
from which the transition will end. The new transition displays in the
Designing Workflow area and Workflow
Transitions area.
 Additional Information
When dragging a connection point to another connection point, a line displays. If the ending connection point and line display as shaded (i.e., green), the transition is valid. Otherwise, dragging the connection point won't create the transition. If a transition exists with the same starting workstate and same ending workstate, no other transition can use the same start-end workstate relationship.

For example, if an existing transition's Edit Transition dialog displays the Authoring workstate in the Current Workstate field and Approving in the Next Workstate field, no other transition can use this pairing. However, if a new transition uses the Approving workstate as the Current Workstate and the Authoring workstate as the Next Workstate, and if this pairing isn't used in an existing transition, this paring is valid.
The new transition needs to use a different current or next workstate. Each workflow can contain only one transition with the same workstate relationship.
- Select the new transition (e.g., Transition0) at the bottom of the Workflow Transitions area.
- Click Edit. The Edit Transition dialog displays.
- Complete the following fields.
Field Description Name Friendly name of the transition. Description (optional) Details about the transition. Current Workstate Value pre-selected in the Designing Workflow area. Starting (or current) workstate of the content item. The CMS uses the workstate ID to determine the workstate. Next Workstate Value pre-selected in the Designing Workflow area. Workstate to which the content item moves after the transition concludes. The CMS uses the workstate ID to determine the next workstate. Is Default If selected, the current transition saves as the default transition for the workstate. NoteWorkstates can use multiple transitions.Next Group Value sets the user group to which the content item will be assigned after the transition completes. In the Advance Workflow dialog's Assign To drop-down list, users can assign the group or a group member to the content item. TipTo view which transitions associate with each user group, see Workflow Transitions Assigned to Groups for details.Default User (optional) Value determines which user displays as the top list item choice in the Advance Workflow dialog's Assign To drop-down list.
The group selected in the Next Group drop-down list filters the available users in the Default User drop-down list. Choose -- No Default User -- to opt out of designating a default user.
The group or user selected in the Assign To list is assigned the content item after the transition completes.
Version Notes: CMS 10.5You can choose -- Self -- as the default user. If selected, this option displays the name of the user, who is advancing the content item, as the top list item choice in the Advance Workflow dialog's Assign To drop-down list.
If the current user isn't a member of the start group and -- Self -- is selected, the Assign To drop-down list uses the -- No Default User -- behavior.
When users assign content items via the Advance Workflow dialog, keep the following in mind:
- If an item is assigned to a group, individual members can claim the content item by selecting Assign to Me in the Edit form toolbar.
- The content item is then assigned to that user and not to the entire group. Users can view all their group- and user-assigned content items in Assignments.
Allow Next Group to Advance If selected, permits the members of the next group to advance the content item to the next workstate. Otherwise, only users with sufficient permissions may advance the content item. - Optional: Click Save Current Item to save changes and continue working
in the dialog.
Create actions to initiate during workflow transitions. - Click Save and Close. The dialog closes and the new transition displays in the Workflow Transitions pane.
- Click Save in the top menu of the Designing
Workflow area when finished making changes in the workflow. Ingeniux
CMS saves the workflow in Workflows Designer. This workflow is
available for content items in the Site Tree and
Assets Tree.ImportantAll workstates require cohesive transitions before saving.
