Setting Device Bundles in Device Manager
In the CMS itself, the Device Manager configures mobile preview. Using the Device Manager, you can create device bundles that group mobile devices by manufacturer and screen size. Users can then preview mobile displays by selecting device bundles from a menu.
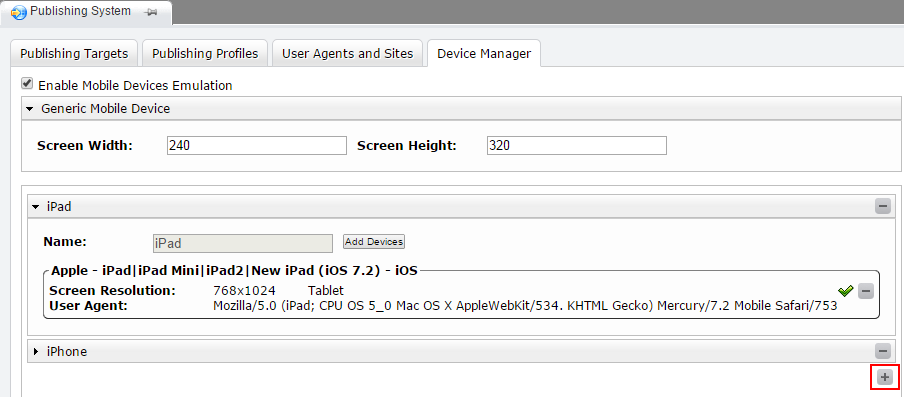
To turn on mobile preview, open the Publishing System Manager, click the Device Manager tab, and enable the check box labeled Enable Mobile Devices Emulation.
When mobile preview is enabled, users can access the Device menu on the Page View tab and the Preview window.
A generic device is configured by default.

To change display dimensions for the generic mobile device, enter values for the screen width and height and click Save. The default dimensions are 240 by 320 pixels.
If you want to create a device-specific preview, you can group multiple devices into a bundle and designate a representative device for the bundle. The user agent of the representative device is then used to generate preview for all the bundled devices.
The first device you add to the bundle automatically becomes the representative device, but you can change the representative device at any time. The manufacturer and screen resolution of the representative device filter which other devices can be added to the group.
To add a new device bundle, click the + button.
A new device form opens. Enter a name for the device. Then click Add Devices and select a device (or multiple devices) from the Select Mobile Devices dialog. To filter results, type a device name in the Search field and click the magnifying glass icon.
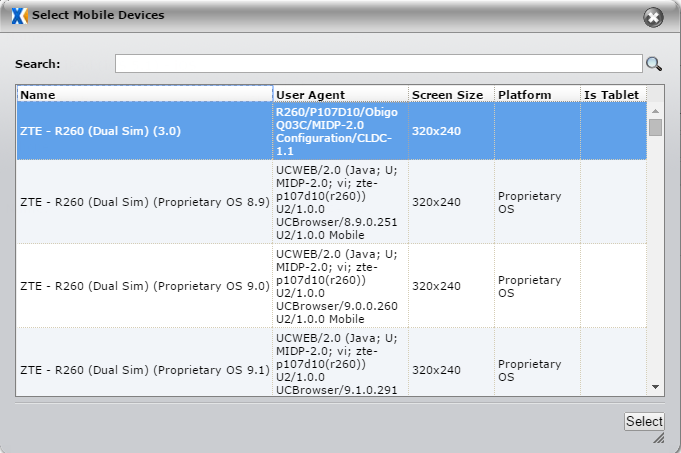
To add the selected device(s), click Select. To add additional devices, click Add Devices and repeat the process above.
The green check mark indicates the representative device.

To change the representative device, point the cursor at the device that you want to make representative. When the check mark appears, click it.
When you’re finished adding devices to a bundle, click Save. To remove a device or an entire device bundle, click the appropriate Remove or Delete button.