Prerequisites: Users require site administrator permissions
to complete this task.
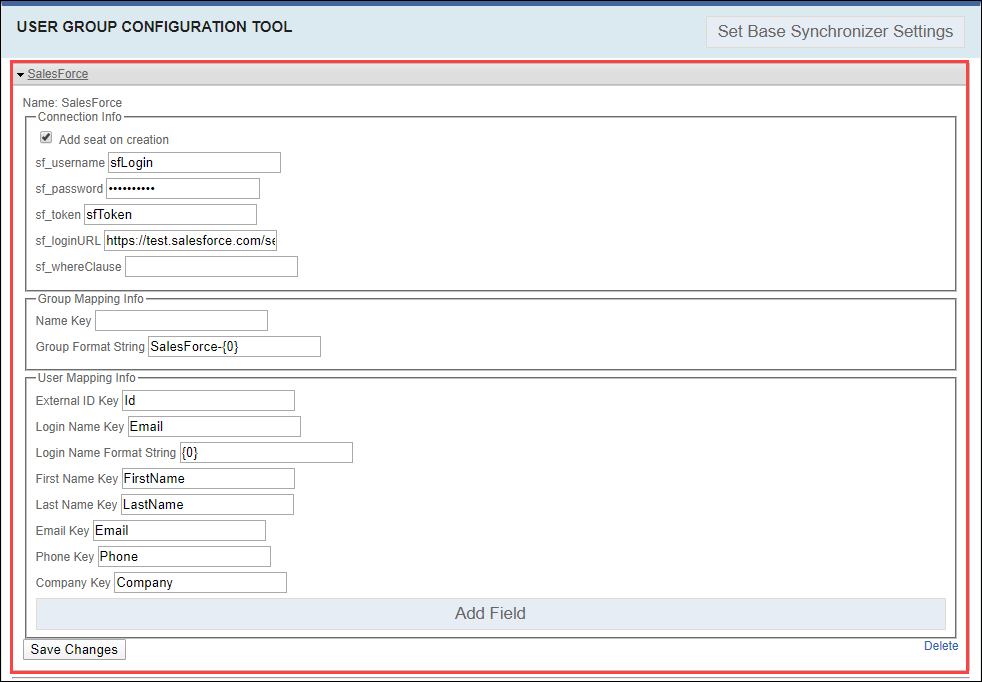
Use the User Group Configuration Tool view to integrate
Salesforce user stores. Syncing to Salesforce imports customer data that is then
used to populate groups in Cartella. All of the contacts for a given company are
converted to Cartella users and associated with the appropriate customer group.
Note
Choose whether or not to sync Salesforce in the Cartella user interface or in
Cartella.config. See
Advanced Setup: Syncing to Salesforce to configure the Salesforce
synchronizer via
Cartella.config.
To sync to Salesforce:
- Log in to Cartella.
- Navigate to .
- Click Salesforce to expand the Salesforce entry.

- Select or clear the Add Seat on Creation checkbox.
Note
Selecting this option adds Salesforce users to the Cartella
seat count on creation.
- Enter the following fields in the Connection Info section:
| Field | Description |
|---|
| sf_username | Salesforce account username. |
| sf_password | Salesforce account password. |
| sf_token | Salesforce security token. |
| sf_loginURL | URL to log in to Salesforce. Example: https://test.salesforce.com/services/Soap/u/24.0 |
| sf_whereClause | SQL WHERE clause to filter specific Salesforce records. |
- Enter the following fields in the Group Mapping Info
section:
| Field | Description |
|---|
| Name Key | Name key for Salesforce. |
| Group Format String | Salesforce group format string. Example: SalesForce-{0} |
- Enter the following fields in the User Mapping Info
section:
| Field | Description |
|---|
| External ID Key | ID of the external key. |
| Login Name Key | Email for the login name key. |
| Login Name Format String | Format string for the login name. Example:
{0} |
| First Name Key | First name. |
| Last Name Key | Last name. |
| Email Key | Email for Salesforce. |
| Phone Key | Phone number. |
| Company Key | Company. |
- Optional: Click Add Field in the User Mapping
Info section to enter additional values for:
| Field | Description |
|---|
| Store Key | Key for store. |
| Cartella Key | Key for Cartella. |
Note
Add additional fields as needed.
Note
Click Remove to remove the added
fields.
- Click Save Changes.
Cartella saves and syncs the Salesforce configuration changes.
Note
Click
Delete to delete the Salesforce syncer.

