Managing Security on Pages, Components, and Folders


Prerequisites:
  • User must have administrator permissions to set security.
  • User groups must exist. See Creating Groups for details.

The CMS has two levels of security that administrators can apply to any page, component, or folder in the Site Tree:

  • Full access
  • Read-only access

Administrators set security by default or on a "per group" basis. The "per group" option grants individual groups different access levels in the same node (i.e., content item). Child nodes inherit their parent node's security settings by default, unless administrators configure the child node's security separately.

Any group with administrator rights has complete, unrestricted access to all nodes in the Site Tree.

Tip
Administrators can set node-level security via Properties > Security in the Edit toolbar or the Site Tree context menu. See Page Security for details.
To set security for a content item:
  1. Navigate to Site > Site Tree.
  2. Right-click the content item and select Page Properties in the Site Tree. The Page Properties dialog displays.
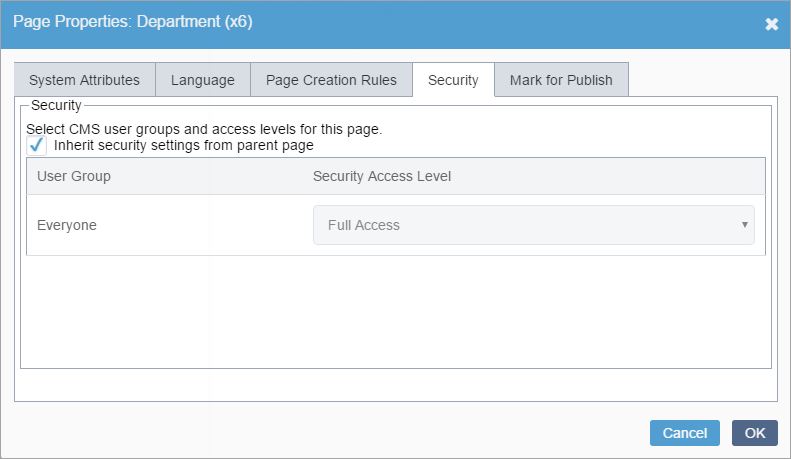
  3. Click the Security tab.

    Content Item Security via Site Tree Context Menu

  4. Choose one of the following steps:
    • Select the Inherit security settings from parent page checkbox.
      Additional Information
      The CMS selects the checkbox by default. If selected, the content item uses its parent's security settings. Repeat the steps above to access its parent item's security settings.
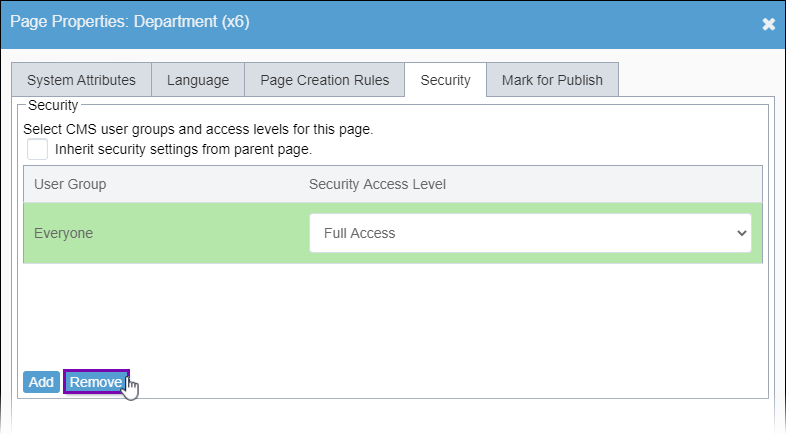
    • Clear the Inherit security settings from parent page checkbox. Click OK in the confirmation dialog. The Add and Remove buttons display.
      Additional Information
      If cleared, the content item uses its own security settings rather than its parent settings.

      For example, the parent item may grant groups full access while the child grants groups read-only access or vice-versa. You can configure the child's security settings per group to be less restrictive, more restrictive, or equal to its parent security.

      1. Optional: Select the Everyone user group. Click Remove.
        Note
        The Everyone user group overrides all other settings in Security.

        Remove Group

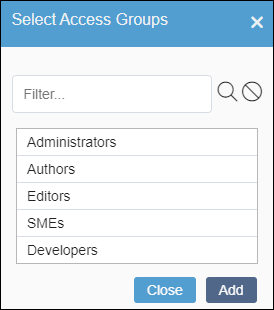
      2. Click Add. The Select Access Groups dialog displays.
      3. Select groups to add. Use CTRL+Click to multi-select groups.

        Add Group(s)

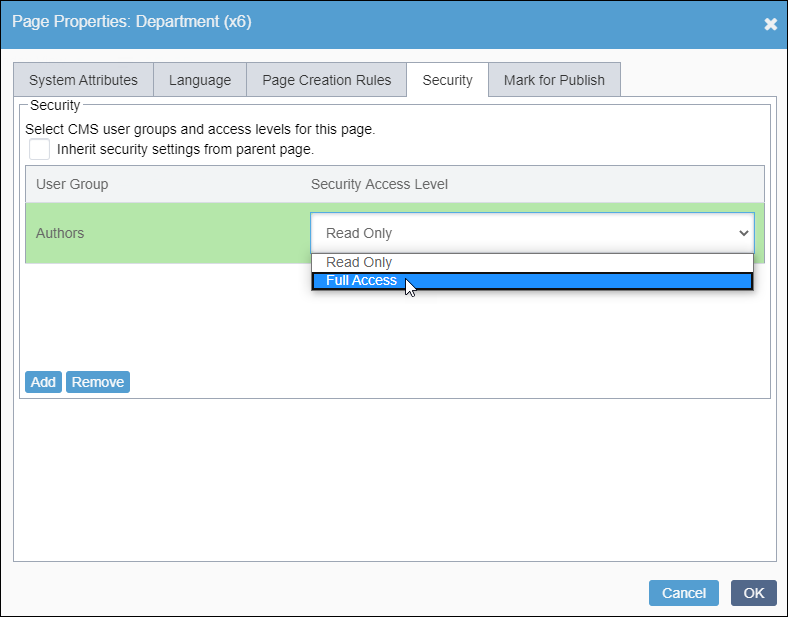
      4. Click OK. The selections display in the User Group list.

        Select Security Access Level

      5. Select one of the following options in each group's Security Access Level drop-down list.
        OptionDescription
        Read-OnlyGrants groups with appropriate permissions to only view, copy, and publish the content item.
        Full AccessGrants groups with appropriate permissions to perform all content item operations and edits.
  5. Click OK.