CMS 10.0–10.5 Adding Layouts


Prerequisites:

Use pre-built or custom layouts to create the grid structure within your presentation. This area contains a selection of page layouts organized by columns and sidebars. Use column and row properties to modify the width, wrapping, padding, additional classes, etc. Each layout consists of only one row. Users choose the number of columns to add to the layout. The maximum is 12 columns per row.

Users can delete or reorder selected layouts in the Design tab workspace.

Layouts contain no content; the content units contain the content. Each column within the row can contain one content unit (unless child layouts exist).

Properties applicable to layouts:

Note
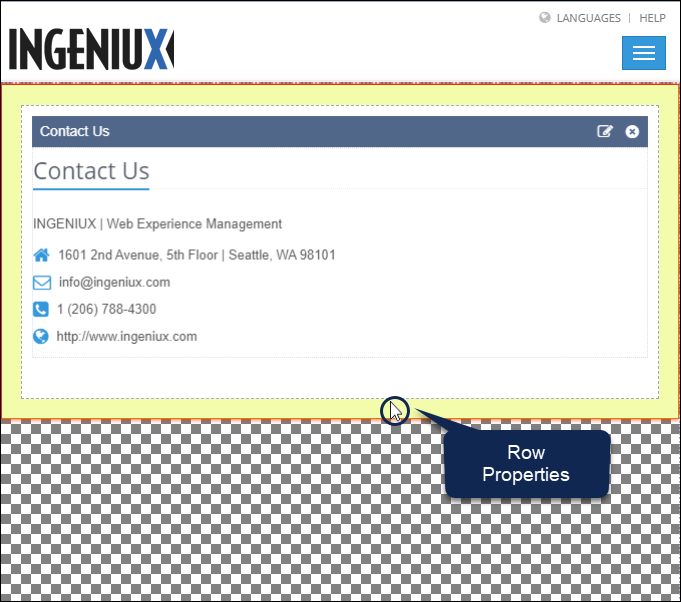
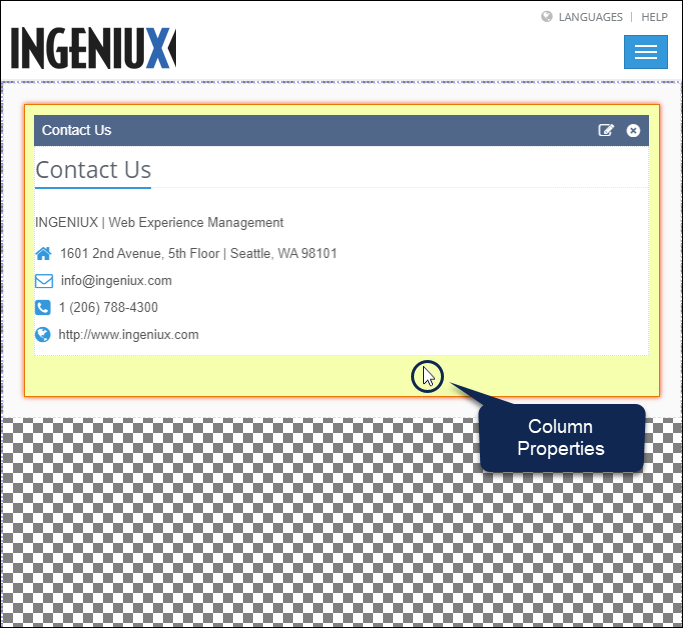
In the How to Access column, use the screen captures as a guide to select objects that display specific Design Presentation pane properties areas. The highlighted (yellow) areas in the screen captures are only present for demonstration purposes and don't display as such in the Design tab workspace.
Properties AreaPresentation ObjectDescriptionHow to Access
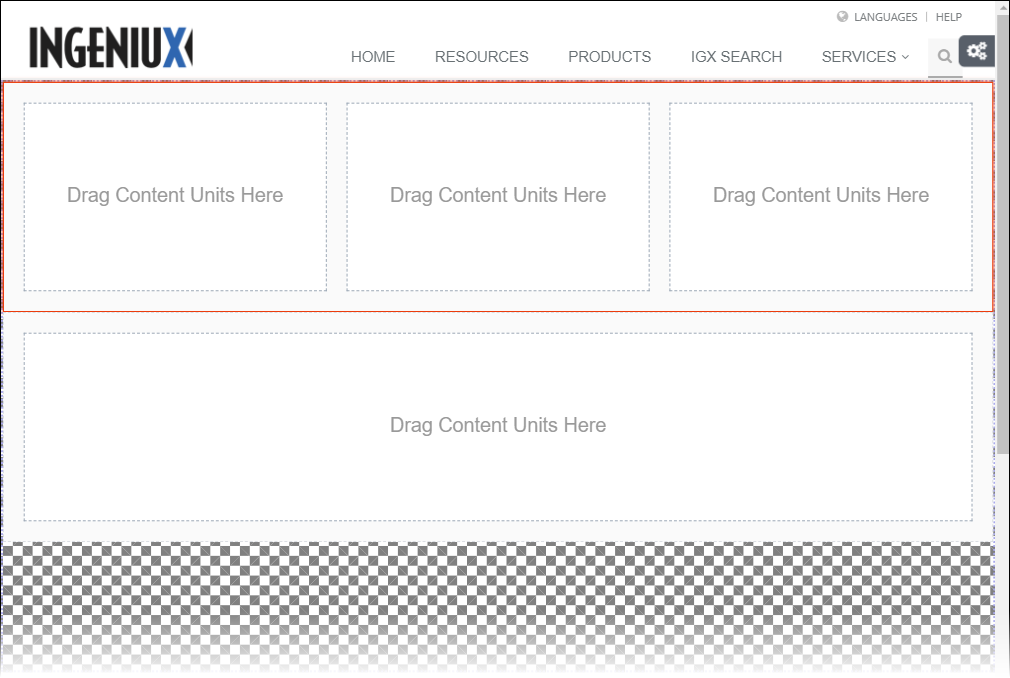
Row PropertiesLayoutsUse these properties in conjunction with the Design Presentation pane's Layout area. Row Properties control the layout object row's padding, additional class names, and the number of available columns.Select the outermost area (gray) inside the layout.

Select Row Properties

Column PropertiesLayouts Use these properties in conjunction with the Design Presentation pane's Layout area. Each column in the layout object's row has their own respective column properties. Column Properties control each column's width, padding, and additional class names. Select the middle area (white) inside the layout. Don't select the content unit itself.

Select Column Properties

Adding Layouts

Page Builder designers drag the layouts to the container.
To add a layout to the container:
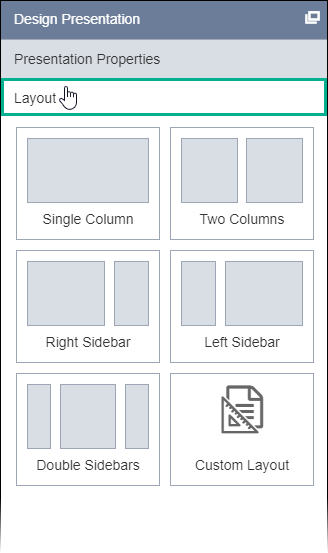
  1. Click the Layout area in the Design Presentation pane.

    Layout Area

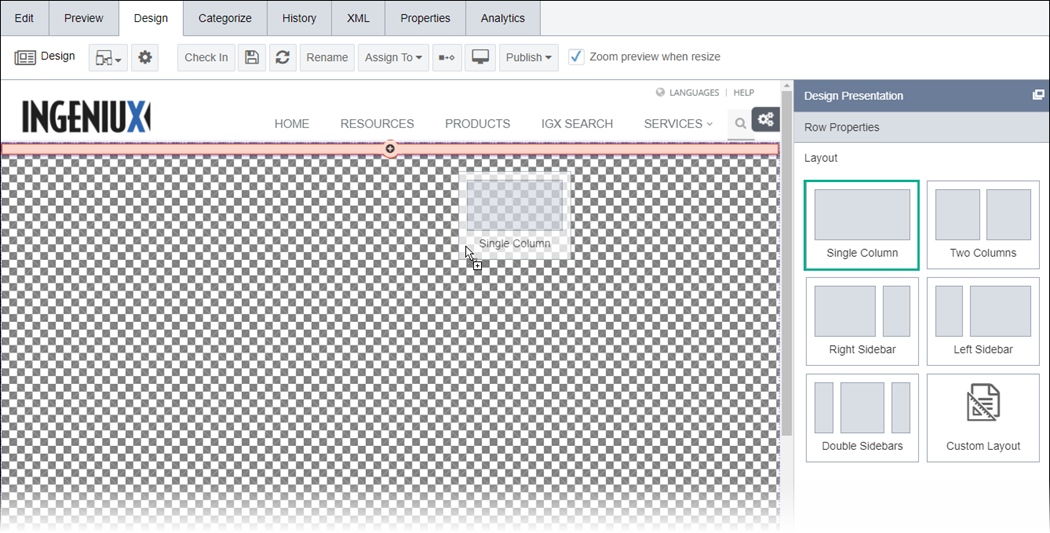
  2. Choose one or both of the following steps. A bar (red) with a plus (+) button indicates where the dragged layout will drop in the Design tab workspace.
    Note
    Inside an existing (parent) layout, the bar indicates the drop point for a child layout. See Adding Child Layouts to Forms for details.
    • Drag a pre-built layout to the checkered area in the workspace.

      Drag Layout to Container

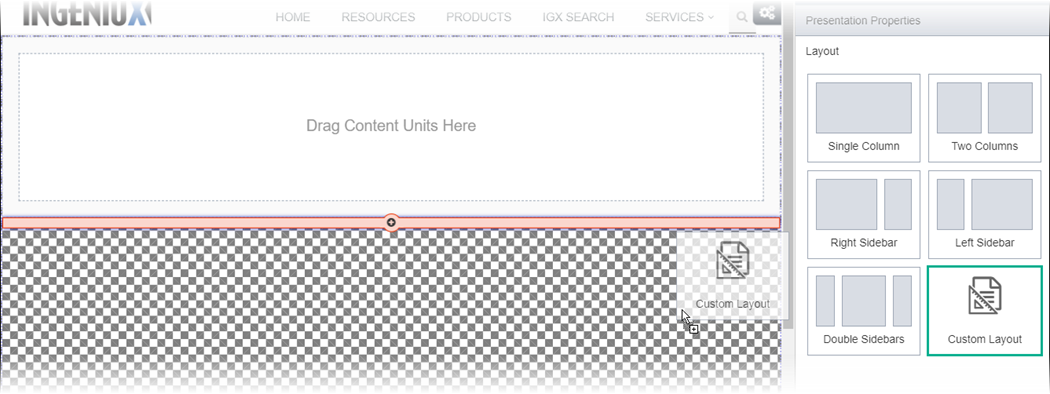
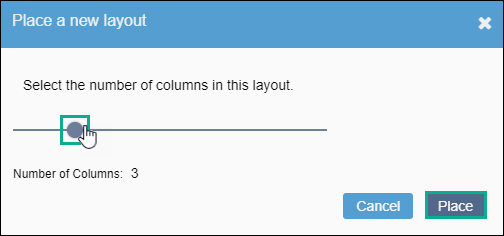
    • Drag a custom layout to the checkered area in the workspace. The Place a New Layout dialog displays. Select the number of columns to include in this layout.

      Drag Custom Layout to Container

      Custom Layout Dialog

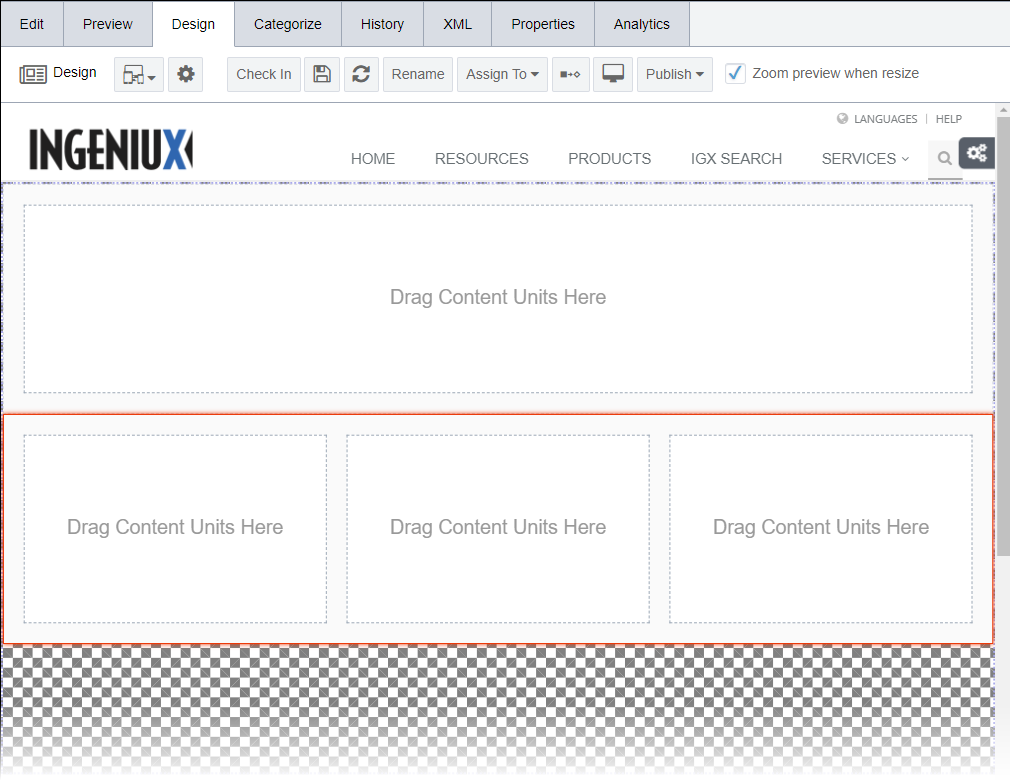
    The layout displays in the checkered area (i.e., the container defined in Presentation Properties) of the Design tab workspace. Each column in the layout displays:
    Drag Content Units Here.
    .
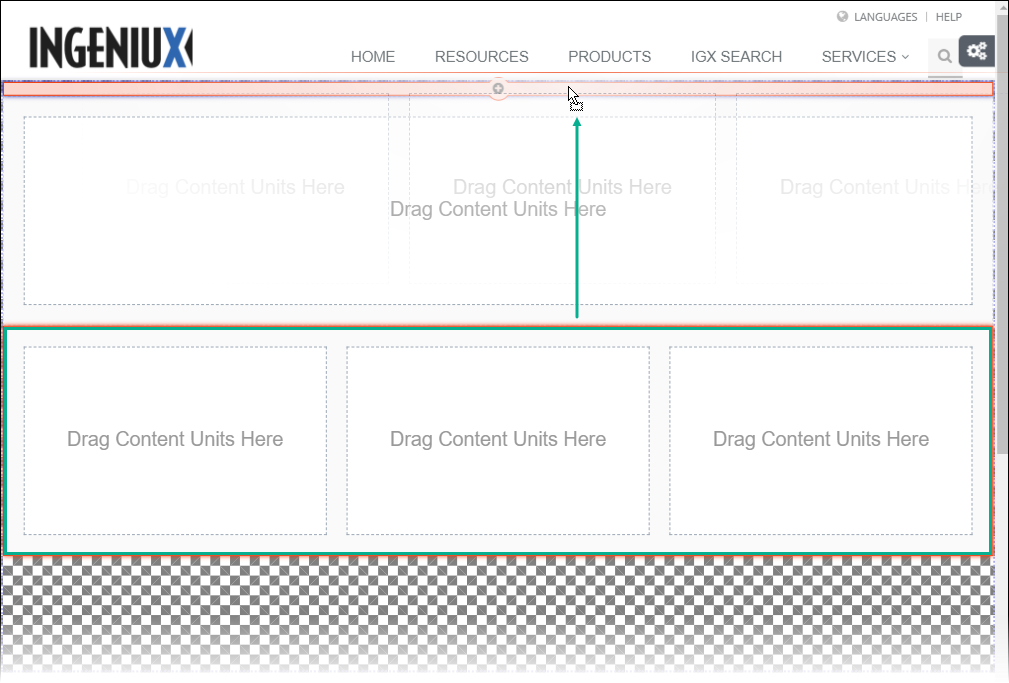
  3. If the container holds multiple layouts, you can reorder them. Drag the desired layout to move. A bar (red) with a plus (+) icon indicates the layout's new placement in the container.

    Select Layout

    Reorder Layouts

    The dragged layout displays in the new location.

    Reordered Layouts

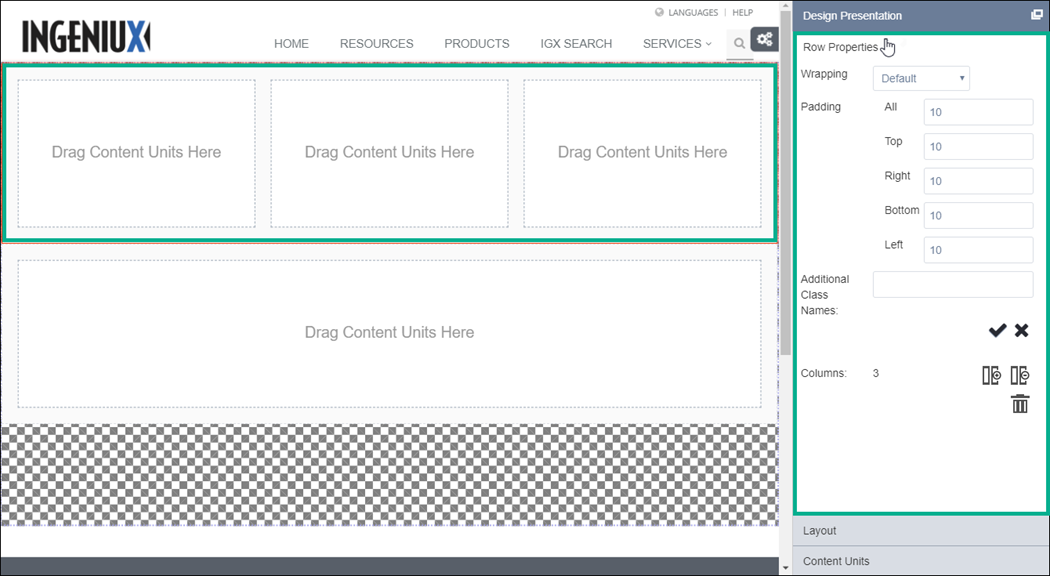
  4. Optional: Click the layout row. See the Properties table for details. Click the Row Properties area that displays in the Design Presentation pane.

    Display Row Properties

    Use the following fields:
    FieldDescription
    WrappingSelects a wrapper. Options include:
    • Default (i.e., desktop)
    • Mobile Device
    • Tablet
    • No wrapping
    Padding AllModifies the padding (px) on all sides of the row.
    Note
    Entering a value in this field populates all Padding fields with the same value.
    TopModifies the padding (px) on the top side of the row.
    RightModifies the padding (px) on the right side of the row.
    BottomModifies the padding (px) on the bottom side of the row.
    LeftModifies the padding (px) on the left side of the row.
    Additional Class NamesAdds additional classes to the row.
    ColumnsDisplays total columns in row. Click the Add Column icon to insert a column or click Remove Column to delete a column in the row.

    Add or Remove Column

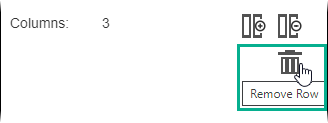
    Remove RowDeletes the row (i.e., layout) from the container. Click the Remove Row icon. If the row contains content units, a dialog displays. Choose whether or not to delete mapped fields.
    Warning
    Deleting a row deletes all nested columns and content units. The row cannot be recovered.

    Remove Row

    Click the Apply checkmark () button to save Row Properties changes.

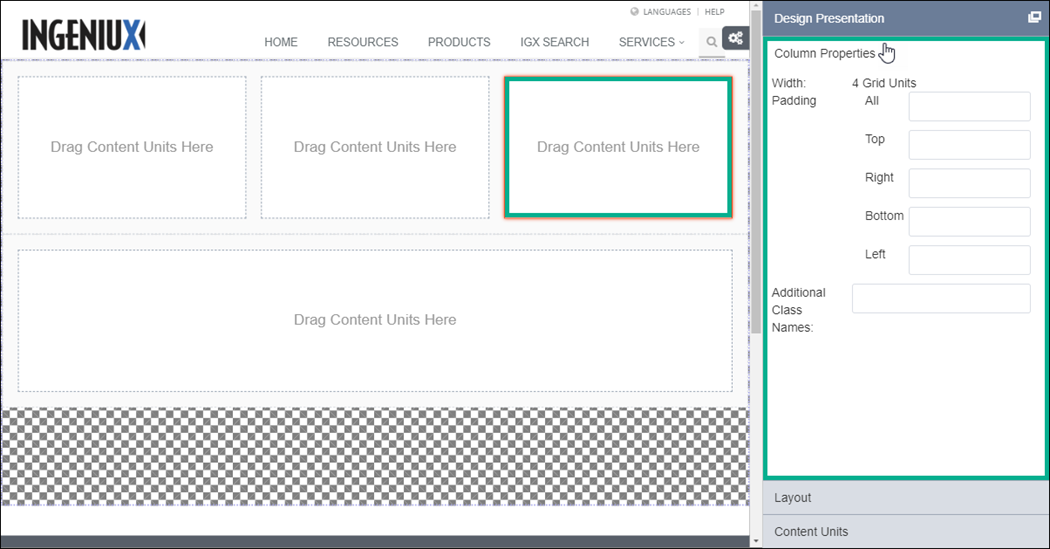
  5. Optional: Click the layout column. See the Properties table for details.

    The Column Properties area displays in the Design Presentation pane.

    Note
    Each column in a row has respective Column Properties.

    Column Properties

    Use the following fields:

    FieldDescription
    WidthDisplays the width (grid units) of the column. In each row, the total width of all columns is 12.

    To change the column width, drag the left or right side of the column in the design workspace.

    Change Column Width

    The Width field updates to reflect the changes.

    Column Width Field

    Note
    If the row contains one column, the column width cannot be modified.
    Padding AllModifies the padding (px) on all sides of the column.

    Entering a value in this field populates all Padding fields with the same value.

    TopModifies the padding (px) on the top side of the column.
    RightModifies the padding (px) on the right side of the column.
    BottomModifies the padding (px) on the bottom side of the column.
    LeftModifies the padding (px) on the left side of the column.
    Additional Class NamesAdds additional classes to the column.

    Click the Apply checkmark () button to save Column Properties changes.

    Note
    To remove a layout from the container, choose one of the following steps.
    • Click the row and select Row Properties in the Design Presentation pane. Click Delete Row.
    • Drag the layout to the Design Presentation pane.
    Page Builder deletes the layout.

Next Steps:

Add Content Units to insert and edit field or component units.