Setting up Ingeniux Translation Manager
Prerequisites:
- Administrators, see Translation Prerequisites for details.
- User must be a systems administrator to access the translation manager files in the Ingeniux CMS file system.
To prepare Ingeniux Translation Manager for use, administrators must first deploy and configure the application package.
To deploy the translation manager package:
- Contact Ingeniux Support for the latest translation manager deployment package.
- Create a new folder in
[Drive]:\[path-to-CMS-root-folder]\site\App_Data\xml\Custom
to contain the Translation Manager files.
For example, create a new folder called TranslationManager. - Extract the zipped translation manager files (e.g.,TranslationManager-vXX.zip) to the new folder.
- Create a local folder on the CMS server that will contain temporary XML files that
are exchanged by users, including translation vendors, during the translation
process. For example, create a new folder called drop in the
TranslationManager folder. ImportantThis exchange folder requires that NetworkService has full control, so the web application can save files to this location. Right-click drop, then select Properties from the context menu. In the Security tab, ensure that NETWORK SERVICE is set to Full control.
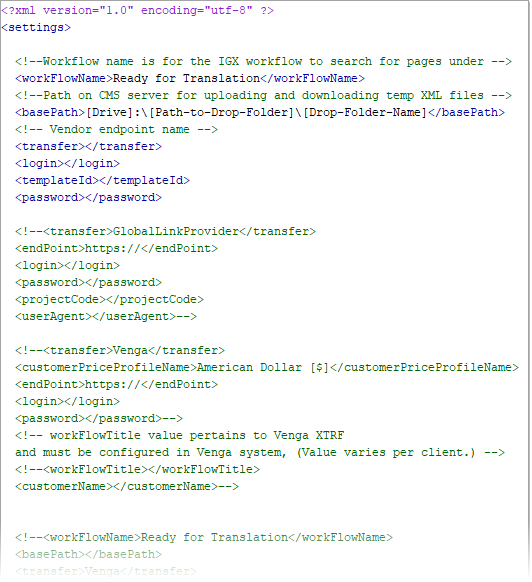
- Locate Settings.xml in the
TranslationManager folder and open the file in a text editor.

- Uncomment the configuration block that corresponds to your translation service and
provide the appropriate values. Most translation services require values for the
following elements in Settings.xml.
Element Description Notes <transfer>This element specifies the actual vendor endpoint. Use Local as the value of the <transfer>element to put Ingeniux Translation Manager in test mode, where content runs locally without advancing to any vendor. In this mode, you can advance translation content through associated translation workflows, and Ingeniux Translation Manager creates test XML files, automatically.<workFlowName>Change the value of the <workFlowName>tag to match the name of the workstate in the workflow configured for translation purposes.Pages in this workstate are included in the translation manager project. <basePath>For the value of the <basePath>tag, provide an absolute path to a local folder on the CMS server, where the vendor-translation files will be dropped into during the translation process (e.g., [Drive]:\[path-to-CMS-root-folder]\site\App_Data\xml\Custom\TranslationManager\drop).Additional InformationDepending on your organization's translation vendor, you may need to provide additional element values to access vendor APIs.
Venga GlobalIf Venga Global is your translation service, provide the following element values:
Element Description Notes <transfer>Designates the vendor type. For Venga Global, provide the following value: Venga. <customerPriceProfileName>Price Profile for customer account, provided by Venga. <endPoint>Vendor API URL to use for this transfer profile. <url>URL value that maps to the drop folder location. Used by Venga Global, exclusively. <login>Username provided by Venga Global. <password>Password provided by Venga Global. <workFlowTitle>Change the value of the <workFlowName>tag to match the title of the translation workflow.Pages in this workflow are included in the translation manager project. <customerName>Provide you organization's name or another identifier. Plunet
If Plunet is your translation service, provide the following element values:
Element Description Notes <transfer>Designates the vendor type. For Plunet, provide the following value: PlunetAPIWorkflow. <endPoint>Vendor API URL to use for this transfer profile. <login>Username provided by Plunet. <password>Password provided by Plunet. <workFlowTitle>Change the value of the <workFlowName>tag to match the title of the translation workflow.Pages in this workflow are included in the translation manager project. <customerName>Provide your organization's name or another identifier. <customerID>Provide identifier provided by Plunet.
Next Steps: Configure the Translation Manager Tab to set up the custom tab for creating and managing translation projects.
