Inserting and Deleting Tables in XHTML Editors


In the past, web developers often used tables to arrange content on the page. This practice has limitations and is now considered somewhat outdated. However, there may be times when a tabular arrangement of content is useful. For example, a table could be used to make data more readable. Using the XHTML editor, you can insert a table into a page or delete it.

To add a table:
  1. Navigate to Site > Site Tree.
  2. Select the desired page with an XHTML editor.
  3. Place your cursor inside the XHTML field editor, where you want the table to display.
  4. Choose one of the following steps:
    • Mouse over Table from the Table drop-down menu. The table grid template displays.

      Adding Tables

    • Right-click the desired table location. Mouse over Table in the context menu. The table grid template displays.
  5. Drag your mouse pointer over the table grid template to select the number of columns and rows (e.g., 3 x 4) for your table.
  6. Click the grid template to populate the XHTML editor field with your new table.
To delete a table:
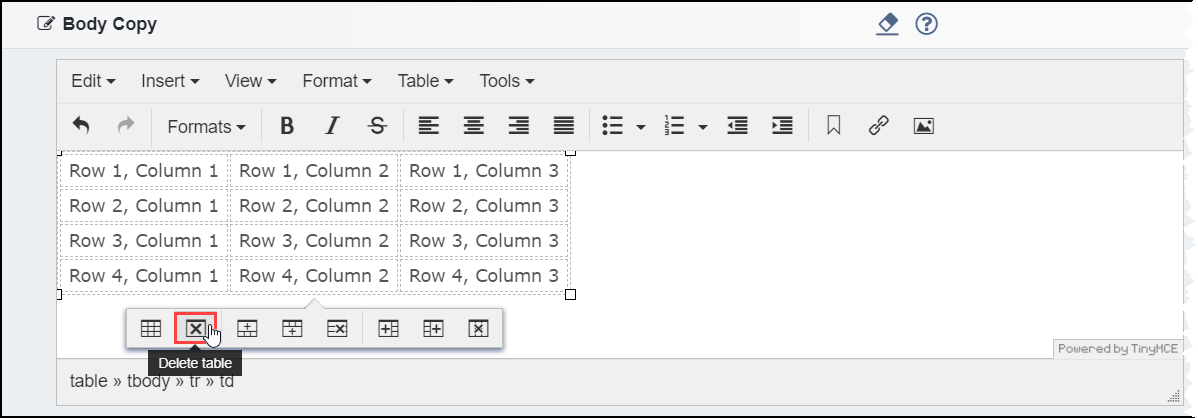
  1. Insert your mouse cursor inside a table that you want to delete. The table toolbar displays at the bottom of your table.

    Deleting Tables

  2. Choose one of the following steps:
    • Click Delete table in the table toolbar.
    • Select Delete Table from the Table drop-down menu in the XHTML editor.
    • Right-click the table. Click Delete table in the context menu.