Creating Page Schemas
Prerequisites: See Schema Designer Prerequisites for details.
Users with permissions create page schemas in Schema Designer.
To create a page schema:
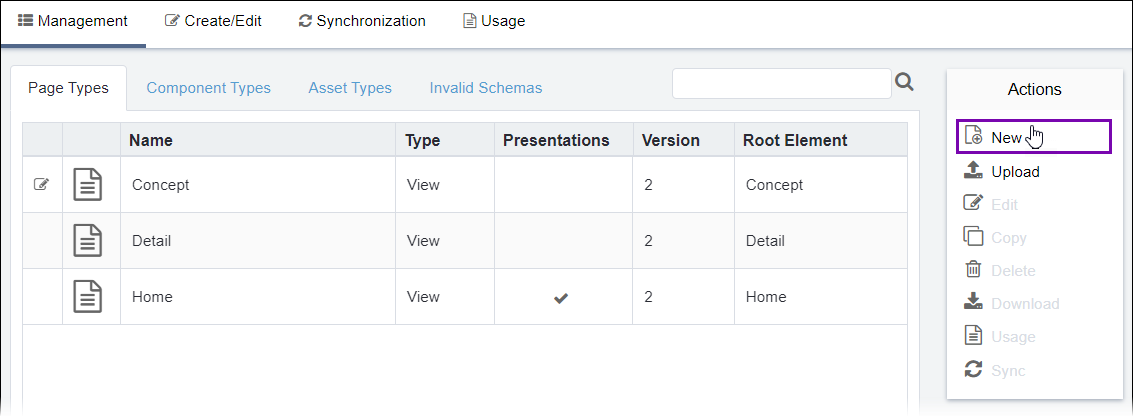
- Navigate to Administration > Schema Designer > Management.

- Click New in the Actions menu to create a
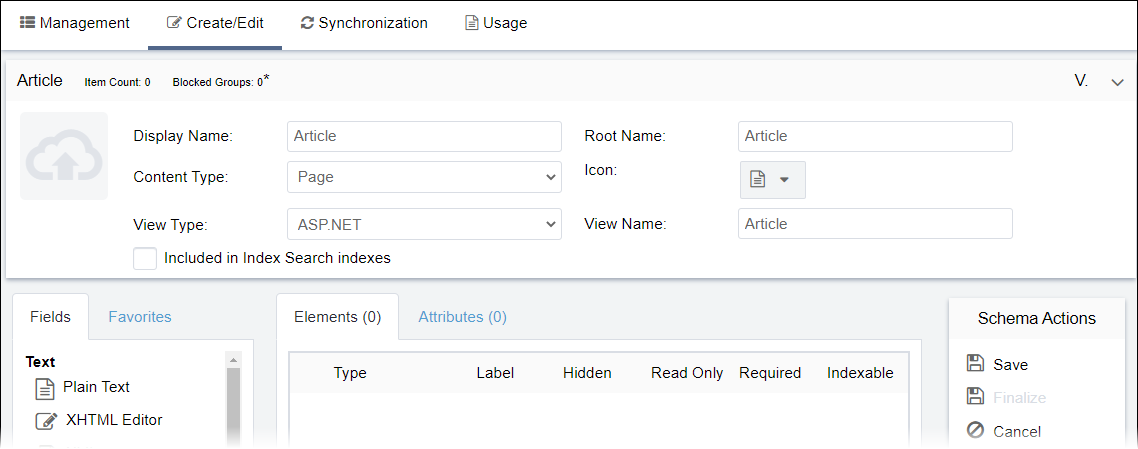
schema.The Create/Edit view displays a New Schema form.
- Select Page in the Content Type drop-down list.
- Enter a Display Name for the schema.The system automatically populates the Root Name field with the Display Name you provided. The Root Name omits special characters and spaces.

- Optional: Select an icon to represent the schema from the Icon drop-down list.
- Choose one of the following options from the View Type drop-down
list:
Option Description ASP.NET (default) An MVC managed view. If you select this type, provide a name for the view in the View Name field. XSLT An XSLT stylesheet. If you select this type, the Stylesheet field displays. Provide the filepath to the CMS XSLT asset file by using the Stylesheet field's ellipsis (...) button. Multi-Format A combination of XSLT and ASP.NET. If you select this type, provide a name for the view in the View Name field. - Optional: Add taxonomy categories to the schema within Taxonomy Configuration. See Associating Taxonomy with Schemas for details.
- Optional: Add a workflow to the schema within Workflow Configuration. See
Associating Workflows with Schemas for details.NoteYou can select a workflow only after saving the schema.
- Optional: Associate element and component content units with the new schema's presentation layer. See Associating Content Units with Page Schemas for details.
- Add elements to the schema within the Elements tab. See Adding Elements to Schemas for details.
- Optional: Add attributes to the schema within the Attributes tab. See Adding Attributes to Schemas for details.
- Click Save in the Schema Actions menu
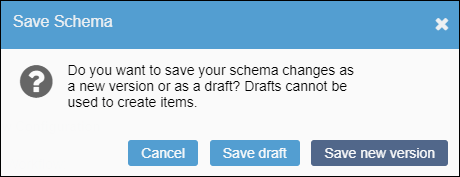
when you finish editing the new schema.The Save Schema dialog displays.

- Choose one of the following steps.
- Click Save Draft. Schema Designer saves the schema as a
draft. NoteIf you save the schema as a draft, then the draft icon displays next to the schema in the Schema Designer Page Types tab, and the system prevents users from selecting this schema to create pages.

Save the draft as a new version to provide the schema as an option to users for creating pages.
- Click Save new version. Schema Designer saves your schema as a new version.
NoteSee Editing Page Schemas for details to edit schema drafts and versions.The system creates the page schema. You can access this schema in the Page Types tab of Schema Designer. - Click Save Draft. Schema Designer saves the schema as a
draft.
Related Topics
