Changing Start Nodes


Prerequisites:

Start nodes indicate which workstate the content items enter when joining workflows. Each workflow requires and contains only one start node. Adding a start node generates a transition called Initial in the Workflow Transitions area. Use the Designing Workflow area to change the start node.
Warning
If you change the start node, ensure the workflow advances content items as intended. Changing the start node maintains all workstate transitions. If an administrator saves a different workstate as the start node, only the transitions connected to that workstate are available to advance the content item.
To change the start node (i.e., initial workstate):
  1. Navigate to Administration > Workflows Designer.
  2. Select the appropriate workflow from the list.
  3. Click Edit.
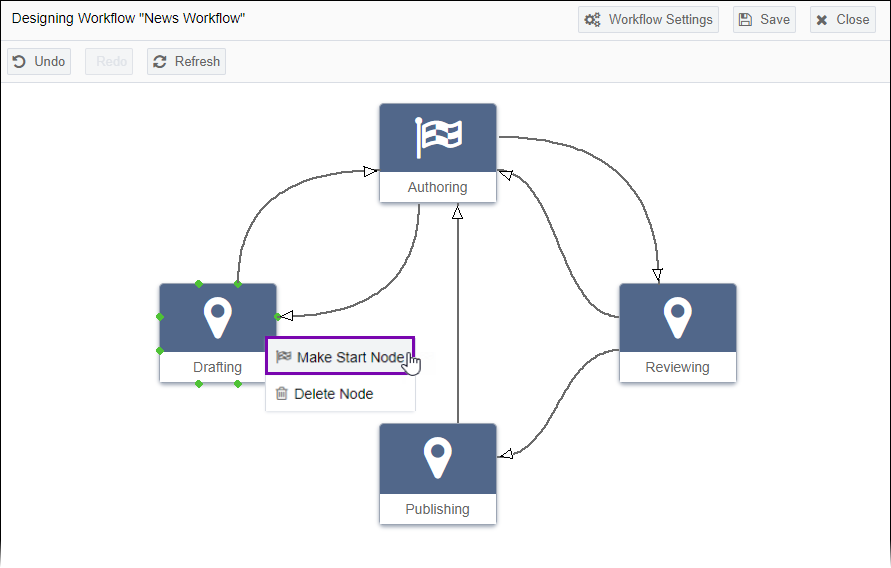
  4. Right-click the workstate that will replace the initial workstate. In this example, Authoring is the initial workstate; Drafting is its replacement.

    Changing Start Nodes

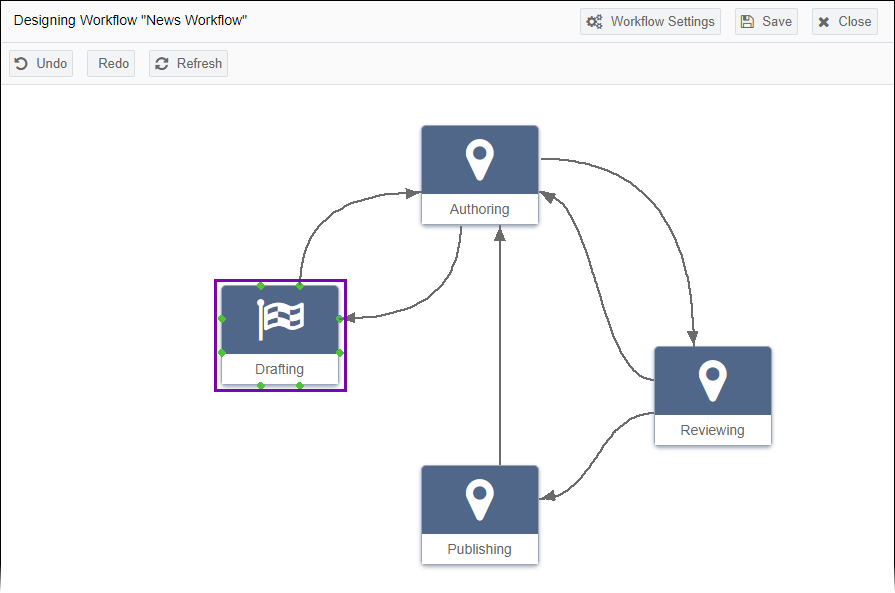
  5. Click Make Start Node. The selected workstate displays as the start node.
    Additional Information
    The Initial transition automatically associates with the start node. This transition assigns the content item entering the workflow to the initial group.

    Workstate Start Node Changed

  6. Click Refresh in the top menu to display the new workstate order.
    Note
    If you click Undo or Redo, click Refresh to view undone or redone changes.
  7. Click Save in the top menu of the Designing Workflow area when finished making changes in the workflow. Ingeniux CMS saves the workflow in Workflows Designer. This workflow is available for content items in the Site Tree and Assets Tree.
    Note
    All workstates require cohesive transitions before saving.