Configuring Windows Server 2016


Before installing the Ingeniux CMS platform and configuring a CMS site instance, system administrators must ensure that the following roles and feature have been included on the Windows Server 2016 host:

  • .NET Framework 3.5.x
  • .NET Framework 4.6 Features
  • ASP.NET 4.6
  • Version Notes: CMS 10.1+
    For Ingeniux CMS 10.1+, install Microsoft .NET Framework 4.7.2.
  • Windows Authentication
To configure Windows Server 2016 for Ingeniux CMS 10.x installation:
  1. Log onto your server as an administrator, then access the Server Manager. This application typically opens automatically for administrators logging onto a Windows Server-based operating system.
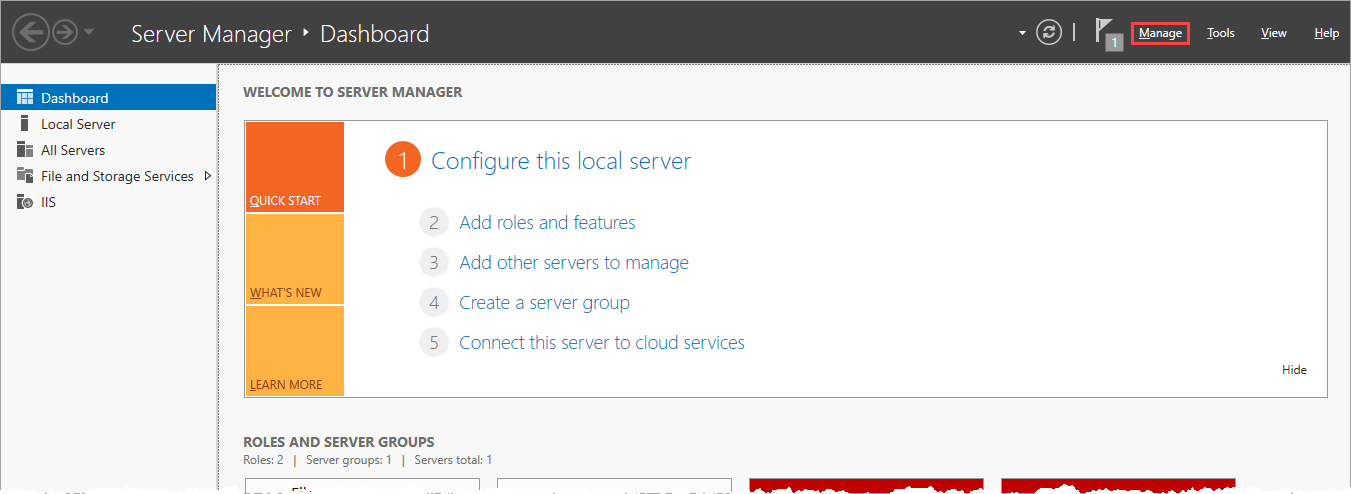
  2. In the Server Manager dashboard, click Manage > Add Roles and Features.

    Server Manager

  3. In the Add Roles and Features Wizard, on the Before you begin page, click Next.
  4. On the Select installation type page, select Role-based or feature-based installation.
  5. Click Next.
  6. On the Select destination server page, select the server where you will install roles and features from the Server Pool area.
    Note
    This server is the machine you are logged onto.
  7. Click Next.
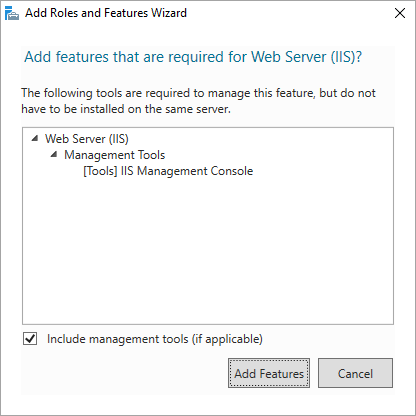
  8. On the Select server roles page, select Web Server (IIS). The Add Roles and Feature Wizard dialog displays.
  9. Click the Add Features button. You are returned the Select server roles page.

    Add Roles and Features Wizard 1

  10. Click Next.
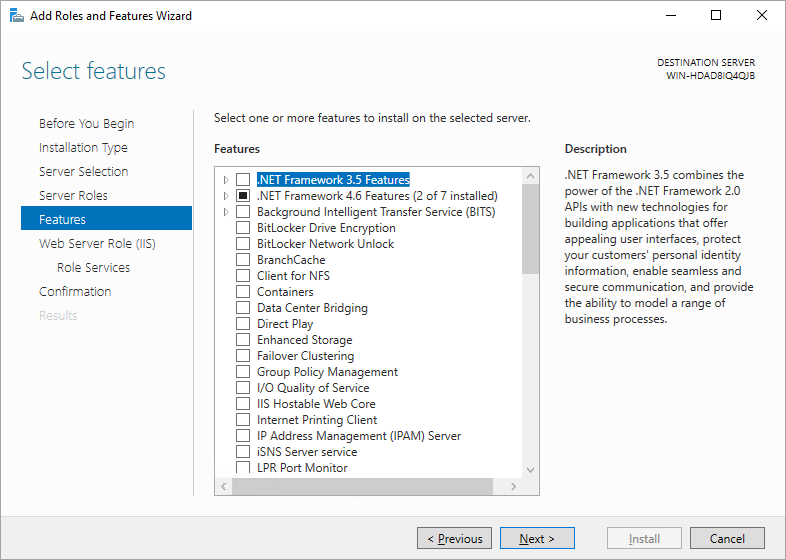
  11. On the Features page, note that the .Net Framework 4.6 Features option has been selected by default.

    .NET Framework 4.6 Features

  12. Click Next.
  13. On the Web Server Role (IIS) page, click Next.
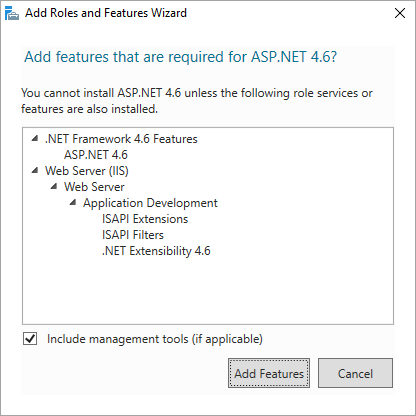
  14. On the Select role services page, expand the Application Development node, and then select ASP.NET 4.6.
  15. Click the Add Features button. You are returned the Select server roles page.

    Add Roles and Feature Wizard 2

  16. On the Select role services page, expand the Security node, and then select Windows Authentication.
  17. Click Next.
  18. Compare the list of required Windows Server features against your Windows Server configuration to ensure all the CMS installation prerequisites are selected.
  19. Select the Restart the destination server automatically if required option, and confirm your selection.
  20. On the Confirm installation selections page, review that you have selected all of the required roles and features, and then click Install.
  21. Close the wizard.
  22. When the installation completes, verify that IIS installed successfully by entering the following into a web browser: http://localhost.
    The default IIS Welcome page should display.

Next Steps: