Setting Up Generated Custom Objects
Object Builder provides Cartella administrators with a way to create custom objects. After Cartella generates the custom object package and associated DLL, an administrator or developer needs to set up the custom object in order for it to be active in Cartella.
- After generating an object through
Object Builder, navigate to
[Site_Root]\App_Data\ObjectBuilder\Files to access the *.zip that contains the object files.
Object Builder generates a .dll and .zip file with the following naming conventons:
Naming Convention Example [Object_Name]_[Creation_Date]_[Time].dll CustomObject1_2020-01-24_08-41-49.dll [Object_Name]_[Creation_Date]_[Time].zip CustomObject1_2020-01-24_08-41-49.zip - Do one of the following tasks:
- Either extract the zipped
Object Builder files into the root folder of your Cartella site (
[Site_Root]).
This is the preferred method.
[Object_Name]_[Creation_Date]_[Time].zip contains the following:
Folder Description App_Code Storage point for code files.
App_GlobalResources This global resource provides versions of a web page in different languages and can be read from any page or code within Cartella. The [Object_Name].resx file is the default locale resources. You must append the locale name in [Object_Name].resx file to introduce resource for other languages (e.g., Validation.de-DE.resx). SQL The SQL folder contains two scripts: Create_*.sql and Delete_*.sql WarningDo not edit these SQL scripts because this may render your Cartella site inoperable.ImportantIf you need to edit the custom object code after you have implemented the object, see Editing Custom Objects.Views Object Builder generates ASP.NET views that can be further developed. [Content_Types].xml Manifest file. In most cases, there is no need to edit this file. *.dll The object's dynamic link library (DLL) does not belong in the root folder. Move it to the bin folder or retain the DLL in [Site_Root]\App_Data\ObjectBuilder\Files, where it was generated. - Or move the DLL ( [Object_Name]_[Creation_Date]_[Time].dll) to the [Site_Root]/bin folder.
ImportantEither extract the code within *.zip to [Site_Root] or move the *.dll to [Site_Root]/bin. Do not deploy both. - Either extract the zipped
Object Builder files into the root folder of your Cartella site (
[Site_Root]).
This is the preferred method.
- Assuming your code was extracted to
[Site_Root], navigate to
Create_*.sql in the
[Site_Root]/SQL folder.
NoteDelete_*.sql resides in the [Site_Root]/SQL folder along with Create_*.sql. Use Delete_*.sql to remove SQL tables created by Create_*.sql if need be.
- Open Create_*.sql in Microsoft SQL Server Management Studio (SSMS).
- Execute
Create_*.sql against your Cartella database. For more details about executing scripts in SSMS, see
Script objects in SQL Server Management Studio.
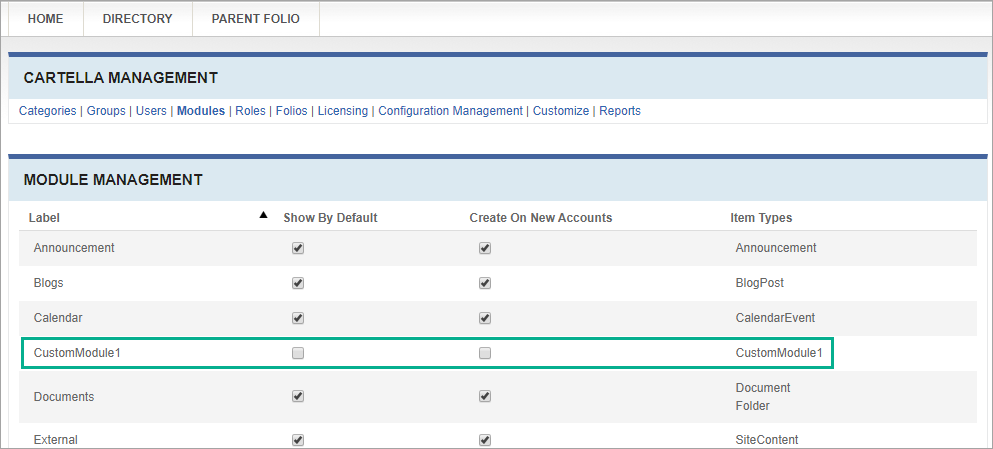
Once the SQL updates are in place within SSMS, your new custom object displays in the Cartella's Module Management view.
- Navigate to Settings > Modules.
- Set the appropriate options on the new object in the
Module Management view. See
Module Management for details.
 Now the new module type can be applied to folios of your choice.
 - To create an object (e.g., module) from the new custom object, see Creating Modules.
Next Steps: After completing the steps above, your new custom object is functional; however, you may need to develop the new object's ASP.NET views. See Developing Custom Object Views.
