Cropping Images


Prerequisites:
  • The image asset must be checked out to the current user.
  • The current user must have asset editing permissions.

Users can apply the Crop tool to modify and remove portions of images.

Rather than navigating to the Assets Manager to crop images, users can use this shortcut tool to crop images without leaving the Site area.

Note
Changes saved in the Ingeniux Image Manipulator register under the current checked-out version of the asset in the Assets Manager.

The Ingeniux Image Manipulator UI differs depending on your CMS site version. Follow the steps that correspond with your version.

CMS 10.6 Steps

To crop images via the Ingeniux Image Manipulator:
  1. Navigate to Site > Site Tree.
  2. Click a page or component that contains an XHTML editor element.
  3. Check out the content item, and expand the XHTML editor element.
  4. Choose one of the following steps.
    • Select an area in the XHTML editor, and click Insert > Image... in the XHTML editor toolbar.
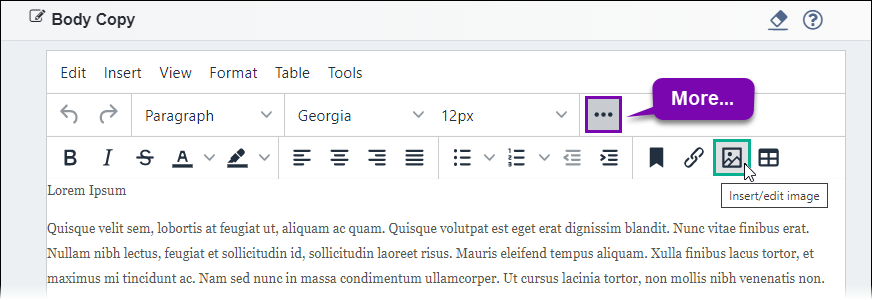
    • Select an area in the XHTML editor, and click the Insert/Edit image icon in the XHTML editor toolbar.
      Note
      If the Insert/Edit Image icon doesn't initially display, then click the More... icon to access the icon in the toolbar.

      Insert/Edit Image Icon

    • Right-click an area in the XHTML editor and select Image... in the context menu.
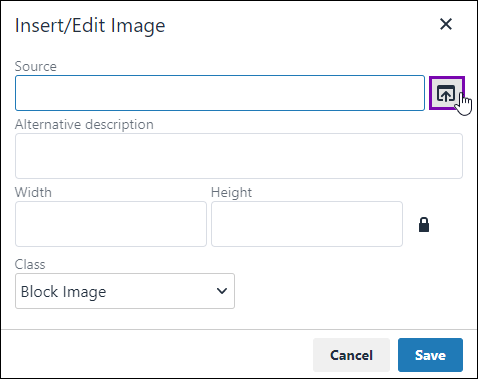
    The Insert/Edit Image dialog displays.

    Insert/Edit Image Dialog

  5. Click the Source icon button.
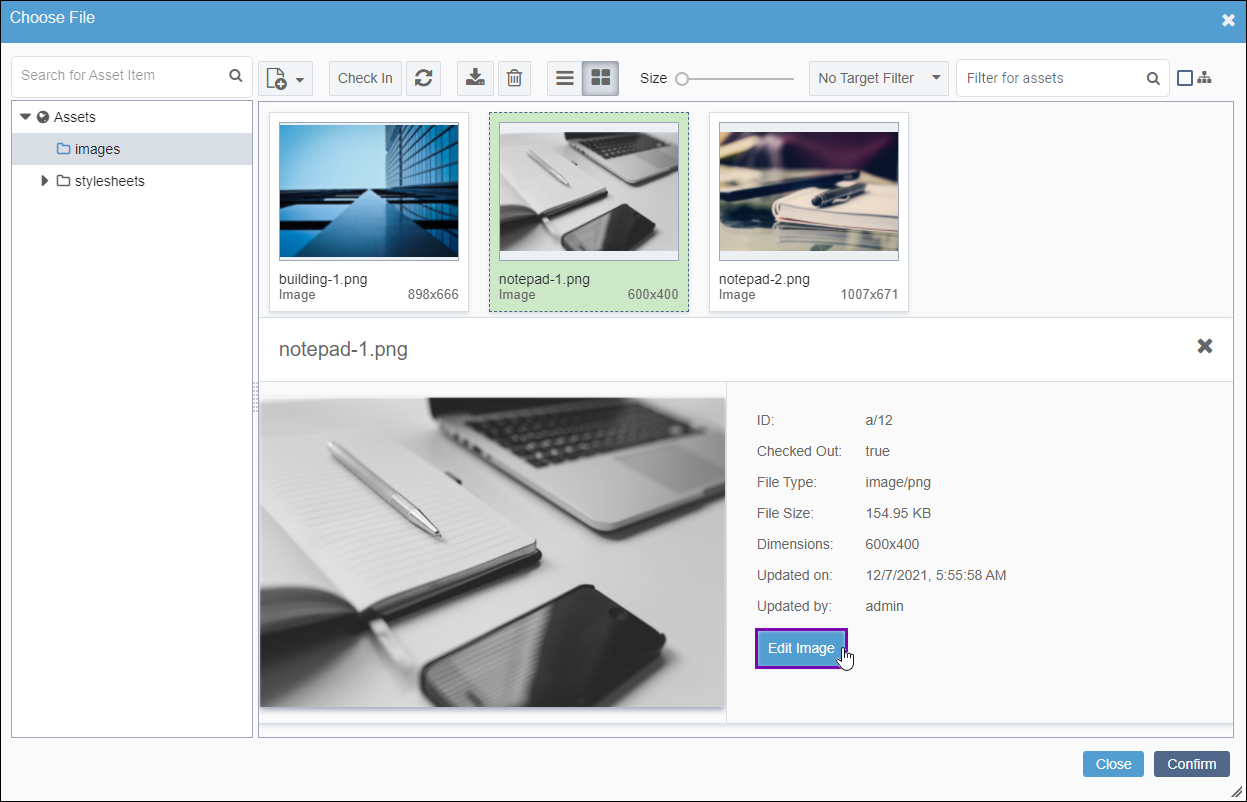
    The Choose File dialog displays.
  6. Navigate to the image asset and choose one of the following steps.
    Tip
    To change views, select the DetailsDetails Button or ThumbnailsThumbnails Button button in the dialog toolbar.
    • Select the image in the Thumbnails view, and click Edit Image in the image details that display.

      Edit Image

    • Double-click the image in the Details or Thumbnails view.
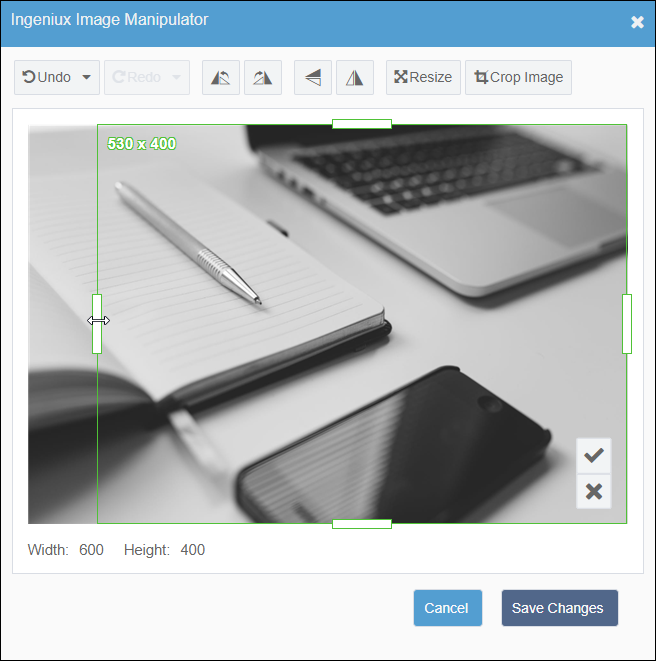
    The Ingeniux Image Manipulator dialog displays.

    Crop Image Button

  7. Click Crop Image in the toolbar.
    A movable border displays around the image.

    Crop Image Tool

  8. Drag the border handles inward.
    When you confirm the crop, the system will retain image portion insidethe border.
    Note
    The number values in the top left corner of the image reflect the crop dimensions. The Width and Height field values below the image reflect the original crop dimensions.
  9. Click the checkmark () icon to confirm the new dimensions.
  10. Click Save Changes when you finish all image edits.
    The system saves the edits to the current checked-out version of the image asset in the Assets Manager.
    Tip
    To undo saved edits, you can revert the image to its previous asset version by undoing the image's current checked-out state. To undo the checkout, navigate to the image asset in the Assets Tree, right-click the asset, and click Undo Checkout.

CMS 10.0–10.5 Steps

To crop images via the Ingeniux Image Editor:
  1. Navigate to Site > Site Tree.
  2. Click a page or component that contains an XHTML editor element.
  3. Check out the page and expand the XHTML editor element.
  4. Choose one of the following steps:
    • Click Insert > Image in the XHTML Editor toolbar.
    • Click the Insert/edit image icon in the XHTML editor toolbar.

      Insert/Edit Image Icon

    • Right-click an area in the XHTML editor and click Image in the context menu.
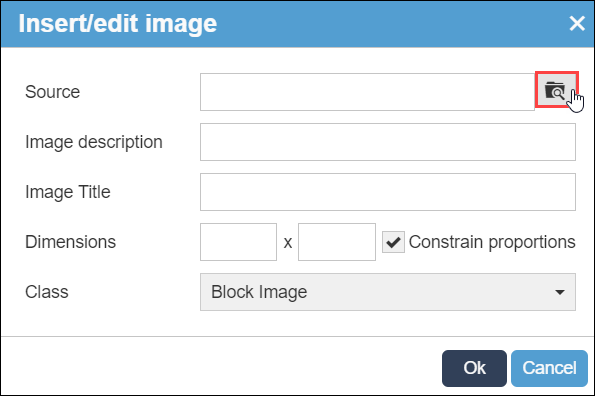
    The Insert/edit image dialog displays.

    Insert/Edit Image Dialog

  5. Click the Source icon button.
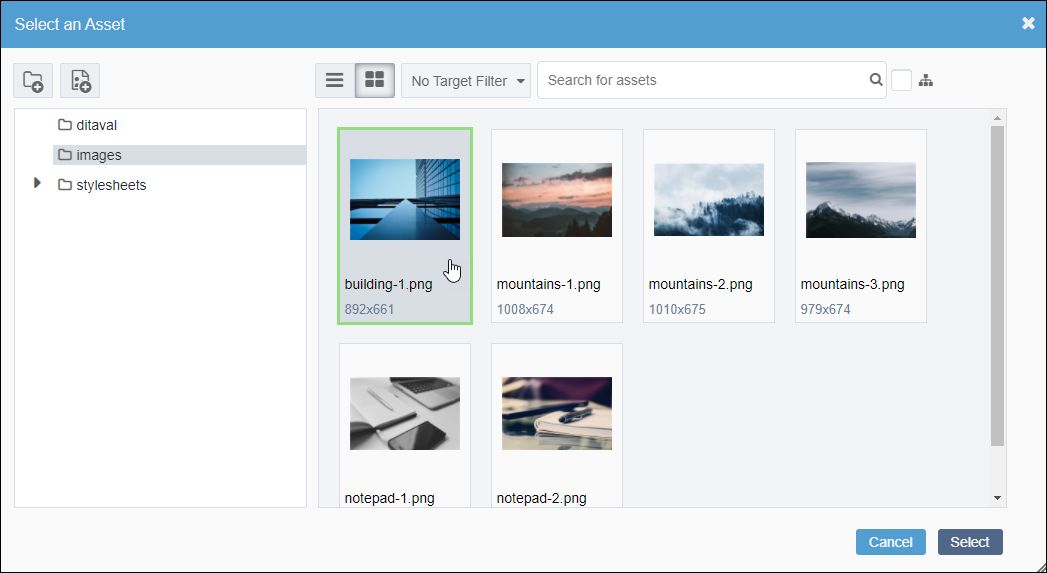
    The Select an Asset dialog displays.
  6. Navigate to the asset folder and double-click the image in the Thumbnails view.
    Tip
    To change views, select the DetailsDetails Button or ThumbnailsThumbnails Button button in the dialog toolbar.

    Edit Image

    The Ingeniux Image Editor dialog displays.

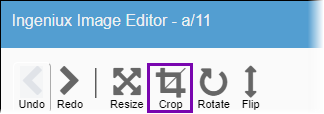
    Crop Image Button

  7. Click Crop in the toolbar.
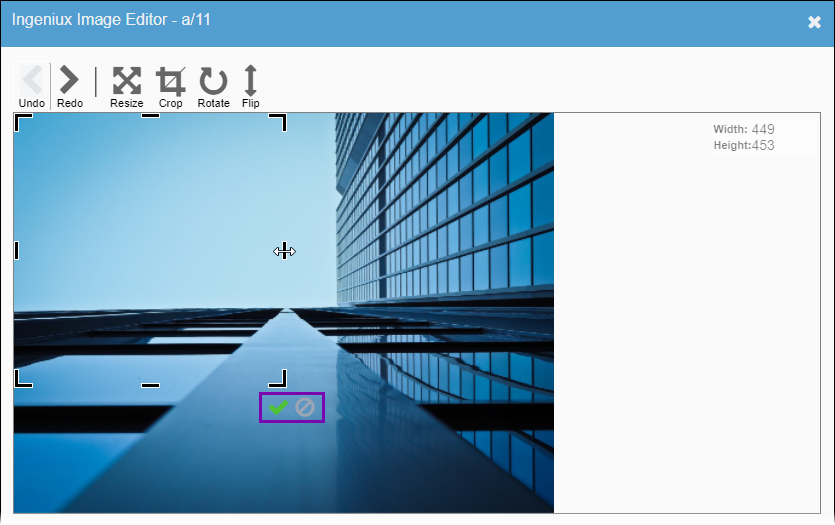
    A movable border displays around the image edges.

    Crop Image Tool

  8. Drag the border handles inward. When you confirm the crop, the system will retain image portion insidethe border.
    Note
    The Width and Height field values reflect the crop dimensions in the top right corner of the dialog.
  9. Click the checkmark (✓) icon to confirm your edits.
  10. Click Save Changes when you finish all image edits.
    The system saves the edits to the current checked-out version of the image asset in the Assets Manager.
    Tip
    To undo saved edits, you can revert the image to its previous asset version by undoing the image's current checked-out state. To undo the checkout, navigate to the image asset in the Assets Tree, right-click the asset, and click Undo Checkout.