CMS 10.0–10.5 Processing an Email Form by Example


Prerequisites:
  • Administrators must complete the prerequisites to enable user access to the Design tab. See Page Builder Prerequisites for details.
  • A working visual form with form fields must exist in the presentation container. See Forms in Page Builder for details.
  • In Administration > System Options > CMS > Email, configure SMTP for email.
  • Create a page and set up a Page Builder template within the page to contain the email form. Name the page Email Form Example. For the sake of simplicity, this test email form contains only a text form field and a button form field. The form within the page will reference the Form Processor page.
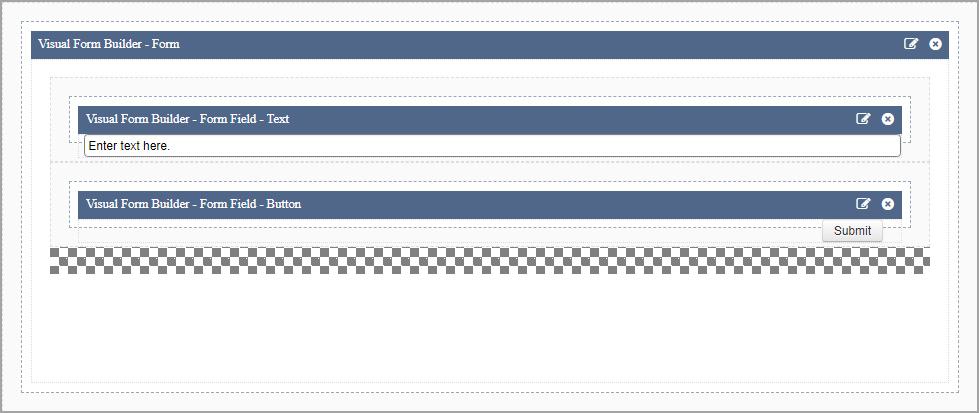
    Simple Page Builder Email Form

  • If you are constructing a production email form, add validation on user input fields (for this example, validation will not be added.)
  • In Administration > Schema Designer, build a page schema-let's name this page schema Feedback-that contains a Component element (this component element will reference the emailer component.)

For the purposes of this demonstration of email form processing, the following three content containers will be created:

  • Page containing our test email form named Email Form Example.
  • Page containing form processing page named Form Processor.
  • DEX - SMTP Emailer Component named Emailer.
Tip
Users can alternatively configure forms outside of Page Builder. To build forms manually, users can access the pages that contain form builder components and then complete the necessary component element fields in the Edit form. This alternative doesn't require administrators to complete the Page Builder prerequisites.
To configure an example email form:
  1. Add a new page in the Site Tree with the Feedback schema. Let's name this page Form Processor.

    This page can reside anywhere in the Site Tree. For this demonstration, it's a child page of Email Form Example.

  2. In Prerequisites, you created a form in a page named Email Form Example. Open Email Form Example in the Site Tree.
  3. Select the get or post method in the Method drop-down list.

    This option sets the form HTTP method.

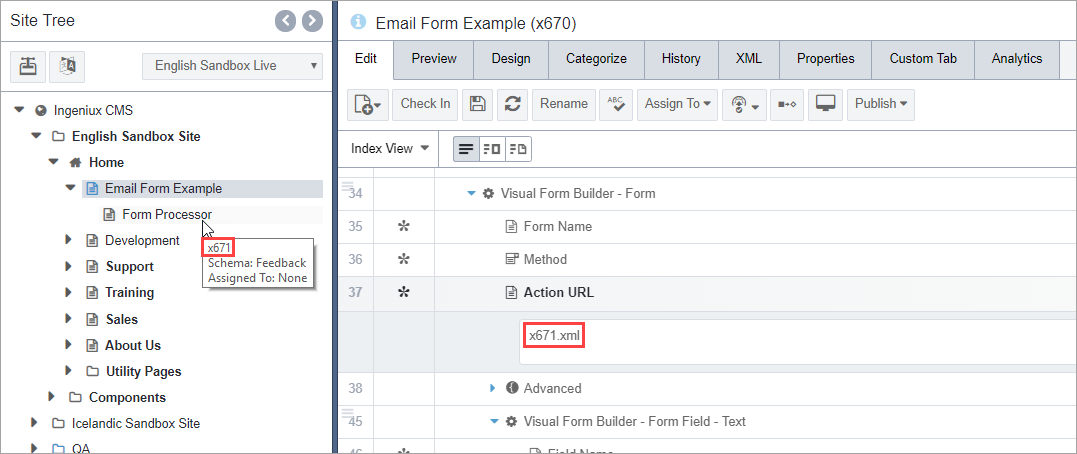
  4. Within the Visual Form Builder - Form area of the Email Form Example page, enter the file name of Form Processor in the Action URL field.

    Insert Processor file name in Action URL

    Note
    The file name is the page ID plus the .xml extension. In this case, it's x671.xml, but your form processor will have a different ID, thus a different file name.
  5. Save Email Form Example.
  6. Create a new component of the type DEX - SMTP Emailer Component in the Site Tree.
  7. Name this component Emailer.

    Emailer can reside as a child of Form Processor in the Site Tree.

  8. For this test example, use 127.0.0.1 as the value for SMTP Server Host Name or IP Address.
    Note
    We are using 127.0.0.1 here, as we will be running a local SMTP test application later in this guide. See Testing Email Forms below.
  9. Add a test Sender's Email Address.
  10. Add a test Receiver's Email Address.
    Note
    For multiple email addresses, separate them with semicolons.
  11. In the Subject and Body fields, choose one of the following steps.
    • Add test text to the the fields.
    • Depending on the example form's HTTP method, you can use syntax to insert values without manually typing them. Use the following syntax to pull and insert information as a value directly within the field:
      Note
      The following examples are case-sensitive.
      SyntaxDescriptionExample
      <QueryString>For GET, use this syntax to pull and insert a value from a CMS query string.<QueryString>FirstName</QueryString> <QueryString>LastName</QueryString> submitted the <QueryString>FormName</QueryString> form.
      <Form>For POST, use this syntax to pull and insert a value from the form.<Form>FirstName</Form><Form>LastName</Form> submitted the <Form>FormName</Form> form.
  12. Save Emailer.
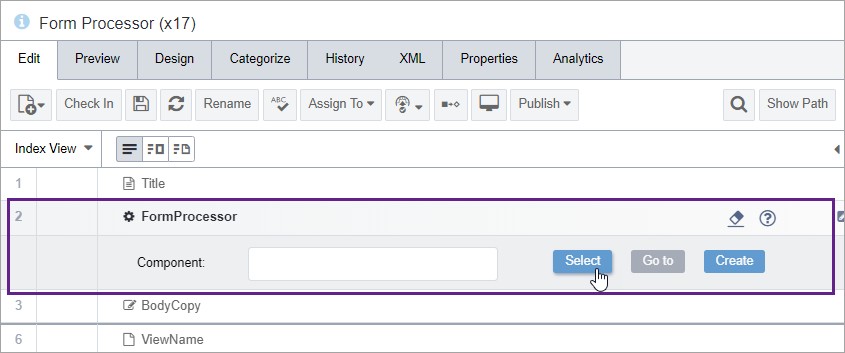
  13. Open Form Processor and note the Component element that you had added in Schema Designer.

    Select Component in Form Processor

  14. Click Select in the Component field.
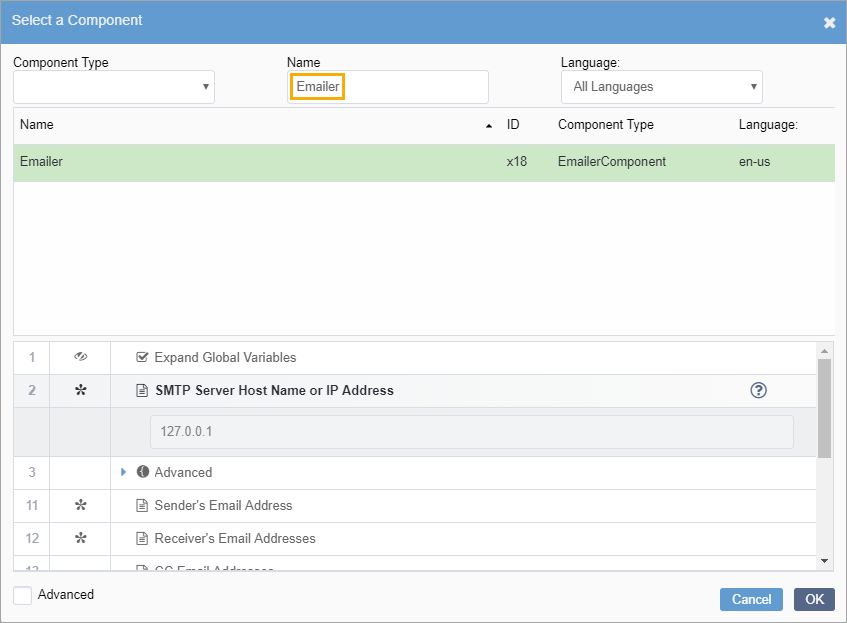
    The Select a Component dialog displays.
  15. In the Name field, search for the DEX - SMTP Emailer Component named Emailer.

    Select a Component

  16. Click OK to save your component selection.
  17. Save Form Processor.
  18. Test email form. (See below.)

Testing Email Forms

After you set up processing for an email form, you can test it before it goes live with third-party tools. For instance, Papercut is a simplified SMTP server for local development.

To test the example email form:

  1. Download and install Papercut.
  2. Open Papercut and keep it open for the remainder of the test.
  3. Configure Papercut to listen on 127.0.0.1 on port 25.
  4. Return to Ingeniux CMS, and then navigate to the email form page (e.g., Form Processor).
  5. On the Edit tab, click Preview. The preview window opens, displaying the completed form.

    Select a Preview on Edit tab

  6. In the form, add test text within the text field, then click the submit button.
  7. Return to Papercut. If the submission is successful, Papercut records the delivery.