CMS 10.0–10.5 Setting Presentation Properties


Prerequisites:
  • Administrators must complete the prerequisites to enable user access to the Design tab. See Page Builder Prerequisites for details.
  • The following instructions assume that the user doesn't create a presentation, or the user deleted the previous presentation. Users can only build one presentation per page. See Deleting Presentations for details to remove an existing presentation.
  • The user must have a container selected. See Selecting Containers for details.

Use the Presentation Properties area in the Design Presentation pane to name the Page Builder presentation the container will hold. Confirming the presentation name and container creates the presentation and allows you to add layouts. Specify the publishing target(s) to associate or remove in your presentation. By default, all publishing targets are associated with the presentation. If you publish the page, the CMS pushes page builder changes to the assigned publishing targets.

Use the table below to access Presentation Properties.

Note
In the How to Access column, use the screen captures as a guide to select objects that display specific Design Presentation pane properties areas. The highlighted (yellow) areas serve demonstration purposes in the screen captures and don't display as highlighted in the Design tab workspace.
Properties AreaPresentation ObjectDescriptionHow to Access
Presentation PropertiesContainersProperties for your presentation. Use this area to select a container, name the presentation, and assign publishing targets to the presentation.
  • If no container is saved and no presentation exists, Presentation Properties displays in the Design Presentation pane by default.
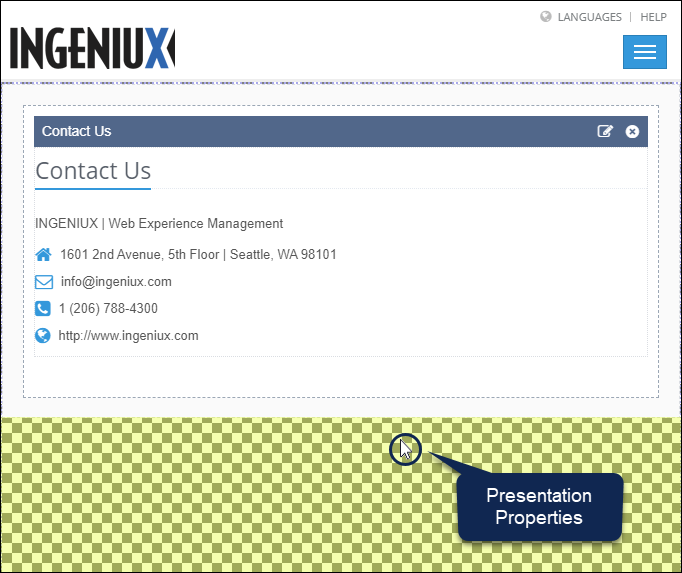
  • If a presentation with a layout and content unit exists, select the checkered background (i.e., area where no layouts are placed) in the container.

    Select Presentation Properties

To set Presentation Properties:
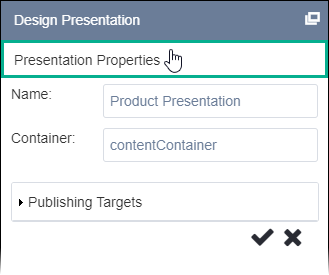
  1. Click the Presentation Properties area in the Design Presentation pane.

    Presentation Properties Area

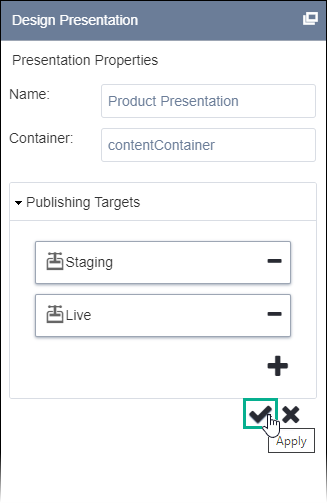
  2. Enter a name for the presentation in the Name field.
  3. Ensure the desired container's ID populates the Container field. If the field isn't populated, repeat task 1.
  4. Click the Publishing Targets drop-down menu to view assigned publishing targets.
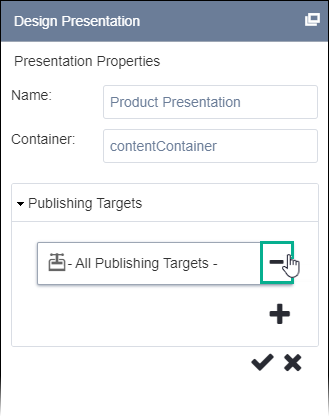
  5. Optional: If you don't want to associate all publishing targets with the presentation, click the Remove Publishing Targets minus (-) button on the -All Publishing Targets- option.

    Remove All Publishing Targets Option

    Note
    By default, all configured targets receive published content. If the -All Publishing Targets- option is selected, no entries display to select in the Add Publishing Targets to Presentation dialog, as all are already selected.
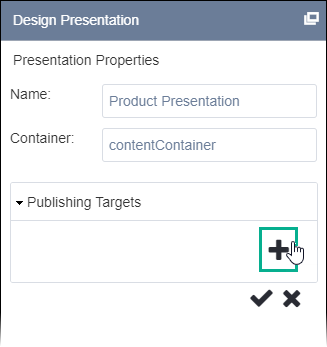
  6. Optional: Click the plus Add Publishing Targets plus (+) button.

    Add Publishing Targets Option

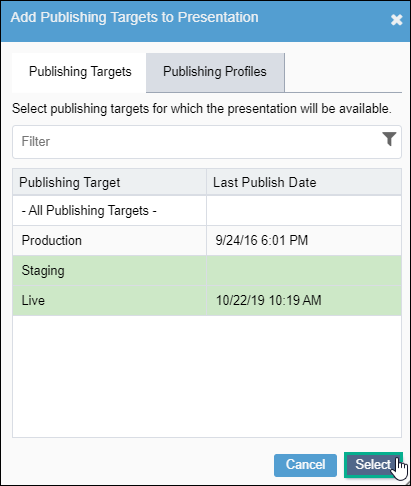
    The Add Publishing Targets to Presentation dialog displays.
  7. Select publishing targets or profiles to associate with the presentation, and click Select.

    Add Publishing Targets to Presentation Dialog

  8. Click the Apply checkmark (✔) button to create the presentation and commit changes to Presentation Properties.

    Add Publishing Targets to Presentation Dialog

    The container displays with a checkered (i.e., transparent) background to indicate where to add layouts.

    Presentation Container

Next Steps: Add Layouts to create a grid structure within the container.