Asset Links
Asset links point to files stored on the web server. These files must be uploaded to the server before links point to them.
To insert an asset link:
- Navigate to Site > Site Tree.
- Choose one of the following steps:
- Select a page containing the XHTML editor in the Site Tree. Ensure the page is checked out.
- Select an element that allows links (e.g., link element).
- Select the text that will serve as the starting point of the link.

- Click the Insert/edit link button. The
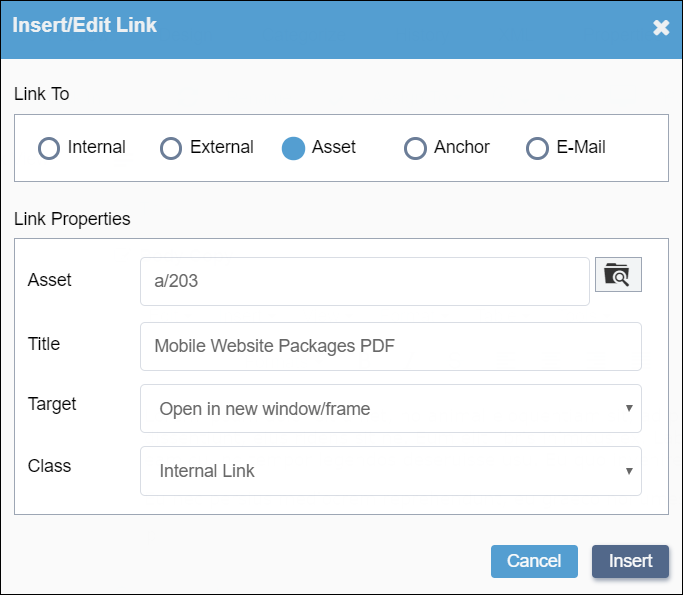
Insert/Edit Link dialog displays.

- Select Asset in the Link To area.
- Click the Select Asset icon, which is to the right of the
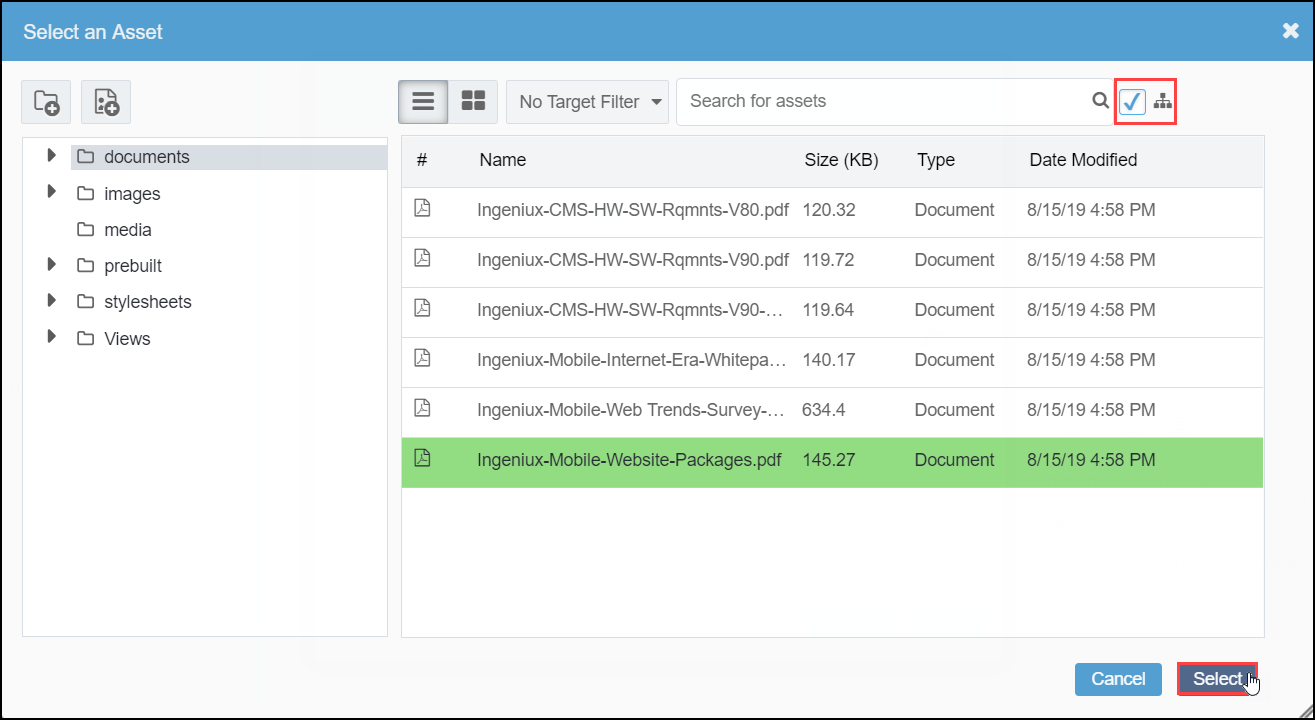
Asset field. The Select an Asset
dialog displays.

- Navigate to the desired managed asset target for the link and select it.NoteIf you want to include all descendants of the selected asset, enable the Include Descendants checkbox to the right of the Search for assets field.
- Click the Select button. The content ID displays in the Asset field.
- Optional: Enter information about the asset in the Title field. NoteHover over the inserted link to view the title. This information is the value of the title attribute in the HTML source.
- In the Target drop-down list, select Open in this window/frame to open the linked page in the current window or Open in new window/frame to open it in a new window.
- Optional: Select a class to classify your link in the Class drop-down list. NoteThis information is the value of the class attribute in the HTML source.
- Click Insert.
Related Topics
