Prerequisites: The CMS Assets Manager must contain uploaded image assets.
Users can insert image assets within XHTML editor elements in pages and components. Use
the
Insert/Edit Image dialog to configure attributes that control the
alternate text, image title, class, and dimensions of the image.
To insert a CMS image asset in an XHTML editor:
- Navigate to .
- Select a page or component that contains the XHTML editor element.
- Check out the content item, and expand the XHTML editor element in the
Edit tab.
- Choose one of the following steps.
- Select an area in the XHTML editor, and click in the XHTML editor toolbar.
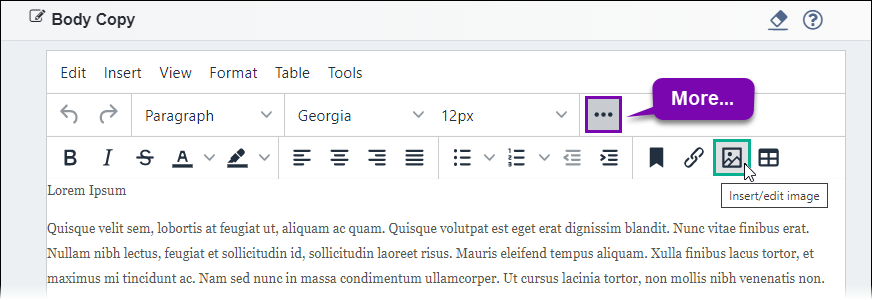
- Select an area in the XHTML editor, and click the Insert/Edit
image icon in the XHTML editor toolbar.
Note
If the Insert/Edit
Image icon doesn't initially display, then click the
More... icon to access the icon in the toolbar.
- Right-click an area in the XHTML editor and click Image...
in the context menu.
The
Insert/Edit Image dialog displays.
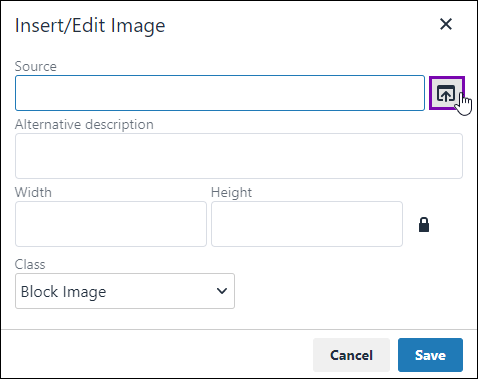
- Click the Source icon button.
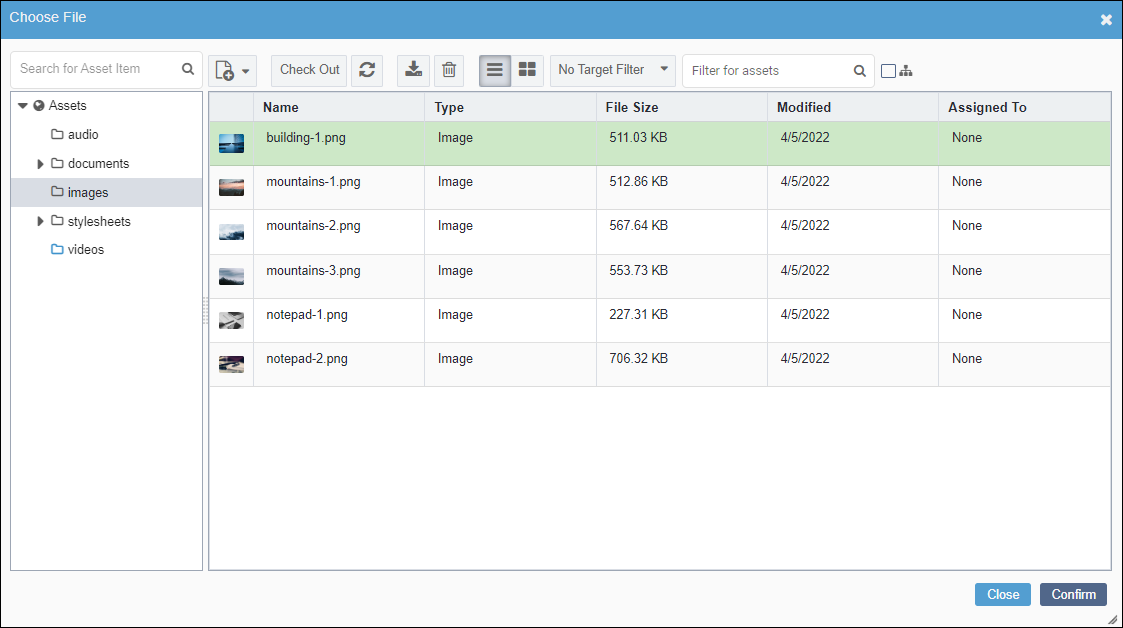
- Browse for and select the image asset to insert from the Assets
Tree.
Tip
Only image assets are visible and selectable in the Choose
File dialog.
- Click Confirm.
The image asset's a/ID populates the
Source field.
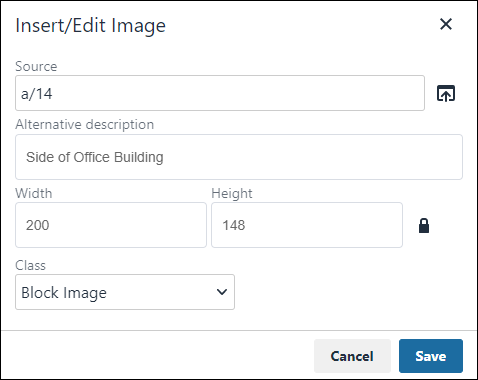
- Optional: Complete the following fields to suit your needs.
| Field | Description |
|---|
| Alternative Description | Provide alternative text for the image. This serves as the @alt
attribute value in the XHTML source code.Version Notes: CMS 10.0–10.5 This field is called the
Image description field in CMS 10.0–10.5. |
| Image Title | Provide the title for the image. This serves as the @title
attribute value in the XHTML source code. |
| Width | Provide a width value for this image. This serves as the @width
attribute value in the XHTML source code.Version Notes: CMS 10.0–10.5 This is the first field within the
Dimensions settings in CMS 10.0–10.5. |
| Height | Provide a height value for this image. This serves as the
@height attribute value in the XHTML source code.Version Notes: CMS 10.0–10.5 This is the second field within
the Dimensions settings in CMS 10.0–10.5. |
| Constrain proportions | This option is selected by default. If selected, the system maintains the
image's original aspect ratio by automatically providing the correct
Height value when you change the Width
value (or vice versa). |
| Class drop-down list | Select a class from the drop-down list options. This serves as the
@class attribute value in the XHTML source code.Options include: - Block Image
- Floated Image
- Banner Image
Note The DSS requires further display property configuration to style images
based on these classes. |
- Click Save.
The image asset displays in the XHTML editor element.
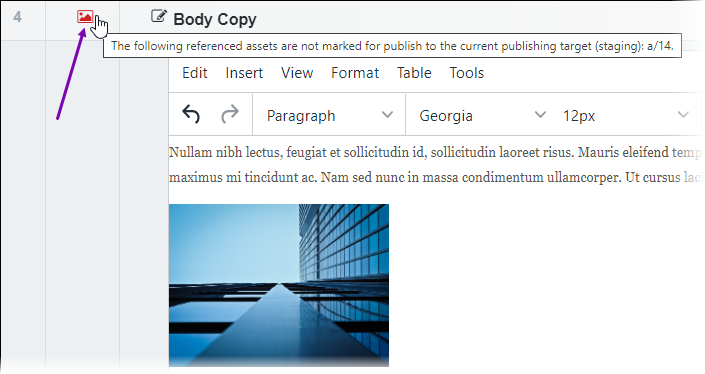
Version Notes: CMS 10.6
CMS 10.6 displays the
unpublished assets icon when XHTML editor elements contain the following:
- Asset items not marked for publish.
- Asset items marked for publish but have never been published.
The unpublished assets icon displays next to the XHTML editor element in the
Edit tab. See
Unpublished Assets Icon for
details.
