Integrating Custom DTDs
- Ensure the Custom DTD Root Asset Folder is specified in . See Defining DITA Root and DTD Folders for details.
Prepare the custom DTDs and any files they reference (such as .ent and .mod files) for upload to the Custom DTD Root Asset Folder in the CMS Assets Manager. If the CMS upload process cannot locate the dependent files, the uploader will flag them as errors.
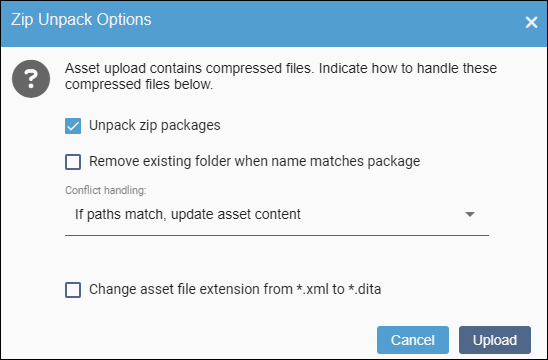
Validate all DTD files you want to integrate before uploading, and ensure the DTD folder structure on your local file system will match the structure being uploaded to the CMS. You can do this by compressing all the DTDs and their dependencies to a .zip package. If the dependent files already reside within the custom DTD folder, you can upload the single DTD without creating the .zip package.
ImportantIf your custom DTDs reference stock DTDs from the DITA-OT, ensure you include the stock ones in the package. Otherwise, your custom DTDs will be unable to locate them in the CMS Assets Manager.- If DITA-OT version 3.1+ is installed, ensure the Skip DTD Denormalization checkbox is cleared on your DITA publishing target. See Configuring Post-Publish Content Processor for details.
- If DITA-OT version 3.0 or below is installed:
- You must have user group permissions to configure DITA.
- Package all your custom DTDs,and any dependent files as a DITA-OT plugin. This prerequisite is in addition to packaging the DTDs within a .zip file. See DITA-OT: Creating Custom Plug-ins for details about custom plugins.
- Ensure the Skip DTD Denormalization checkbox is selected on your DITA publishing target to prevent DTD denormalization/removal from being carried out during DITA post-publish processing.
- If CMS 10.6.308–10.6.342 is installed, you must have system administrator permissions to access the CMS server to recycle the CMS application pool.
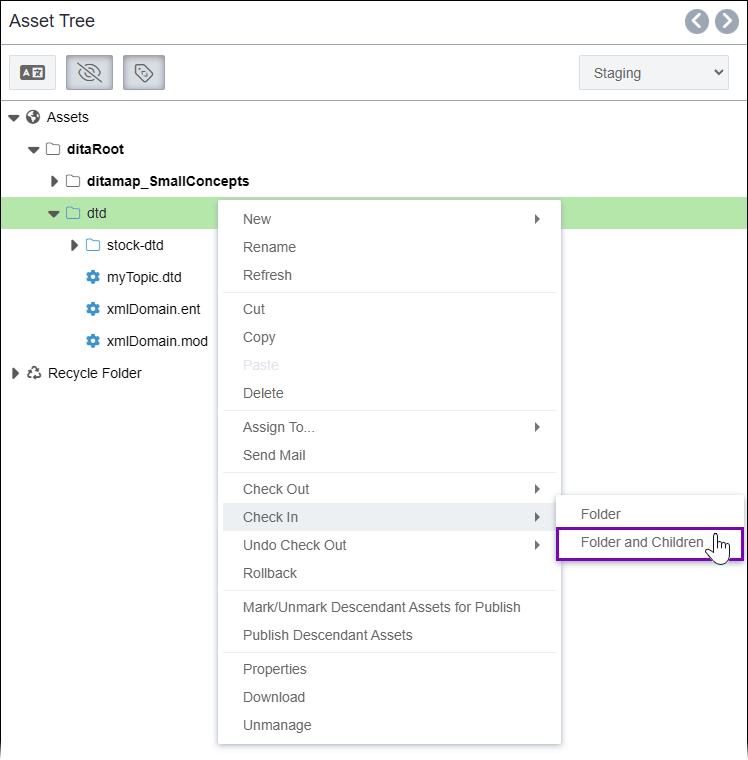
You can integrate custom DTDs directly in the CMS platform without packaging them as a DITA-OT plugin. After uploading and checking in the DTDs to the designated Custom DTD Root Asset Folder in the CMS Assets Manager, they will be processed and integrated into the CMS.
The CMS primarily uses the Custom DTD Root Asset Folder to validate the custom DTD schemas during the upload and check-in process. Once your custom DTDs are integrated, you can upload, check in, and run DITA publishing pipeline processing on the DITA assets that reference them. If you intend to edit these DITA assets in an XML editor like Fonto or Oxygen Web Author, this will require further configuration to the editor.
Custom DTD integration differs depending on the DITA-OT version you install. Follow the steps that correspond with your DITA-OT version.
DITA-OT 3.1+ Steps
The CMS processes and integrates your custom DTDs.
Task Troubleshooting: If you receive the error message, Cannot locate custom DTD, this indicates the custom DTD has not been
successfully integrated. For example, the full error message is similar to
this:Cannot locate custom DTD at 'articleDetail.dtd' with public id '-//CCS//DTD DITA Article Detail//EN.
Please make sure DTD root is configured, custom DTDs are uploaded, and the uploaded DTD folder structured
matches the structure on your locale file system for this package.
- Verify the prerequisites have been met. Double-check that all necessary requirements have been fulfilled.
- Ensure all your DTDs and dependent files are valid.
- Ensure you upload and check in the DTDs and all their dependencies, including any referenced stock DITA-OT DTD files, to your designated custom DTD folder. If the error message indicates a file with an extension such as .ent or .mod cannot be located, this indicates referenced files are missing from the custom DTD folder.
- Version Notes: CMS 10.6.308–10.6.342If CMS 10.6.308–10.6.342 is installed, remember to recycle the CMS application pool after uploading and checking in the custom DTDs.
Also, if an administrator has changed the Custom DTD Root Folder ID to a different folder ID in , the application pool will need to be recycled.
Next Steps:
To confirm your DTDs have been fully integrated, run one or more of the following tests:
- Upload DITA assets that reference the custom DTD.
- Check in the DITA assets that reference the custom DTD.
- Run a DITA preview on DITA assets that reference the custom DTD to verify the DITA-OT processes the custom DTD successfully.
DITA-OT 3.0 and Below Steps
The custom DTD integration upload feature is incompatible with DITA-OT versions 3.0 and earlier. Uploading the custom DTDs to the Custom DTD Root Asset Folder allows the CMS to validate DITA assets that reference the custom DTDs on upload and check in, but the uploaded DTDs will not be integrated into the DITA-OT. To integrate your custom DTDs into DITA-OT 3.0 or earlier, package them as a DITA-OT plugin and deploy the plugin to the DITA-OT on the CMS in addition to uploading them to the Assets Manager.
Task Troubleshooting: If you receive the error message, Cannot locate custom DTD, this indicates the custom DTD has not been
successfully integrated. For example, the full error message is similar to
this:Cannot locate custom DTD at 'articleDetail.dtd' with public id '-//CCS//DTD DITA Article Detail//EN.
Please make sure DTD root is configured, custom DTDs are uploaded, and the uploaded DTD folder structured
matches the structure on your locale file system for this package.
- Verify the prerequisites have been met. Double-check that all necessary requirements have been fulfilled.
- Ensure all your DTDs are valid, and verify your custom DTD plugin is functioning properly.
- If you have installed a custom DITA-OT version, ensure your DITA-OT is functioning properly. See DITA Open Toolkit Architecture for details about the processing structure and other factors.
- Ensure you upload and check in the DTDs and all their dependencies, including any referenced stock DITA-OT DTD files, to your designated custom DTD folder. If the error message indicates a file with an extension such as .ent or .mod cannot be located, this indicates referenced files are missing from the custom DTD folder.
Next Steps:
To confirm your DTDs have been fully integrated, you can run one or more of the following tests:
- Attempt to upload DITA assets that reference the custom DTD.
- Attempt to check in the DITA assets that reference the custom DTD.
- Attempt to run a DITA preview on DITA assets that reference the custom DTD to verify the DITA-OT processes the custom DTD successfully.

 in the folder's
