Configuring Ingeniux Manager Tab
Prerequisites:
- Administrators, see Translation Prerequisites for details.
- Systems administrator must first deploy the Ingeniux Translation Manager package. See Deploying Translation Manager for details.
After deploying the Ingeniux Translation Manager application package, administrators must set up a custom tab, where users can create and manage translation projects.
To configure a custom tab for translation manager:
- Log in to the CMS and navigate to Administration > System Options > CMS > Custom Tabs > Management. The Custom Tabs Management Configuration area displays.
- Click the Add Custom Tab (+) button. A new accordion area displays, where administrators set up the custom tab for translation management.
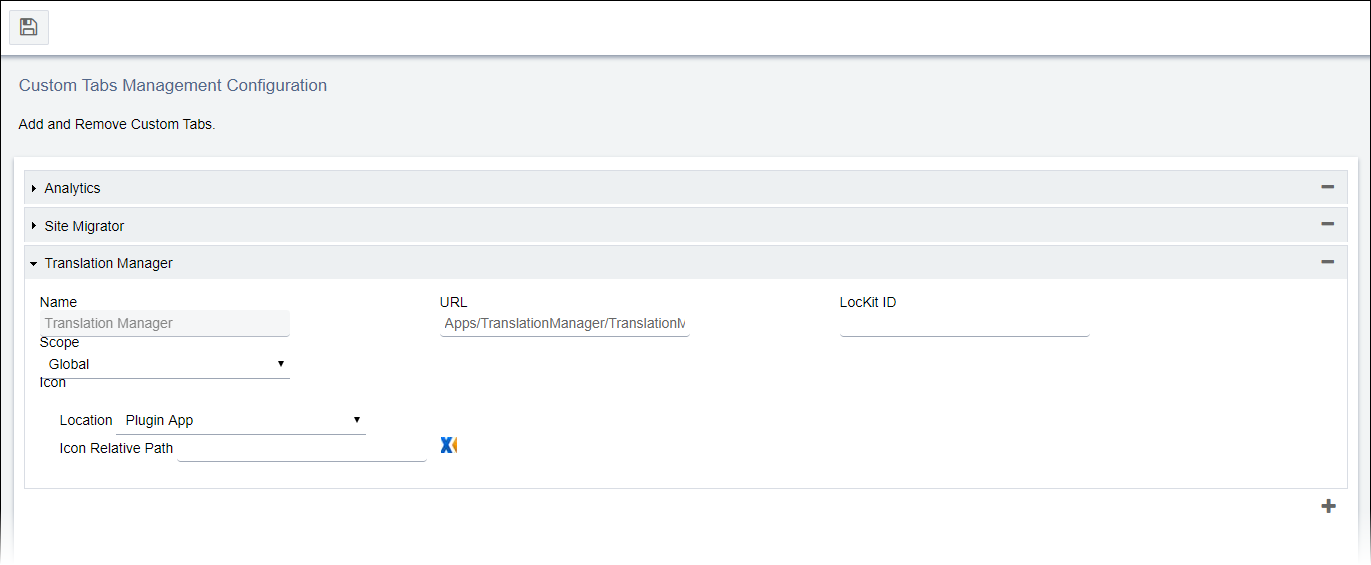
- Complete the following fields. When complete, your custom tab's configuration should resemble the following screen capture.
- Name: Enter the name of tab (e.g., Translation Manager).
- URL: Enter the filepath to Translation Manager (e.g., Apps/TranslationManager/TranslationManager).
- LocKit ID: Provide the localization kit identifier only if localization is needed for the App tab. Usually, this field is left blank.
- Icon:
- Location: Indicate where the translation manager icon is located.
- Pick Icon: Choose an icon from the CMS or provide the icon's relative path.
Location Pick Icon Description CMS System Select an icon from the drop-down list. The CMS system provides these icons. Plugin App Provide the relative path to the custom icon for the tab; otherwise, the custom app uses the default icon. Usually, this field is set to Plugin App to use the default icon. Remote Provide the relative path to custom icon for tab; otherwise, the custom app uses the default icon. This field allows you to use an icon from a remote location.
Note: See Custom Tabs for details about configuring custom tabs.
- Before the application displays in the CMS, open IIS Manager and refresh your site's application pool. The new translation manager application is located in Apps > Translation Manager in the CMS user interface.
Next Steps: Create Translation Projects to manage translation content.