Configuring Sample JSON Content Processor
- System administrators need access to the CMS file system to build the SampleJsonPublishContentProcessor.csproj and recycle the application pool.
- System administrators need to set up a DITA content processor in order to use the JSON processor.
Developers can add custom content processors as a new plugin to the CMS publishing pipeline. A sample has been included in the CMS installation to model pipeline processing and to serve as a base for custom processors. Processors introduced to the pipeline can either consume output from upstream processors or generate output for further modification by downstream processors. The sample plugin simply converts DITA XML to JSON.
The JSON processor depends on the DITA Publishing Content Processor, which displays beneath This processor requires the following processor(s) to precede it in the queue. This means that the JSON processor requires the output of the DITA processor, so this JSON processor must follow the DITA processor in the list of content processors.
To configure the sample content processor:
- Click the Sample JSON Publish Content
Processor list item.
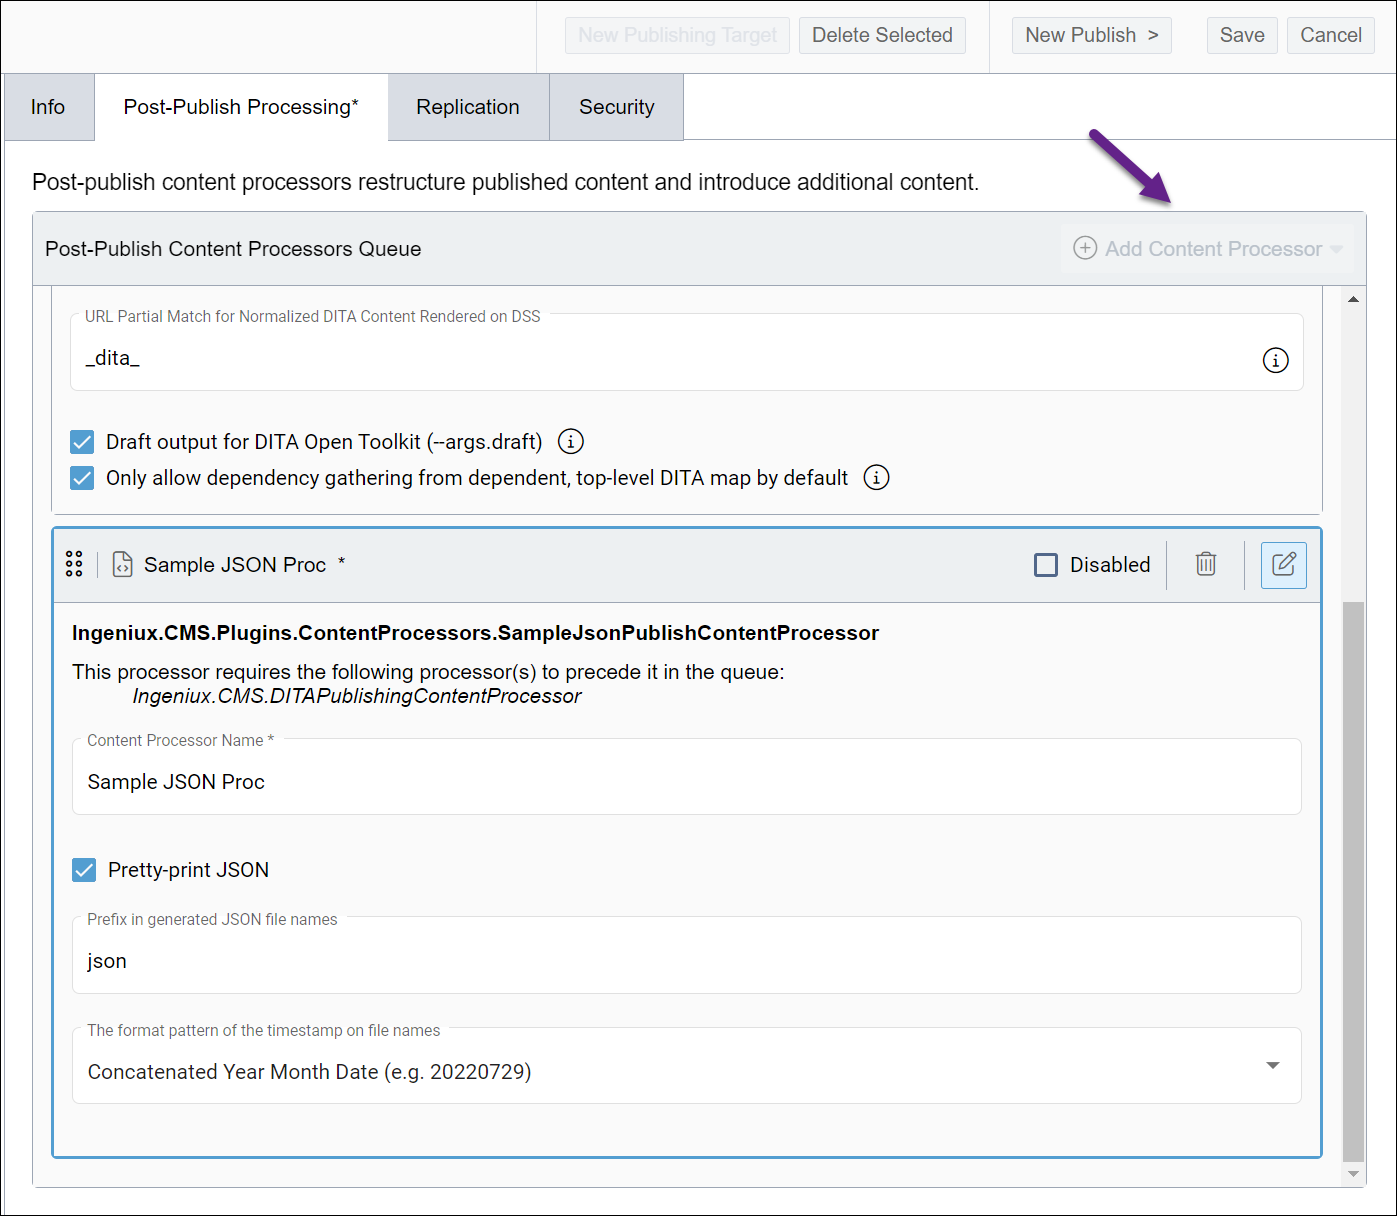 The processor's configuration fields display.
Next Steps:
Once the sample JSON processor is in place, CMS developers can use the sample as a model to build their own content processors.