Configure Fonto AI
Prerequisites:
- Users must have CMS administrator permissions to access Fonto Configuration settings.
- The Ingeniux AI System must be installed and activated on your CMS before you can configure the Fonto AI Insert feature. See AI Module 1 Setup for details.
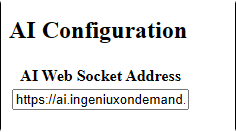
You can use generative AI to create and enhance content directly in Fonto. To enable the Fonto AI Insert feature for users, enter your AI Web Socket Address in Fonto Configuration settings.
To configure AI for Fonto:
Next Steps:
Verify the Fonto AI Insert feature is
functioning properly. You can do so by navigating to a DITA asset within the CMS, then
opening the topic's DITA Authoring tab. In the editor, click the
AI Insert button ![]() in the toolbar.
in the toolbar.
Troubleshooting
If the AI Insert button
is inactive in Fonto, re-enter and save the AI Web Socket
Address in your Fonto Configuration
settings. If the button remains inactive, review the prerequisites to ensure the Ingeniux AI
System is activated and functional. If the issue persists, contact Ingeniux Support.

