Prerequisites: - Administrators: Complete prerequisites to enable user access to the
Design tab. Developers must create the appropriate Page
Builder views before the content unit styling displays properly. See Page Builder
Prerequisites for details.
- The instructions assume that a form template exists in the presentation container.
See Configuring Form Templates for details.
The basic setup of Page Builder-placing content units within layout units-can be
expanded to create complex page designs to meet the needs of your organization. Page
Builder supports multiple levels of content and layout units. It's possible to place
form layout units within a form content unit and then more content units within that
layout unit. This concept is known as child layouts, and it dramatically expands the
functionality and complexity of a site's page designs. While it's possible to nest
non-form content units, it's far more common to employ nesting in form-based
scenarios.
To create child layouts with a form:
- Navigate to .
- Select the page that either has a Page Builder form or will contain a Page Builder
form where you will add a child content units.
- On the Design tab, click the Design
button on the toolbar to display page presentations from the list.
- Select one of the following options.
- Select the form presentation that will contain the child form layout.
Note
The
following steps assume that you will procede after choosing this option because you
have already created a (parent) form presentation. For demonstration purposes, we've
created a design presentation named Contact Form Design 1, which contains a
single column layout and a form content unit.
- Click + New Presentation if you have not created a form
presentation for this page. See Configuring Form Templates
for details about creating forms in Page Builder.
Troubleshooting
After you choose either option, you should see target icons within
the page that mark the elements in the page's view where you can add a Page Builder
layout. If no target icons display within the page, it's likely that there are no
id attributes on elements within the page's view, so these identifiers must be
included within the page's ASP.NET view. See
Page Builder Prerequisites
for details.
- Select the form content unit (in this example, the content unit Visual Form Builder
- Form has been selected.).

Tip
Ensure that you select the header portion of the form content unit.
See the
Adding Content Units: Properties Table for details.
The
Content Unit Properties display in the
Design Presentation pane, including a
Pick button, which looks like a target.
- Click the Pick button.

Once you activate the
Pick icon, target icons
display in the container area of the parent form. In this example, the following
three child layout containers display:
- Parent container layout
- (Auto-generated) form content component layout
- (Auto-generated) message container layout
- Select the appropriate child layout container (e.g., form container component layout)
by clicking its target within the markup work area.

The child layout name displays in the Child Layout
Container field.
- Click the Apply checkmark (✔) button to
confirm the selection.

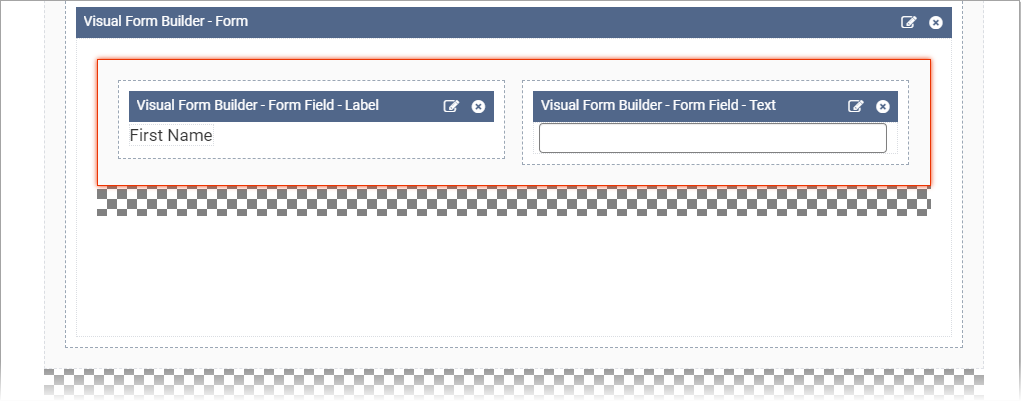
The child layout area displays as an empty checkered area.
- Open the Layout area.
- Drag a layout to the checkered work area . In this example, the Two
Columns layout has been used.

- From Content Units, drag the appropriate form content units to
the new child layout. In this example, the form label and form text content units were
used; however, you can add as many child layouts and content units within them as you
need.

- Click Save in the toolbar.
When finished designing the form, you have the option of editing it in any of the
views within the Edit tab, including In-Context
Editing.
Next Steps (optional): Validate user
input in form fields.


