Migrating from Ingeniux CMS 8.x to 10.3
System administrators can use the Migrate from v8 tab in the Ingeniux CMS 10 Site Wizard to migrate CMS 8.x site instances to new 10.3 sites.
To migrate from CMS 8.x to CMS 10.3:
- Within your server's file system, navigate to Ingeniux CMS 10.3 > Ingeniux CMS Site Wizard.
- Select the Migrate from v8 tab.
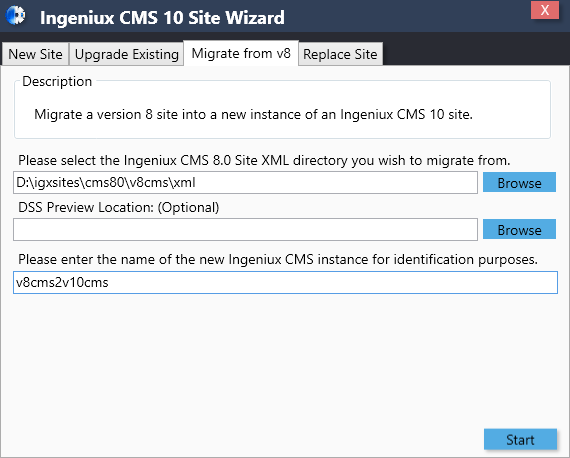
- Click Browse and then navigate to the XML folder within the instance of CMS v8 that you want to migrate to CMS v10. The path populates the field provided. Example: D:\igxsites\cms80\v8cms\xml
- Optional: Click Browse and then navigate to your DSS preview location. The path populates the DSS Preview Location field.
- In the last field, provide a new CMS instance name.
- Click Start. The Welcome dialog displays.
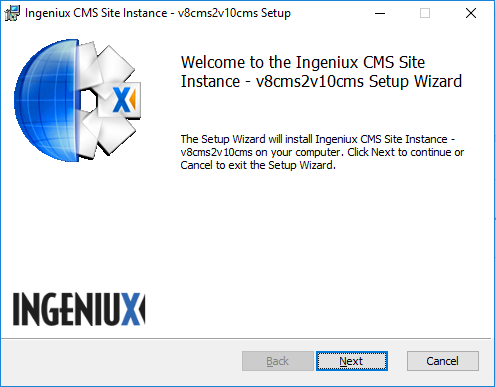
- Click Next. The Select Instance Web Application Type screen displays.
- Select either Web Site or Virtual Directory.
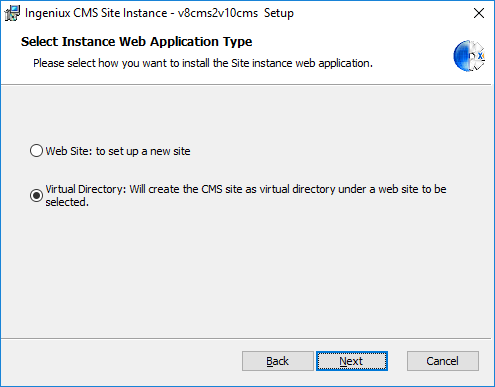
- If you want to set up a new website:
- Select the Web Site radio button.
- Click Next. The IIS Site Configuration screen displays.
- Configure the following values:
- IP Address
- Port Number
- Host Name
- Display Name (friendly name)
- If you want to set up the CMS site as a virtual
directory:
- Select the Virtual Directory radio button.
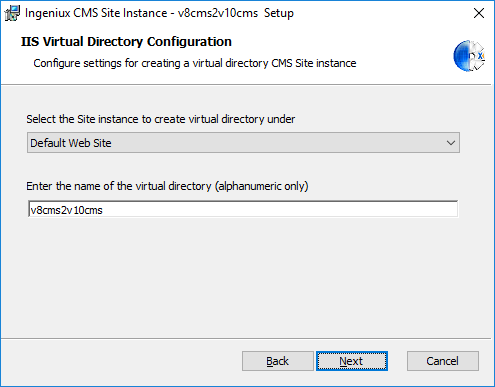
- Click Next. The IIS Virtual Directory Configuration screen displays.
- Choose the site instance from the drop-down list that will run under the virtual site.
- Enter the name of the virtual directory (or retain the auto-populated name).
- If you want to set up a new website:
- Click Next. The Select User Provider Type screen displays.
- Select either Ingeniux User Provider or Domain
Controller.
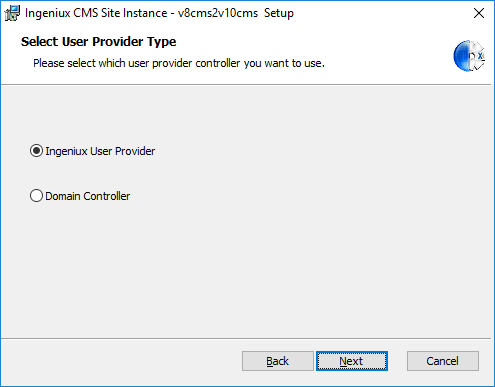 NoteThis step configures the administrative account credentials that must be used to log into the CMS first.
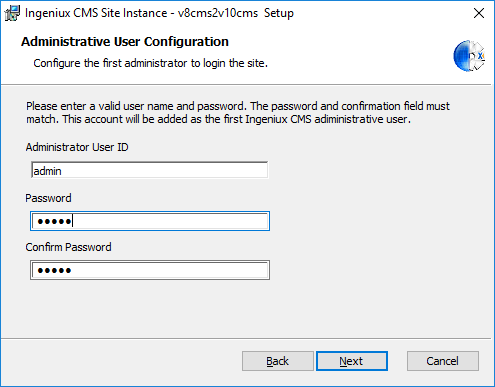
- If you selected Ingeniux User Provider:
- Enter an Administrative User ID.
- Enter a password and then confirm your password in the respective
fields.
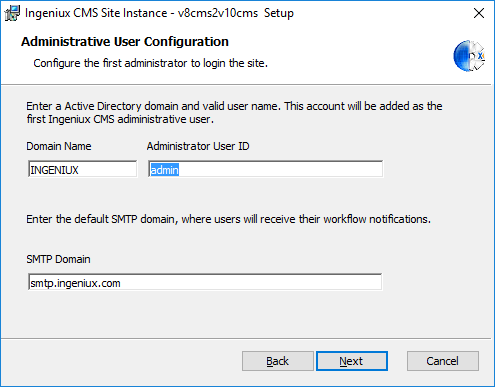
- If you selected Domain Controller:
- Enter a Domain Name in the field provided.
- Enter an Administrative ID.
- Enter an SMTP domain. This is the domain where users receive workflow
notifications from the CMS.
- If you selected Ingeniux User Provider:
- When you're finished configuring the administrative account, click Next. The Custom Setup screen displays.
- The final step in migrating CMS version 8 to version 10 is to configure which
features are installed and where. For most sites, the default settings are adequate.
Click Next to begin the installation, unless you want to
customize how and where features are installed.
To customize features in the Custom Setup dialog box:
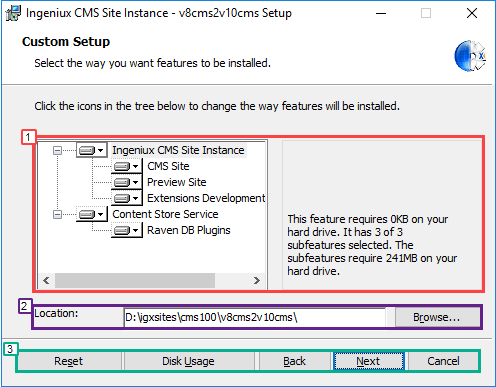
- Tree Area: Clicking any server icon in the tree opens a context menu
where you can decide to install a feature on a local hard drive or to run from
a network. You can also make entire features unavailable if they are not
necessary.
NoteKeep in mind that in a standard CMS implementation, all features are required.
- Ingeniux CMS Site Instance:
- CMS Site: The site to be installed.
- Preview Site: A rendering of the DSS that users can use to preview their work.
- Extensions Development Package: Solution and project for developing hooks, apps, and plugins.
- Content Store Service:
- Raven DB Plugins: Ingeniux plugins for Raven DB to support custom indexing and other functionality.
- Ingeniux CMS Site Instance:
- Location: This field specifies the path where the CMS instance will be installed. You can change this location via the Browse button.
- Buttons: The following table describes each of the remaining buttons in
the Custom Setup dialog.
Button Description Reset Returns your feature options to their initial, default values. Disc Usage Clicking the Disc Usage button opens the Disc Space Requirements dialog box. This dialog box shows how much disc space your volumes have and how much disc space is required by the exported CMS. .NoteA highlighted volume indicates that they do not have enough disk spaceBack Returns to the previous dialog box. Next Advances to the next dialog box. Cancel Cancels the Ingeniux CMS site installation.
When you finish customizing your site installation, click Next to begin the installation. - Tree Area: Clicking any server icon in the tree opens a context menu
where you can decide to install a feature on a local hard drive or to run from
a network. You can also make entire features unavailable if they are not
necessary.
- After the installation completes, click Finish to exit the installer.
- Review the migration
report and log files for any errors that may have been thrown during the process.
