Install AI Module 1


Prerequisites:
  • CMS 10.6 must be installed. See CMS Statistics to check the site version.
  • System administrators must have access to the CMS site instance file system and must have access to the latest Ingeniux AI System installation package.
  • If your organization is not using the Ingeniux AI system default access for the ChatGPT connection, administrators must have their OpenAI ChatGPT API key.

    See OpenAI: Where do I find my OpenAI API key? for details to obtain a private ChatGPT API key.


Install the Ingeniux AI module version 1 by setting up the external module through CMS 10.6 custom applications. Review the installation and setup process.

This process includes:

  1. Configure Module
  2. Add Custom Tab
  3. Configure Application
Note
Ingeniux AI version 2 is available. To install version 2, skip this topic and see Install AI Module 2 for details.

Configure Module

The Ingeniux AI Generation version 1 requires system administrators to configure ExternalModules.json before setting up the external module in the CMS.

To configure Ingeniux AI Generation external module version 1 server files:

  1. Configure ExternalModules.json by completing the following steps:
    1. Navigate to [Drive]:[path-to-CMS-root-folder]\site\App_Data.
    2. If ExternalModules.json doesn't exist, download the following ExternalModules.json, and copy and paste the file within the App_Data folder.
      Warning
      Only deploy this file once. If the existing ExternalModules.json has configurations for other modules, re-deploying this file will overwrite them.
    3. If ExternalModules.json already exists, then open the file in a text editor, copy the following code snippet, and paste the code into the open file.
      Important
      Ensure the code snippet nests directly within the outermost square brackets in the JSON file. Do not paste the snippet within another external module's code.
      AI module configuration
      [
        {
          "Name": "AIModule",
          "Url": "https://ai.ingeniuxondemand.com/scripts/cmsaimodule/hookup/cms-ai-hookup.js",
          "Styles": [
            "https://ai.ingeniuxondemand.com/scripts/cmsaimodule/styles.css"
          ]
        }
      ]

      You can leave the copied AIModule code as is in ExternalModules.json. However, keep the following values in mind:

      ObjectValueDescription
      NameAIModuleName of the Ingeniux AI System external module.
      URL https://ai.ingeniuxondemand.com/scripts/cmsaimodule/hookup/cms-ai-hookup.jsURL to the AI system external module's hookup script.
      Styles https://ai.ingeniuxondemand.com/scripts/cmsaimodule/styles.css

      URL to additional styles for the AI system external module. The styles provided in the URL will load into the CMS.

      This file contains Ingeniux default styles. However, you can apply your own where needed.

      Caution

      We strongly recommend applying as minimal additional styling as possible.

      If module styles conflict with CMS styles, they may interfere with CMS functionality and user experience.

    4. Save and close ExternalModules.json.
  2. Recycle the CMS instance application pool by completing the following steps:
    Important
    We strongly recommend coordinating with your organization before recycling the application pool, as the CMS instance will not be accessible while the recycle process runs. Consider completing this action during a maintenance period.
    1. Open Internet Information Services Manager (IIS), and navigate to the CMS instance application pool.
    2. Right-click the application pool, and select Recycle.

      The CMS instance application pool recycles.

Add Custom Tab

CMS administrators add an AI custom tab to the CMS as part of the Ingeniux AI System setup process. The custom tab defines the CMS administration endpoint for the external module and defines the application scope within the CMS. After adding the custom tab, administrators can modify the AI application in the Apps area.

To add the Ingeniux AI System custom tab:
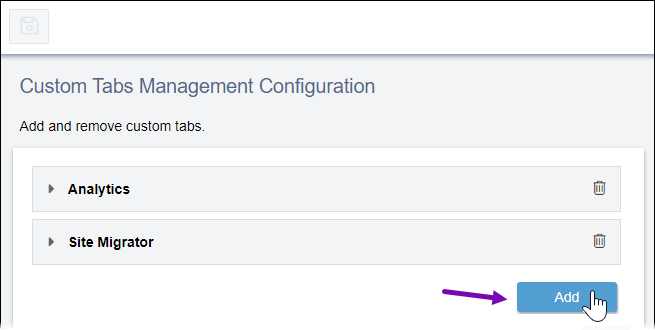
  1. Navigate to Administration > System Options > CMS > Custom Tabs > Management.
  2. Select Add.

    Add Custom Tab

    The New Custom Tab dialog displays.
  3. Enter AI in the custom tab name field, and select Confirm.
    The new AI custom tab entry displays as expanded in the list.
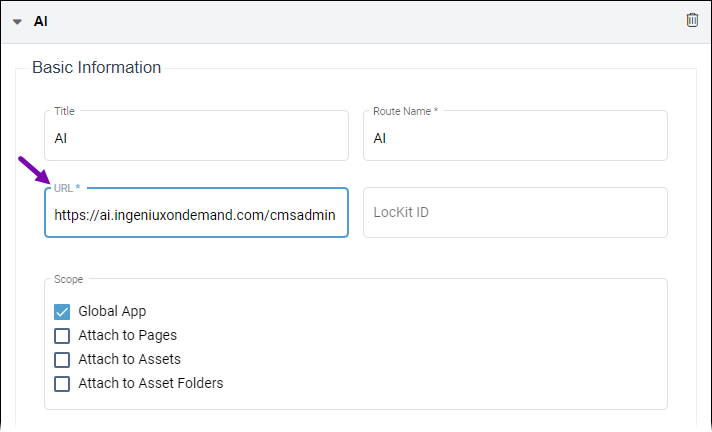
  4. Enter the following value in the URL field:
    Ingeniux AI System URL
    https://ai.ingeniuxondemand.com/cmsadmin

    Enter AI URL in URL Field

  5. Select only the Global App checkbox in the Scope section.
  6. Optional: Choose a CMS System graphic from the Pick Icon drop-down list.
    This graphic serves as the icon for the AI system custom application in the Apps area.
    Note
    You can choose an alternative icon Location instead of CMS System. See Adding Custom Tabs for details about alternative icon options.

    Pick Icon Graphic

  7. Select the Save button Save Button in the top left-hand corner of the Custom Tabs Management Configuration screen to register the new custom tab and save your changes.

Configure Application

Administrators configure an AI application in the CMS as part of the Ingeniux AI System setup process. The application interface provides settings to activate the AI system connection, activate ChatGPT access, and choose permissions for user groups.

To configure the Ingeniux AI System application:
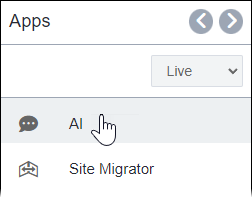
  1. Navigate to Apps via the main navigation menu.
  2. Select the AI application in the Apps list.

    Apps Navigation List

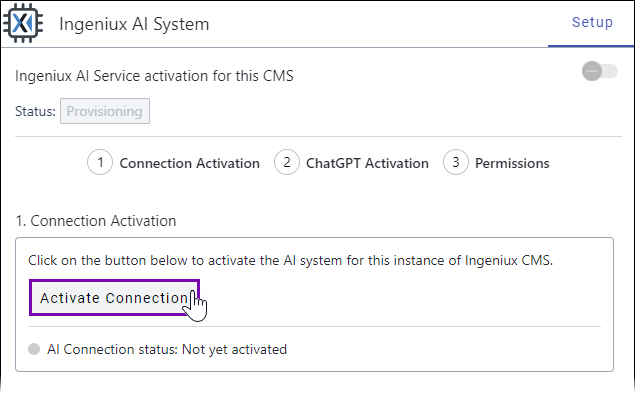
    The Ingeniux AI System application settings display in the Setup. If the AI system is not setup, the Status field displays the text Provisioning.
  3. Select Activate Connection in the 1. Connection Activation section.

    Activate Connection in "1. Connection Activation"

    The connection between the AI system and the CMS instance activates, as indicated by the AI Connection Status field.
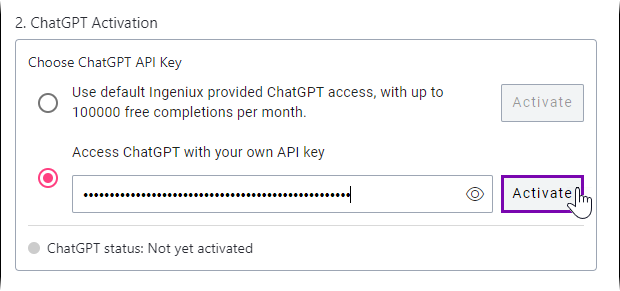
  4. Choose your ChatGPT access point preference in the 2. ChatGPT Activation section by selecting one of the following options.
    • Select the Use default Ingeniux provided ChatGPT access option.

      Choose this option to use the AI system with Ingeniux default access. This option does not require you to enter an API key, and this option allows your organization to run up to 100,000 AI system submissions per month. This restriction applies to your organization as a whole, rather than on a "per user" basis.

      If users meet the maximum AI submissions, the AI system prevents users from accessing the AI system tool until the next month begins.

      Important
      Keep in mind this option does not provide your organization with the full AI system toolset. The Ingeniux AI System requires you to enter your own API key to access features including the AI Training Model.
    • Select the Access ChatGPT with your own API key option.

      Choose this option to provide your own ChatGPT API key. By providing your own private key, you can connect your ChatGPT profile with the Ingeniux AI system.

      See the prerequisite for details to obtain your API key.

  5. Select the correlating Activate button for the option you chose.

    Choose ChatGPT API Key in "2. ChatGPT Activation"

    The AI system activates with the access point you provided, as indicated by the ChatGPT Status field.
    Tip
    For activated private keys, the CMS displays the last four letters of the API key within the 2. ChatGPT Activation section.
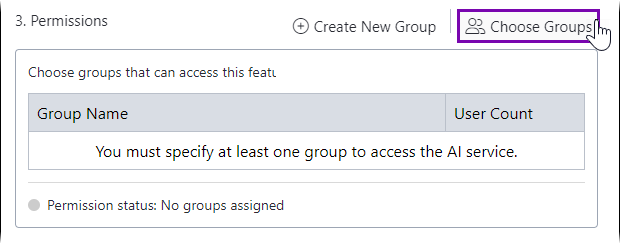
  6. Determine which user groups will have permission to access the AI system tool by completing the following steps in the 3. Permissions section.
    1. Select Choose Groups.

      Choose Groups in "3. Permissions"

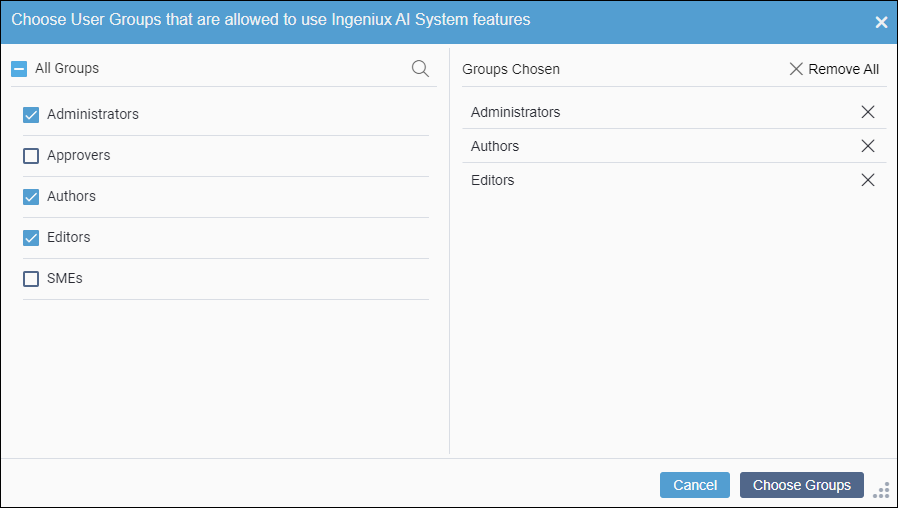
      The Choose User Groups... dialog displays.
    2. Select groups in the All Groups (left) column.
      Tip
      • You can select the Search button Search Button in the All Groups column, and enter keywords in the field that displays to search for available groups.
      • You can select the checkbox next to All Groups to select all available groups.

      The selected groups display in the Groups Chosen (right) column. The system will provide AI system tool permissions for groups within this column.

      CMS 10.6 Choose User Groups... Dialog

    3. Select Choose Groups.

      The selected groups display in the user groups with AI system permissions list.

      Tip
      You can create new user groups directly AI system app settings by selecting Create New Group in the 3. Permissions section. Enter a Group Name in the Create New User Group dialog that displays, and select Create Group. The AI system automatically provides AI system permissions to the new group.

      Refresh the AI system app settings interface to see the new group in the permissions list. See Creating Groups for details to further modify the group's settings and to add user members.

    The Ingeniux AI System becomes activated for the CMS site. The app settings interface displays the Status field value as Enabled. This indicates you completed each part of the setup, including Connection Activation, ChatGPT Activation, and Permissions.

    You may need to refresh the app settings interface to see the Status switch to Enabled.

    Tip
    You can disable or enable the Ingeniux AI System application at any time by turning the toggle switch off (disabled) or on (enabled). The toggle switch resides directly under the Setup tab heading in the top right corner of the app settings. When disabled, the Ingeniux AI System tool becomes inaccessible to users.

    CMS 10.6 Create New Group in "3. Permissions"

Next Steps: Review the AI system usage requirements to make the Ingeniux AI Generation Module 1 available to users on site pages.

Upgrade

Ingeniux AI version 2 is available. To install version 2, see Install AI Module 2 for details.

Important
When installing version 2 of the Ingeniux AI module, update the URL paths to https://ai2.ingeniuxondemand.com/ in the ExternalModules.json file and in the custom application settings. In AI Module 2 installation topic, see the Install AI Taxonomy and Configure Module and Add Custom Tab sections.