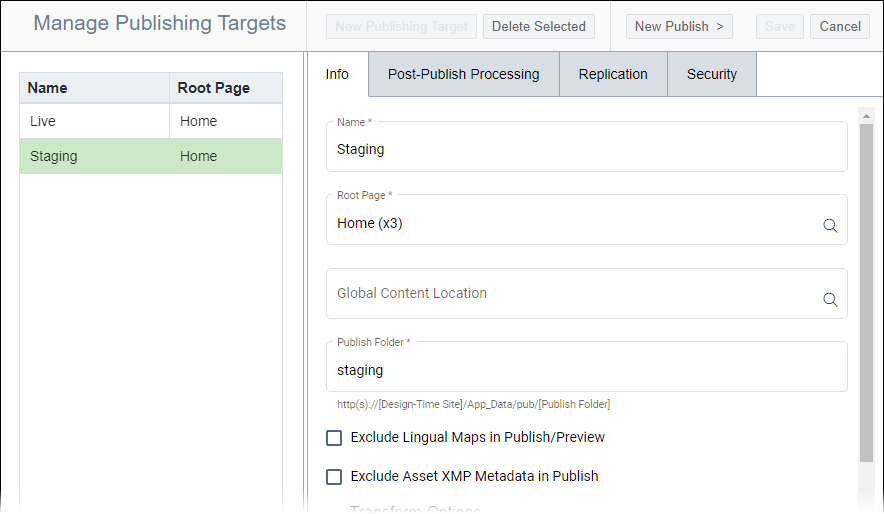
| Name (required) | Enter the name of the publishing target. |
| Root Page (required) | Enter and select top-level node of the publishing target. The root
page-typically the home page-is the page, folder, or component from which to
start the publish. |
| Global Content Location | Enter and select the folder for global content location. If your
published Site Tree only uses components in a folder
intended for one publishing target, you can leave Global Content
Location field empty. Global content location serves as the
root location for global components. Components beneath this location
publish to the publishing target. Additional Information A site can be segmented into multiple sections (i.e., folder structures).
Each section can publish content to respective publishing targets.
Multiple publishing targets may share a common set of components.
Considering more than one publishing target may use these components, this
common set typically lives outside of the publishing target roots in the
Site Tree. The global content location is only applicable to components and not
structured URLs. |
| Publish Folder (required) | Enter the name of the physical directory to which XML files publish. When
users publish content items to the publishing target for the first time,
Ingeniux CMS creates the pub folder and the physical directory in the
CMS file system (e.g.,
[Drive]:[path-to-cms-root-folder]\App_Data\pub\[name-of-publish-folder]).
Only system administrators have access to the CMS file system. Tip We recommend the publishing target and publish folder use
identical names. |
| Exclude Lingual Maps in Publish/Preview
checkbox | The checkbox is cleared by default. If selected, Ingeniux CMS excludes
all lingually mapped content when publishing content items to the publishing
target. See Translating Site Content with WorldView
for details about lingual mapping. |
| Exclude Asset XMP Metadata in Publish checkbox | Version Notes: 10.6 The checkbox is only
available in CMS 10.6 and is cleared by default. If selected, the CMS
excludes all asset XMP metadata when publishing content items to the
publishing target. If you select this option and then execute a full
publish, then the system removes existing XMP files from the publishing
target. The system stores asset XMP metadata files in
[Drive:]\[path-to-cms-site-instance]\App_Data\pub\[name-of-publish-folder]\_XMP_.
See Assets Metadata and Adding Asset Schema Metadata for
details about descriptive metadata. Troubleshooting If administrators select this checkbox and then later decide to include
asset XMP metadata in the publish, then clearing this checkbox will
restore the XMP files on the next publish. If not all XMP files are present and the checkbox is cleared, then the
system requires either a full assets-only publish or a full publish of the
site to regenerate all the XMP files. Without the full publish, individual
asset publishes only generate XMP for assets included within that
individual publish. |

