Installing UI Language Packs
By default, labels, UI messages, help text, etc. within Ingeniux CMS are provided in English. If your organization requires Ingeniux CMS UI to be in a language other than English to serve an international user base, Ingeniux provides localizations in the following languages/locales:
- English/United States (Default)
- Spanish/Mexico
- French/France
- German/Germany
- Simplified Chinese/Mainland China
- Japanese/Japan
Ingeniux CMS users can select the provided languages/locales through the Change Language drop-down menu.
If your organization requires the UI to be display in other languages/locales, administrators can install a UI language pack of your choice.
To install a UI language pack:
- Add Language Element to Languages.xml:
- Navigate to [path-to-cms-site-instance]\App_Data\xml\Custom\languages.
- Open languages.xml in a text editor.
Note: Alternatively, you can edit this file in Visual Studio after opening the API Extensions Development Harness solution within [path-to-cms-site-instance]\App_Data\xml\Custom.
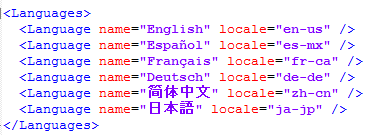
- Create a Language element, identifying the new name and locale attribute.
Example: < Language name="Português" locale="pt-br" />
- Save your changes.
- Include a new flag image:
- Navigate to [path-to-cms-site-instance]\App_Data\xml\Custom\languages\flags.
- Add a new flag image that represents the new language pack.
- Create a UI language file:
- Navigate to [path-to-cms-site-instance]\l10n\client.
- Create a new language file that will contain the UI instructions and labels in the following format:
[language]-[country].xml
Example: pt-br.xml -
Copy the contents of, for example, en-us.xml into the new language file.
-
Translate the tag values to the target language.
- Create a TinyMCE file:
- Navigate to [path-to-cms-site-instance]\l10n\client\tinymce.
- Create a new TinyMCE file in the following format:
[language].xml
Example: pt.xml
- Create a .resx resource file:
- Navigate to [path-to-your-cms-site-instance]\l10n\server.
- Add a new schema file with the following filename format:
[language]-[country].resx
Example: pt-br.resx
Note: The .resx resource file format consists of XML entries, which specify objects and strings inside XML tags, such as error messages. One advantage of a .resx file is that it is human-readable so it can be edited manually in a text editor. For information about its format, see Microsoft: Resources in .resx File Format. For information about creating this file programmatically, see Microsoft: Working with .resx Files Programmatically.
- Create folder and file for email notification:
- Navigate to [path-to-cms-site-instance]\App_Data\xml\Custom\emailNotifications.
- Create a folder with the following naming scheme: [language]-[country].
Example: pt-br - Within the new folder, create a new file named workflowNotifications.xml. This file contains workflow information sent to recipients in the selected language.
- Configuring locale listing:
- Navigate to Administration > System Options > CMS > WorldView.
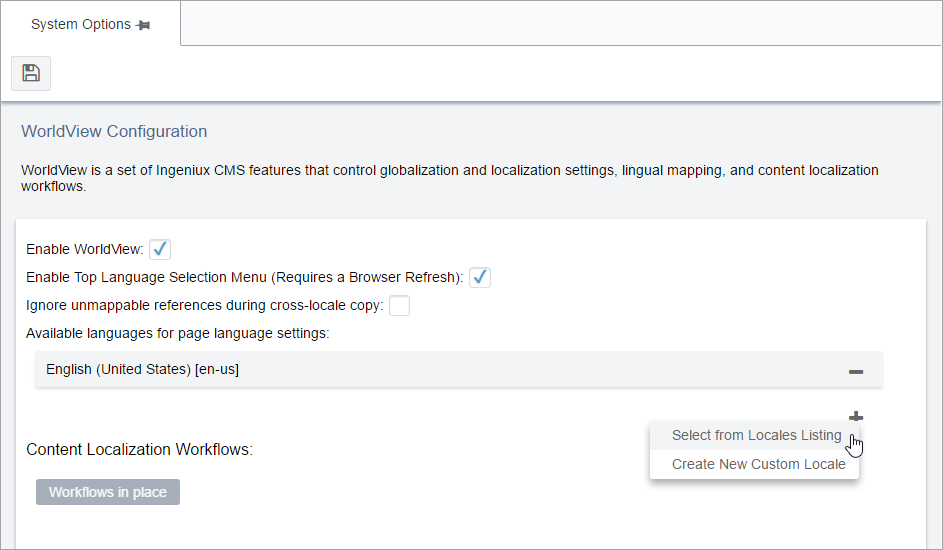
- In the WorldView Configuration workspace, ensure that the Enable WorldView and the Enable Top Language Selection Menu checkboxes have been selected.
- Click the Add New Language button (+).
- Choose Select from Locales Listing from the menu. The language field displays.
- In the language field, enter the name of the new language. The drop-down list displays relevant matches.
- Choose the appropriate language-locale pair.
- Select the newly added language in the Change Language drop-down menu.