Installing Ingeniux CMS Connector in Oxygen XML Editor
Prerequisites:
- System administrators must the install the Oxygen Web Service for Ingeniux CMS site instance. See Installing Oxygen Web Service for details.
- CMS content contributors must install Oxygen XML Editor 23.1 on their authoring client(s). See the Oxygen XML Editor website for details.
- If CMS content contributors installed the IngeniuxCMSConnector.zip for Oxygen Desktop Plugin, then they must delete the IngeniuxCMSConnector folder (e.g., [Drive]:\Program Files\Oxygen XML Editor 23\plugins\IngeniuxCMSConnector\).
The Oxygen Desktop Plugin requires each CMS content contributor who will use the plugin to install the Ingeniux CMS Connector add-on in their Oxygen XML Editor 23.1 application. After installation, users can check for and install subsequent updates to the Ingeniux CMS Connector plugin.
To install the Ingeniux CMS Connector add-on for the Oxygen Desktop Plugin:
- Open the Oxygen XML Web Editor application.
Note: Before opening Oxygen XML Editor, ensure that the CMS instance containing your DITA assets is running.
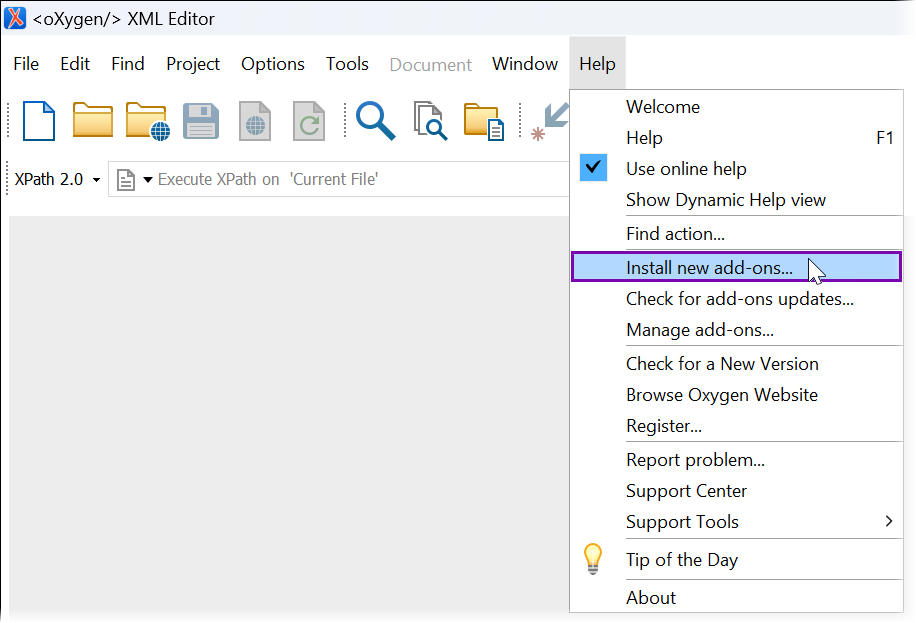
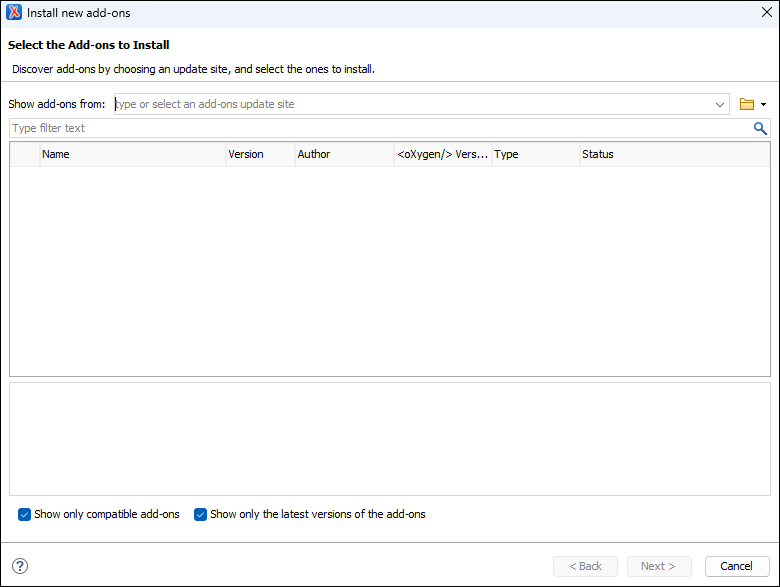
- Navigate to Help > Install new add-ons... in the Oxygen XML Editor toolbar. The Install new add-ons dialog displays.
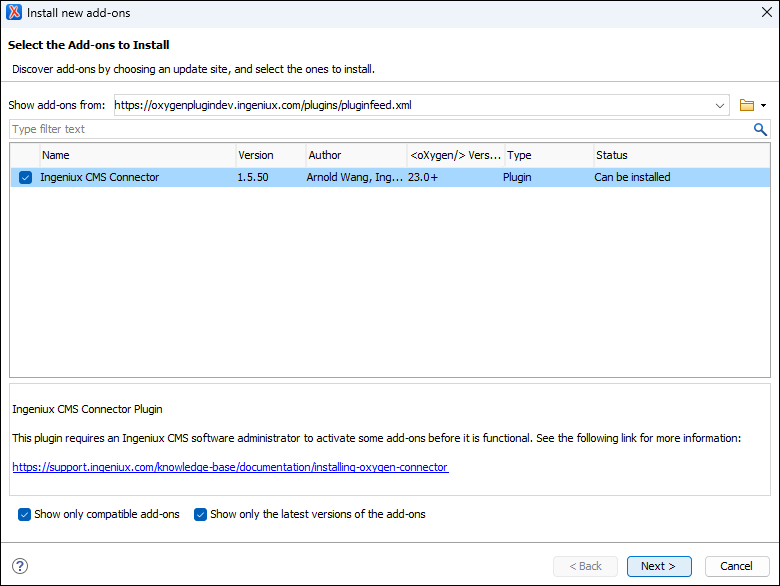
- Copy and paste the following URL in the show add-ons from field:
https://oxygenplugin.ingeniux.com/plugins/pluginfeed.xml
The Ingeniux CMS Connector add-on displays in the list.
-
Select the Ingeniux CMS Connector add-on, and click Next. The Security dialog displays.
- Click Allow or Allow and remember to grant the system permission to connect with the host URL.
Tip: We recommend clicking Allow and remember. This way, you only have to grant permissions once and not for each subsequent version update.
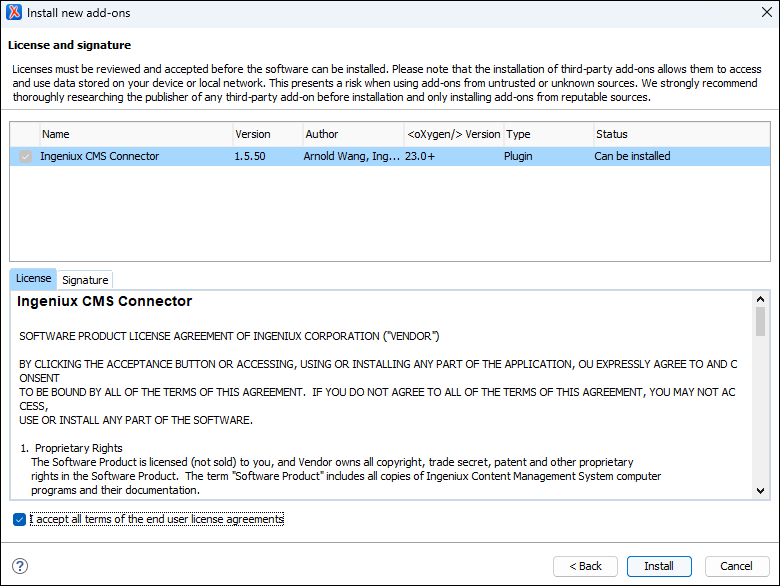
- Accept the license agreements in the License and Signature tabs by selecting the I accept all terms of the end user license agreements checkbox.
- Click Install. The add-on installs to your system, and the Add-ons dialog displays.
- Click OK, and restart the Oxygen XML Editor application to apply the add-on install changes.
- Open the Oxygen XML Editor. The UI now displays new options (i.e., the Check Out, Check In, and Insert Topic Reference buttons) in the application's toolbar and the Ingeniux CMS Browser tab.
- Click the Settings (gear) icon or click Setup Connection to Ingeniux CMS in the Ingeniux CMS Browser tab. The Configure Ingeniux CMS Connection dialog displays.
- Enter values in the following fields:
Field Description CMS URL Enter the URL of the Ingeniux CMS instance containing the DITA assets (e.g., https://cms-site.com). Important: Don't include a trailing slash in the CMS URL.
API Key Enter the key value (API key) you provided in Web.config. Operating User Enter your CMS User ID that is used to access the CMS authoring UI (e.g., first.last@company.com) Connection timeout (seconds) Enter the maximum duration the system will wait (in seconds) to connect before timing out. If no response initiates after this specified timeout period, the connection process terminates. Allow Self-Signed Certificate for HTTPS Connection to CMS checkbox Select or clear the checkbox. If selected, Oxygen Desktop Plugin allows users to connect to the CMS via an HTTPS self-signed certificate. If cleared (default), the Oxygen Desktop Plugin doesn't allow HTTPS self-signed certificates.
This setting is based on the CMS instance setup. Contact your CMS system administrator for details.
Important: Self-signed certificates only work for TLS 1.2+.
Close Editor After Check In / Undo Check Out checkbox Select or clear the checkbox. If selected (default), Oxygen Desktop Plugin closes DITA assets after users execute the Check In or Undo Check Out action. If cleared, the DITA assets remain open in the editor after executing these actions. Important: After saving any value change in the Configure Ingeniux CMS Connection dialog, exit from Oxygen XML Editor to ensure your changes take effect upon reopening the application.
-
Click Save Settings. The Configure Ingeniux CMS Connection dialog closes, and the structure of your CMS DITA assets displays in the Ingeniux CMS Browser tab. The plugin is now ready for you to connect Oxygen XML Editor to DITA assets in Ingeniux CMS.
Next Steps:
- See Using Oxygen Desktop Plugin for details to use the plugin tools in Oxygen XML Editor.
- When subsequent Ingeniux CMS Connector add-on updates become available, see Installing Add-on Updates for details to update the add-on to the latest version.