Creating Ingeniux CMS 10.5–10.6 Site Instances


Prerequisites:
  • Version Notes: CMS 10.6

    For CMS 10.6 site installation:

    • Users must have site administrator permissions and access to the appropriate server.
    • Ingeniux CMS 10.6 software must be installed. See Installing Ingeniux CMS 10.5–10.6 Software Platform for details.
    • If the Raven Database (RavenDB) 5.4 instance will live on an external server, the RavenDB must be set up.
    • If providing a manual certificate, the certificate must be accessible. See RavenDB Certificates for details.
  • Version Notes: CMS 10.5

    For CMS 10.5 site installation:

    • Users must have site administrator permissions and access to the appropriate server.
    • Ingeniux CMS 10.5 software must be installed. See Installing Ingeniux CMS 10.5–10.6 Software Platform for details.
    • If the Raven Database (RavenDB) 4.2 instance will live on an external server, the RavenDB must be set up.
    • If providing a manual certificate, the certificate must be accessible. See RavenDB Certificates for details.

After installing the Ingeniux CMS 10.5–10.6 software, site administrators can create CMS site instances. The Ingeniux CMS Site Instance Wizard creates a default site, adds the site to IIS, and installs supporting files.

Each CMS site instance exists as one of two types: 1) a website or 2) a virtual directory underneath a website. The CMS server may host multiple CMS instances. Single CMS instances may host multiple websites and publishing targets.

Note
This task uses version numbers within CMS names for demonstration purposes only. For staging, administrators may choose to use version numbers within CMS names as well. For production, we recommend your CMS name not include version numbers because you may upgrade your CMS instance in the future.

To create a CMS 10.6 or CMS 10.5 site instance:

  1. Follow the step that corresponds with your CMS site instance installation version.
    • Version Notes: CMS 10.6
      For CMS 10.6, navigate to [Drive]: [path-to-CMS-installation]\Ingeniux CMS 10.6 in your server's file system, and open Installers\Ingeniux_CMS_Site_Wizard.exe.
    • Version Notes: CMS 10.5
      For CMS 10.5, navigate to [Drive]: [path-to-CMS-installation]\Ingeniux CMS 10.5 in your server's file system, and open Installers\Ingeniux_CMS_Site_Wizard.exe.

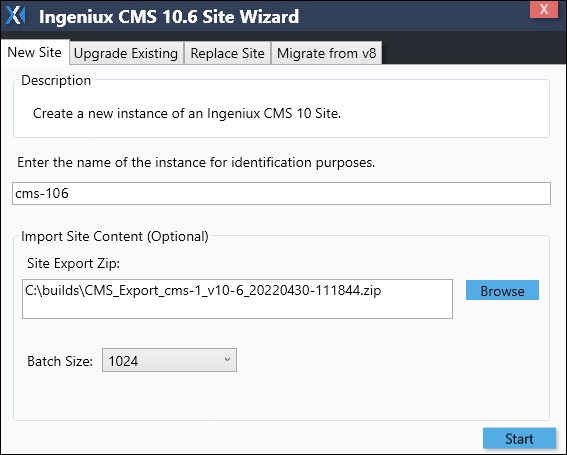
    The Ingeniux CMS Site Wizarddialog opens and displays the New Site tab.

    Ingeniux CMS 10.5–10.6 Site Wizard

  2. Enter the new CMS instance name in the field provided.
  3. Optional: You can set up the instance with a site export. Complete the following steps:
    1. Click Browse, and select the site export .zip folder from your system's file explorer.
    2. Click Open.

      The path to the export .zip file displays in the Site Export Zip field.

    3. Select the maximum allowable export .zip size in the Batch Size drop-down list.
      Tip
      Use the 1024 default value for servers with 8 GB of RAM or less. Use a larger batch size for servers with more than 8 GB of RAM to make the content import faster. The installer uses Voron as the engine.
    Version Notes: CMS 10.1+

    Setting up a new CMS site export automatically disables replication profiles for all publishing targets and retains replication profile settings. This feature prevents an accidental publish of test content to production DSS environments.

  4. Click Start.

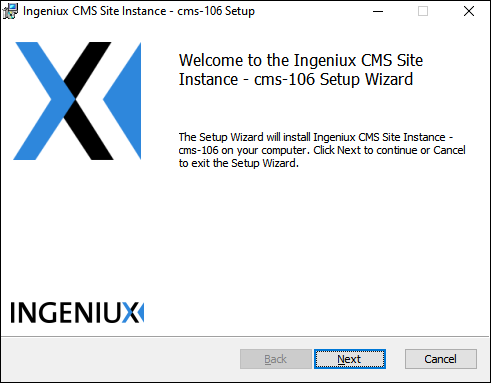
    The Setup Wizard dialog opens.

    Ingeniux CMS 10.5–10.6 Site Instance Setup Wizard Welcome Screen

  5. Click Next.

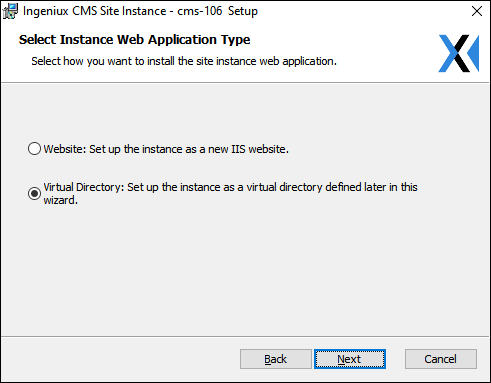
    The Select Instance Web Application Type screen displays.

    Note

    This screen provides configuration settings for the CMS URL and not the RavenDB.

    CMS 10.5–10.6 Select Instance Web Application Type

  6. Choose one of the following options:
    • Select Website to set up the instance as a new IIS website.

      1. Click Next.

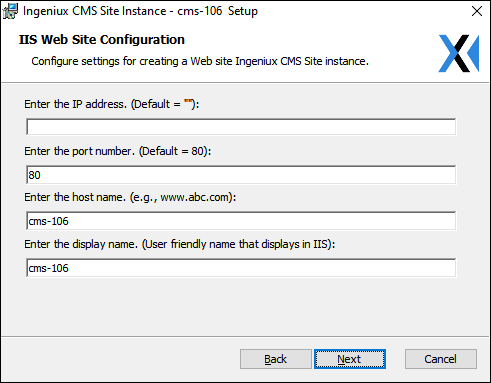
        The IIS Site Configuration screen displays.

        CMS 10.5–10.6 IIS Web Site Configuration

      2. Complete the following fields:

        Field

        Description

        IP Address

        Enter the appropriate IP address. The default is an empty value.

        Port Number

        Enter the appropriate port number. The default is 80.

        Host Name

        Enter the host name. The default is the CMS instance name.

        Display Name

        Enter the friendly name that displays in IIS for the CMS instance. The default is the CMS instance name.

        Note

        We recommend maintaining the CMS instance name. If you have multiple CMS instances, maintaining the name helps you to clarify which application pool associates with each CMS instance.

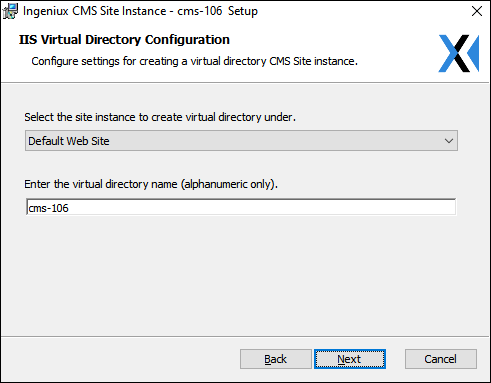
    • Select Virtual Directory to set up the instance as a virtual directory.

      1. Click Next.

        The IIS Virtual Directory Configuration screen displays.

        CMS 10.5–10.6 IIS Virtual Directory Configuration

      2. Complete the following fields:

        Field

        Description

        Site Instance drop-down list

        Choose the site instance under which to run the virtual site. The default is Default Web Site.

        Virtual Directory Name

        Enter the virtual directory name. The CMS instance name displays as the default.

        Note

        This field only accepts alphanumeric characters.

  7. Click Next.

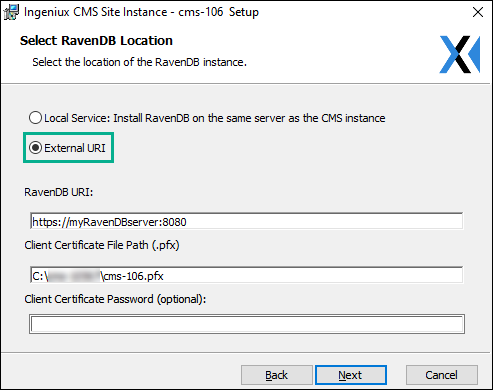
    The Select RavenDB Location screen displays.

    CMS 10.5–10.6 Select RavenDB Location

  8. See RavenDB Certificates to configure RavenDB and its security certificates. Return to this page for steps to complete the wizard.
  9. Click Next.

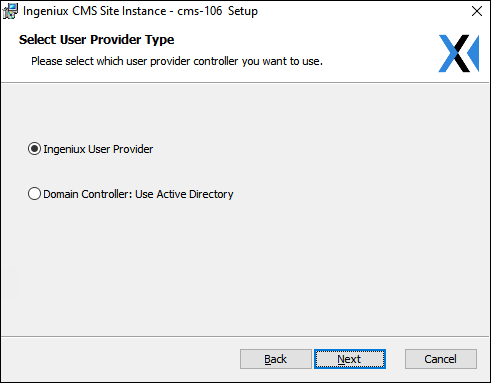
    The Select User Provider Type screen displays.

    CMS 10.5–10.6 Select User Provider Type

  10. Choose one of the following options:
    Important
    This step configures the administrative account credentials that the CMS instance initially requires to log in.
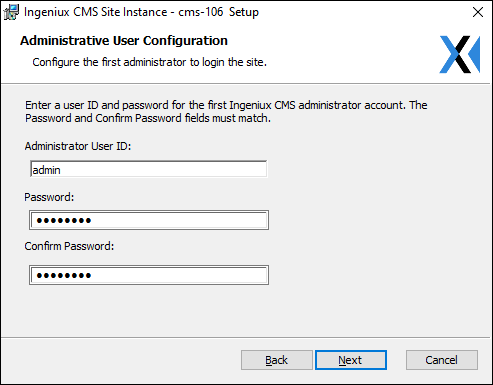
    • Select Ingeniux User Provider to use LDAP.

      • Click Next.

        The Administrative User Configuration screen displays.

        CMS 10.5–10.6 Ingeniux User Provider Administrative User Configuration

      • Complete the following fields:

        Field

        Description

        Administrator User ID

        Enter a user ID name. The system creates a user with system administrator permissions.

        When initially logging in to the CMS instance, enter this ID in the User Name field.

        Password

        Enter the password to associate with the administrator user ID.

        When initially logging in to the CMS instance, enter this password.

        Confirm Password

        Re-enter the password to validate the new credentials.

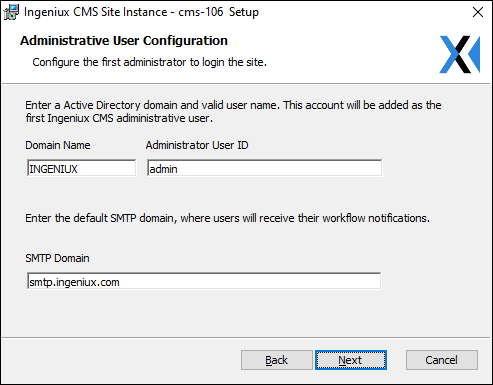
    • Select Domain Controller to use Active Directory.

      • Click Next.

        The Administrative User Configuration screen displays.

        CMS 10.5–10.6 Domain Controller Administrative User Configuration

      • Complete the following fields:

        Field

        Description

        Domain Name

        Enter the domain controller name.

        Administrator User ID

        Enter a user ID name. The system creates a user with system administrator permissions.

        When initially logging in to the CMS instance, enter this ID in the User Name field.

        SMTP Domain

        Enter the SMTP domain where users receive workflow notifications from the CMS instance.

  11. Click Next.

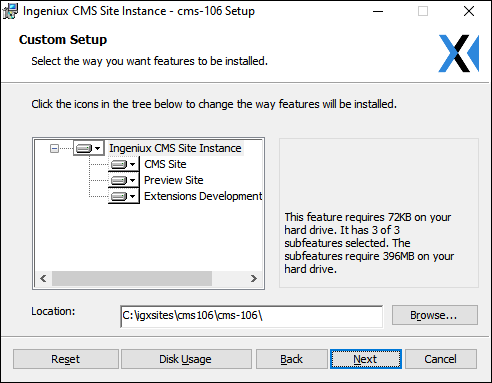
    The Custom Setup screen displays.

    CMS 10.5–10.6 Custom Setup

  12. Optional: If you prefer settings other than the defaults, configure which CMS instance features the system installs and where. This serves as the final step in setting up the CMS site instance.

    To custom configure the setup:

    Caution
    Standard CMS implementations require all features. For most sites, the default settings are adequate.
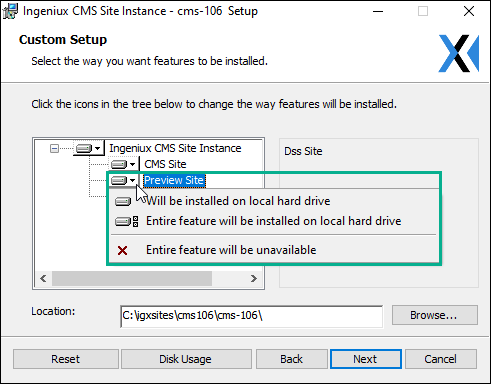
    1. Click the appropriate server icon in the tree area to open the context menu.

      You can install a feature on the local hard drive or make unnecessary entire features unavailable for install.

      Additional Information

      The Ingeniux CMS Site Instance tree includes:

      Node

      Description

      CMS Site

      Site to install.

      Preview Site

      Rendering of the DSS that users can see to preview their work.

      Extensions Development Package

      Solution and project for developing custom hooks, apps, and plugins.

      CMS 10.5–10.6 Custom Setup Node Context Menu

    2. Click Browse in the Location field to change the filepath where the CMS feature will install.
    3. Click Reset to return feature options to their initial default values.
  13. Optional: Click Disk Usage to display the Disc Space Requirements dialog. View how much disc space your volumes have and how much disc space the exported CMS requires.
    Caution
    Highlighted volumes lack disc space to install features.
  14. Click Next to begin the CMS instance installation.

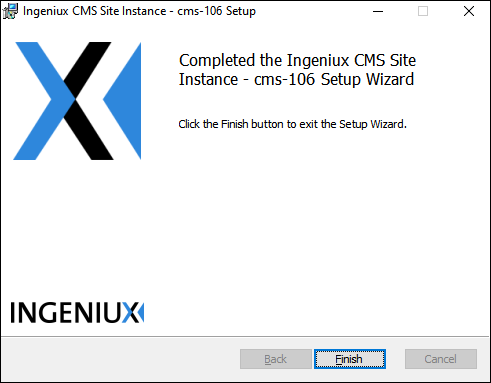
    The Completion screen displays when the installation finishes.

    CMS 10.5–10.6 Custom Setup Node Context Menu

  15. Click Finish to exit the dialog.
    Note
    You can uninstall a site instance via Add or remove programs in your server's System Settings.

Next Steps: