Generate Metadata with AI Module 2


Prerequisites: You must have permissions and meet the usage requirements to use Ingeniux AI Generation to generate metadata. See AI Module 1 Usage Requirements for details.

Use Ingeniux AI Generation version 2 to streamline the metadata creation process for pages and components.

Metadata enhances content discoverability, improves SEO performance, and provides essential information about your content. Using AI to generate metadata saves time and ensures consistency across your content items.

To generate metadata with Ingeniux AI Generation:
  1. Check out the content item you want to modify with AI, then click the Ingeniux AI icon Ingeniux AI Generation Icon in the utility bar to open the page-level Ingeniux AI Generation module.
  2. Click the Metadata tab in the navigation menu.
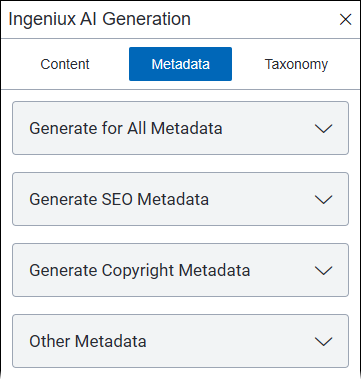
    The Metadata tab displays with options for generating metadata.

    Ingeniux AI Generation Metadata Tab

  3. Choose one of the following options to filter available metadata fields:
    • To display all metadata fields in the main pane, expand the Generate for All Metadata option.
    • To display only metadata fields for an individual group (such as SEO metadata or technical metadata) in the main pane, expand the corresponding Generate [Group Name] Metadata option.
    • To display only metadata fields not part of a group in the main pane, expand the Other Metadata option.
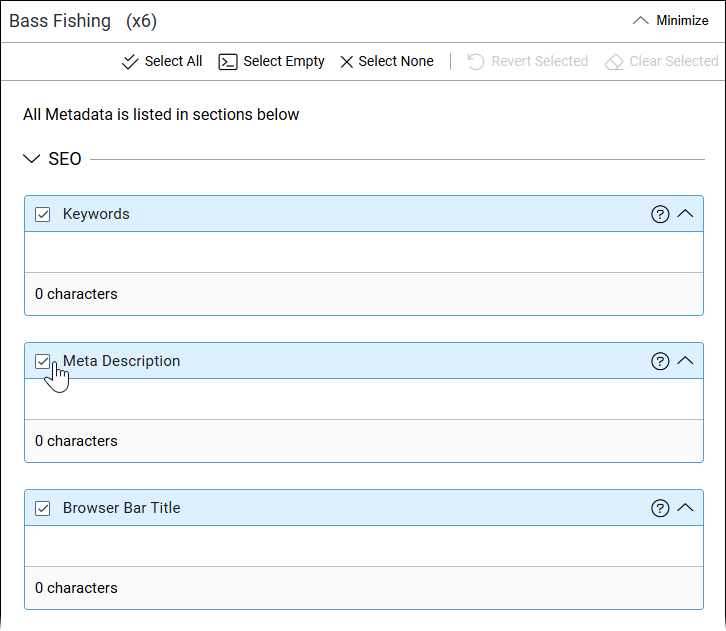
  4. Select the fields in the main pane where you want to use AI generation.
    • Use the quick selection options in the toolbar.
      OptionDescription
      Select AllSelects all available fields.
      Select EmptySelects only fields without content values.
    • Directly select the checkbox of each field.
    Tip
    • Click Select None in the toolbar to clear all field selections.
    • Without administrator permissions, the following fields are inaccessible for AI generation:
      • Hidden fields. They are not visible in the main pane.
      • Read-only fields. They display as inactive in the main pane.

    Select Fields for Metadata Generation

  5. You can provide a prompt for the AI to consider. Select the Prompt to Provide Additional Guidance checkbox, then enter your instructions in the Prompt the AI field.
  6. Click Generate to create the metadata content.
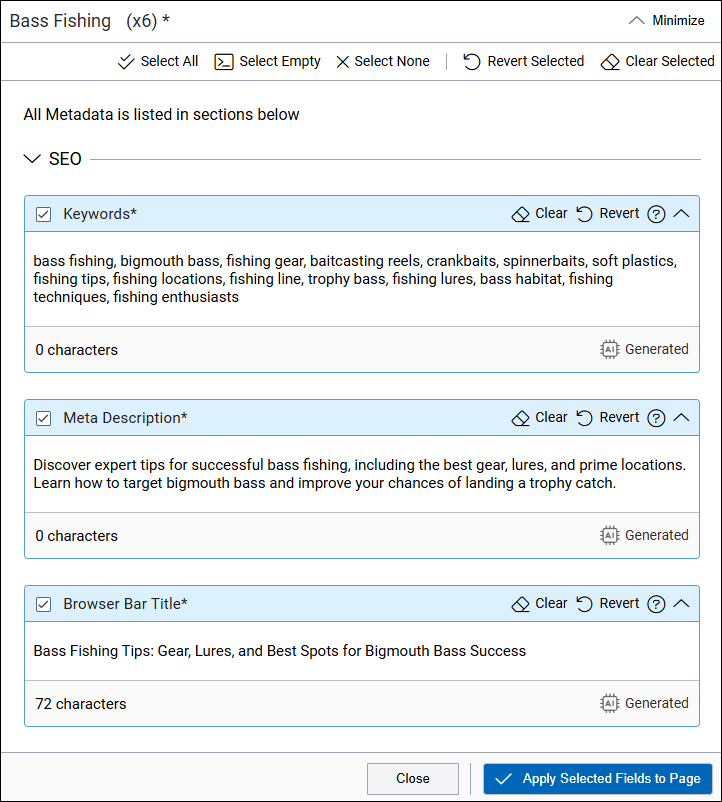
    The AI processes each metadata field, populating them with new values.

    Metadata Generated with AI

  7. Review the generated metadata, then choose whether to clear, revert, or apply the AI-generated metadata in one or more fields:
    • To apply an action to an individual field in the main pane, click one of the following buttons within the corresponding field:
      OptionDescription
      Apply to Field on PageApply the AI-generated metadata to only the individual field within the content item. When you close the module, the metadata populates the field value.
      ClearClear the metadata from the field, leaving the field value empty.
      RevertRevert the metadata within the field value. This action reverts the metadata to the field's original value, removing any AI-generated changes.
    • To apply an action to all selected fields field in the main pane, click one of the following buttons:
      OptionDescription
      Apply Selected Fields to Page

      To apply AI-generated metadata to all selected fields within the content item, click Apply Selected Fields to Page in the bottom-right corner of the main pane.

      Revert SelectedTo revert the metadata within the all selected field values, click Revert All in the top-right corner of the main module pane. This action reverts the content in each selected field to its original value, removing any changes generated by AI.
      Clear SelectedTo clear the metadata within the all selected field values, click Clear All in the top-right corner of the main module pane. This action will clear the metadata from each field, leaving the values empty.

Task Troubleshooting: If you encounter issues with metadata generation, consider the following factors:

  • Ensure the content item includes sufficient relevant information for the AI to analyze, per prerequisites.
  • Try refining your prompt if the generated metadata is too broad or generic.
  • If you apply AI changes to a list item's text field, the changes may not immediately display in the Edit tab's Form mode Form Edit Mode Button. To view the updated field, refresh the content item after applying changes.

Next Steps:

  • Review the generated metadata to ensure the new values complements your content and make adjustments as needed. During your review, keep the following in mind:
    • Click Minimize in the top-right corner of the main pane to view the current state of the page fields without leaving your AI generation session.
    • To close the AI module completely, click the Site Tree icon in the utility bar.
    • To manually modify field values without AI, edit [ plain text and XHTML editor directly within the content item's Edit tab.
    • To undo changes you've applied with AI along with any other changes you've made to the checked-out content, right-click the content item in the Site Tree and click Undo Check Out.
  • Optional: Generate content with AI using the Content tab.
  • Optional: Generate metadata values with AI using the Metadata tab.
  • Optional: Categorize your content item with AI-suggested taxonomy categories using the Taxonomy tab.
  • Save and check in the content item when you finish.