CMS 10.6 Making Changes to Fields via In-Context Editing
Users can directly make and preview field changes in site pages with In-Context Editing (ICE) mode.
To field changes via ICE:
- Access ICE mode. See Accessing ICE Mode for details.
- Select the field to edit within the workspace.
The field becomes selected (i.e., the header fill color changes to blue), and the toolbar displays in the field header.
TipIf header toolbar icons don't initially display, then select the Show Actions vertical ellipses (...) icon to access the toolbar options.

- Optional: You can maximize space in the Edit tab by selecting Close Trays Palette
 on the rightmost side of the Edit tab toolbar to collapse the Trays pane.
 - Edit fields based on their type.
The table below provides steps to edit each field type. Use the steps that correlate with the field type you want to edit.
Additional InformationICE provides different editing functionality based on the field type. For example, if you edit a plain text field, ICE provides a text area where you can edit the content. If you edit an asset field, then ICE provides a dialog where you can choose an asset to add.
Field
Steps
Plain Text
Selecting the field displays the editable text area.
To edit plain text fields:
Make your text changes directly in the field, and select the Confirm checkmark (✔) icon in the header toolbar to enter your changes.

XHTML Editor
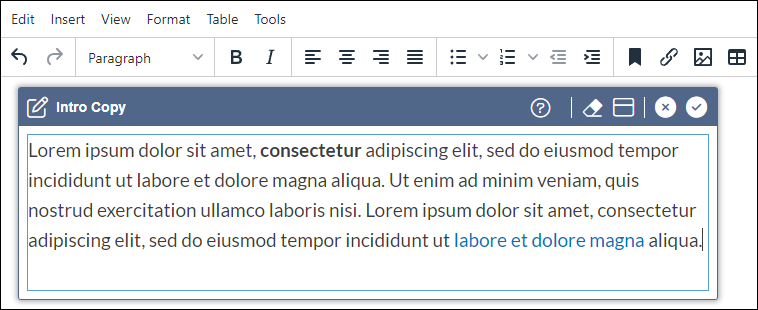
Selecting the field displays the editable text area and displays the XHTML editor toolbar.
See XHTML Editor for details about the editor features.
To edit XHTML editor fields:
Choose one of the following steps.
Make your text changes directly in the field, and use the XHTML toolbar options as needed.

Select the Maximize Edit Area
 icon in the header toolbar to expand the XHTML editor in a pop-up
dialog, and use the XHTML tools to make your text changes.Tip
icon in the header toolbar to expand the XHTML editor in a pop-up
dialog, and use the XHTML tools to make your text changes.TipSelect the Restore to original size
 (-) icon in the header toolbar to switch the editor from
pop-up dialog to in-line.
Select the Confirm checkmark (✔) icon in the header toolbar to enter your changes.
Asset
To edit asset fields:
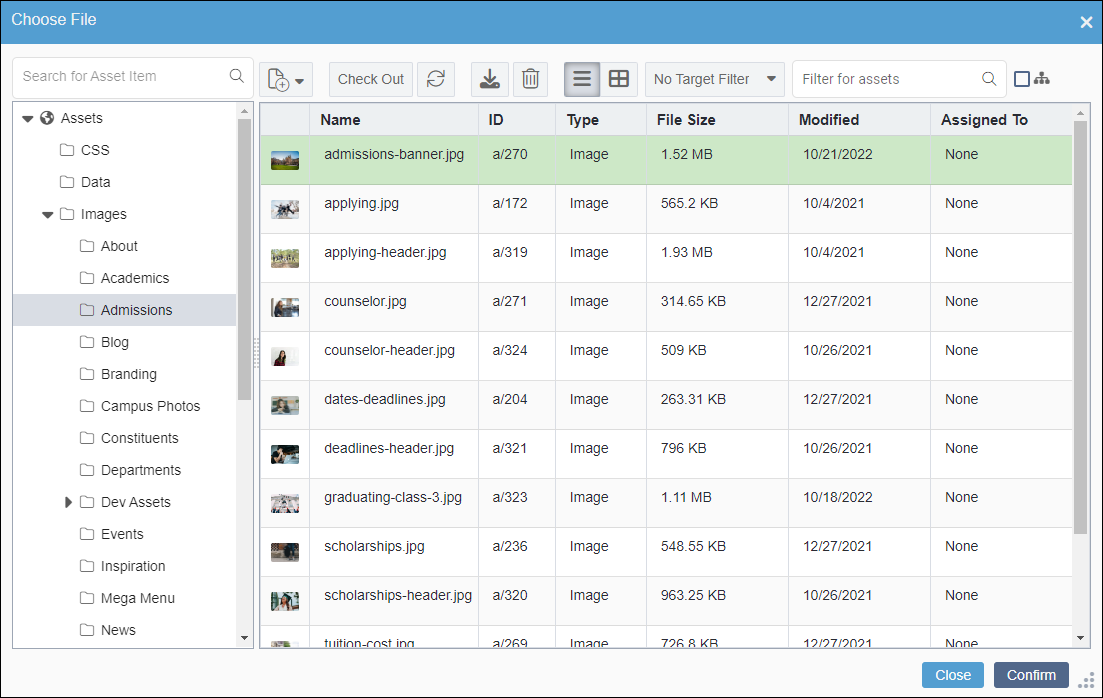
Select the Edit in field
 (pencil) icon in the header toolbar to display the Choose File
dialog.
(pencil) icon in the header toolbar to display the Choose File
dialog.Select an asset to display in the field, and click Confirm.
See Choose Asset File Dialog for details about dialog features.

Component You can preview, add, edit, replace, or remove component content in a page structure. Keep in mind that ICE editing options differ for embedded components vs. referenced components.
See CMS 10.6 ICE Content Trays for details.
List
You can edit different list element types in ICE, including plain text lists, link lists, asset lists, component lists, etc. For component lists, ICE provides additional functionality to add, edit, replace, preview, and clear content.
See CMS 10.6 ICE List Elements for details.
Asset Link Set
Link
Link Set
Date
Local Date
Local Time
Multi-Select
You can click the Edit in field
 icon to edit the listed fields in a dialog. The editable elements differ,
depending on the field type you choose.
icon to edit the listed fields in a dialog. The editable elements differ,
depending on the field type you choose.To edit these fields:
Select the Edit in field
 icon in the header toolbar to display the Edit this Field
In-Context dialog.
icon in the header toolbar to display the Edit this Field
In-Context dialog.See Completing Page and Component Elements for details that correlate with the field type you want to edit.
NoteThe Edit this Field In-Context dialog provides the same elements as the ones the Index edit mode
 provides for the field type.
Select Apply Changes to confirm your edits to the field.
- Save changes when you finish by selecting Save in the Edit tab toolbar.WarningAlways save after in-context editing changes. Otherwise, the system will not preserve your new changes.
- Optional: Check in your changes when you finish.
