Scheduling Automated Tasks
Version Notes: CMS 10.6
Automated Tasks Module v1.42 relies on the OAuth feature added in Ingeniux CMS 10.6. If your organization uses a version earlier than Ingeniux CMS 10.6, you must install a version of the Automated Tasks Module earlier than v1.42.
To schedule automated tasks:
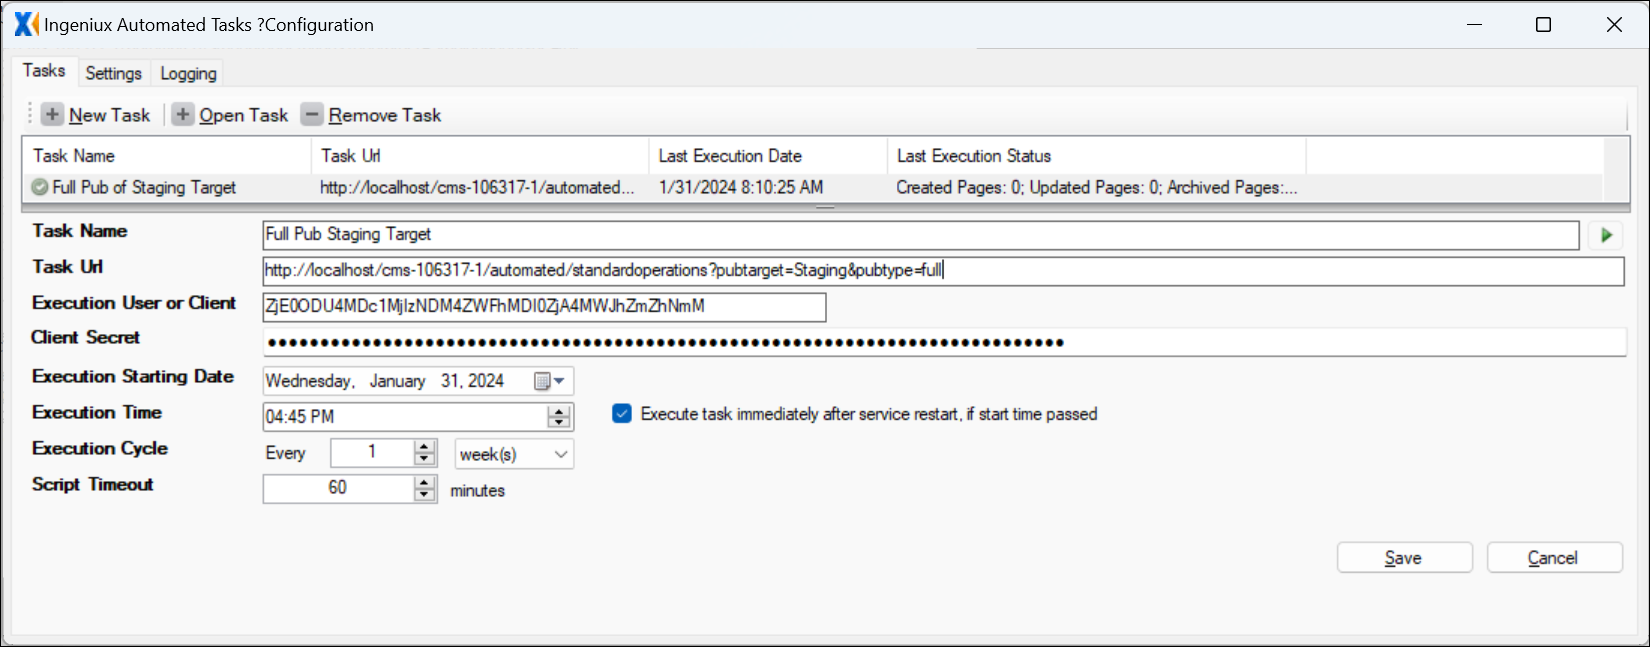
- On the Tasks tab, click New Task. (The other buttons,
Open Task and
Remove Tasks, open a
saved task from the list or remove it, respectively.)

- Configure the following fields:
- Task Name: A friendly name for the automated task.
- Task URL: The path to the controller where the task is located. This controller must be stored in a child folder of xml\Custom.
- Execution User or
Client: The Client Id generated in the OAuth Identities Configuration
area of CMS 10.6. See Configuring OAuth Identities for
details about configuring OAuth authorization.Version Notes: CMS 10.5For customers using CMS 10.5 and earlier, provide an Execution User name (domain\username), who is setting the task. Consider creating a local user in the CMS without a password. This user must be added to the Administrators group. This user only serves to execute automated tasks, so it is easy to find this user's activity in the CSAPI logs.
- Client Secret: A
shared secret known to both the Automated Task Configuration Application and the
authorizing CMS 10.6 instance. See Configuring OAuth
Identities for details about configuring OAuth authorization and copying the
client secret for use in this field.Version Notes: CMS 10.5This field is not present in CMS 10.5 and earlier.
- Execution Starting Date: The date on which the task will begin executing.
- Execution Time: The time at which the task will begin executing.
- Execution Cycle: How often the task executes. Can be set in minutes, hours, days, or weeks.
- Script Timeout: If the task takes longer to complete than this time value, the task times out. The default value is 60 minutes.
- Select the Execute task immediately after service restart ... option if you want the configured task to execute after a restart if the application were to miss a scheduled task cycle.
- Click Save. Windows Explorer opens.
- Select a location to save the automated task configuration file.
- Click Save again. The task displays on the list at the top of the application.
